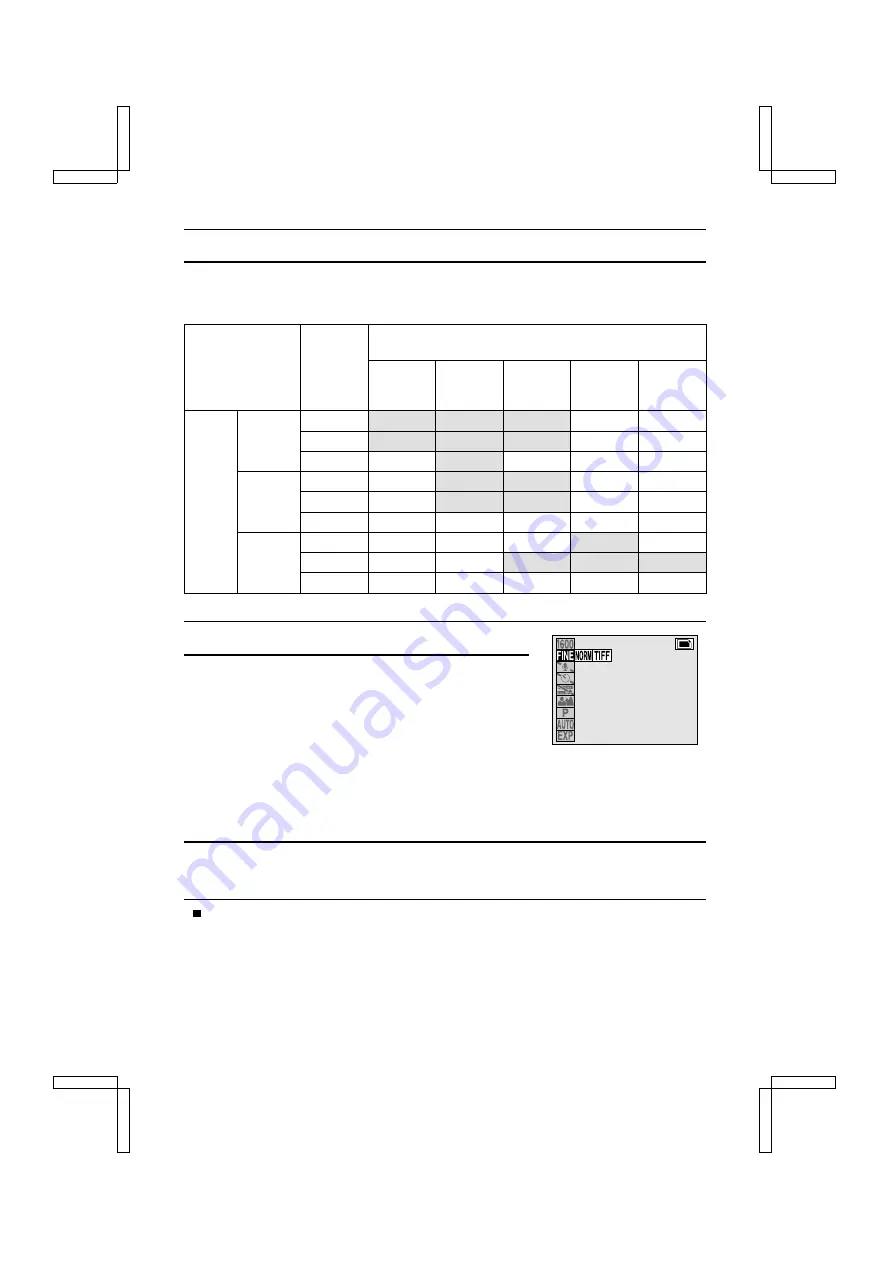
SETTING THE COMPRESSION RATIO
Use the procedure given below to set the compression ratio. Even if the same resolution is used,
you can change the compression setting to decrease the image data size so that you can capture
more images, or increase the image data size for no loss in image quality.
Compression
ratio
Resolution (units: pixels)
[Icon displayed on LCD monitor]
2,000 x
1,496
Ó
1,600 x
1,200
Ò
640 x 480
4
320 x 240
2
160 x 120
0
Shooting
mode
Still image
D
Yes
Yes
Yes
Not available Not available
G
Yes
Yes
Yes
Not available Not available
L
Not available
Yes
Not available Not available Not available
Sequential
shot
D
Not available
Yes
Yes
Not available Not available
G
Not available
Yes
Yes
Not available Not available
L
Not available Not available Not available Not available Not available
Video clip
D
Not available Not available Not available
Yes
Not available
G
Not available Not available
Yes
Yes
Yes
L
Not available Not available Not available Not available Not available
1
Display the Shooting Setting Screen (see page 29).
2
Select the desired compression ratio from the
compression menu.
D
: Stores the data with a low compression (high quality).
G
: Stores the data with moderate compression (normal
quality).
L
: Stores the data in TIFF format (no compression for
highest quality).
œ
The selected icon turns orange in color.
œ
Some compression ratios cannot be selected depending on the shooting mode that is set
(refer to the table above).
3
Press the SET button.
œ
The selected compression ratio is set.
To exit the Shooting Setting Screen, press the MODE button.
13
SX212/EX, /E, /U (VPC-MZ1EX, VPC-MZ1E, VPC-MZ1 GB) Fri. July, 06/2001
53
English


