


89
window.
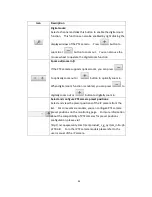
i.
Shrink image to fit window, maintaining aspect ratio
ii.
Shrink image by 1/2, 1/4, 1/8… and so on to fit
window
D.
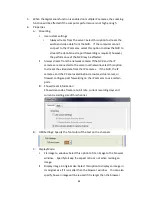
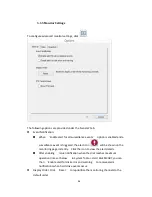
Video Processing: Turn on ‘Deinterlace’ when there are interlaced lines on
the video.
E.
Video Resolution: Specify to adjust the resolution automatically or use a
fixed resolution. To adjust the resolution automatically, the NVR will
select the resolution setting* which best fits the size of your web browser
window. Note that ‘Stream from network camera’ will not be available if
the IP camera does not support streaming from camera or video resolution
configuration. Both options will not be available if the IP camera does not
support multiple streams.
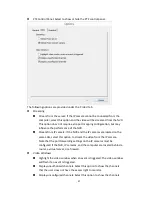
*If an IP camera supports different resolution settings, the NVR will select
the smallest resolution larger than (or equal to) the size of the browser
window. If all the supported resolution settings of an IP camera are smaller
than the browser window, the largest resolution will be selected.
F.
Let me choose other cameras to apply the same settings: Select this option
to apply the changes to other IP cameras. Note that some settings may
not be applied if the IP camera does not support the features, such as
streaming from camera or video resolution configuration.
Содержание VIOSTOR
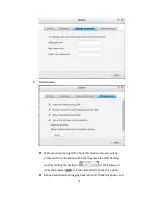
Страница 46: ...46 4 Select the disk configuration 5 In the Summary you can confirm your settings and click Apply to finish ...
Страница 47: ...47 ...
Страница 49: ...49 ...
Страница 90: ...90 ...
Страница 114: ...114 ...
Страница 115: ...115 5 2 6Enable Disable Event Alert To enable event alerts on an E map click ...
Страница 122: ...122 zoom is enabled you can use your mouse wheel to use digital zoom function ...
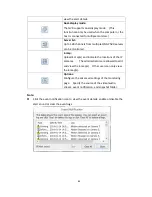
Страница 140: ...140 Note You cannot play recording files via double click here ...
Страница 142: ...142 ...
Страница 184: ...184 ...
Страница 185: ...185 ...
Страница 194: ...194 ...
Страница 196: ...196 Step2 Enter the Product Authorization Key PAK code to activate the license ...
Страница 217: ...217 10 Confirm the settings and click Next 11 Click Finish to exit the wizard ...
Страница 259: ...259 3 Select a port trunking group to use Click Apply 4 Click here to connect to the login page ...
Страница 264: ...264 ...
Страница 283: ...283 3 Select to change the encryption password or download the encryption key file to the local PC Click Next ...
Страница 292: ...292 Process This tab shows information about the processes running on the NVR ...
Страница 305: ...305 4 Enter a name to register your NVR and click Next ...
Страница 306: ...306 5 The wizard will configure your router automatically ...
Страница 307: ...307 6 Review the summary page and click Finish to complete the wizard ...
Страница 311: ...311 ...
Страница 324: ...324 Step5 Specify your replication schedule ...
Страница 325: ...325 Step6 Click Finish to complete the setup ...
Страница 336: ...336 Step 2 Go to All Apps Step 3 Click Add QSCM Lite to QVR ...
Страница 340: ...340 Step 4 Click Install Manually Step 5 Find the unzipped QSCM Lite and click Install ...
Страница 341: ...341 Step 6 Click OK Step 7 The NVR will then install QSCM Lite ...
Страница 351: ...351 ...


