188
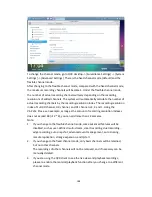
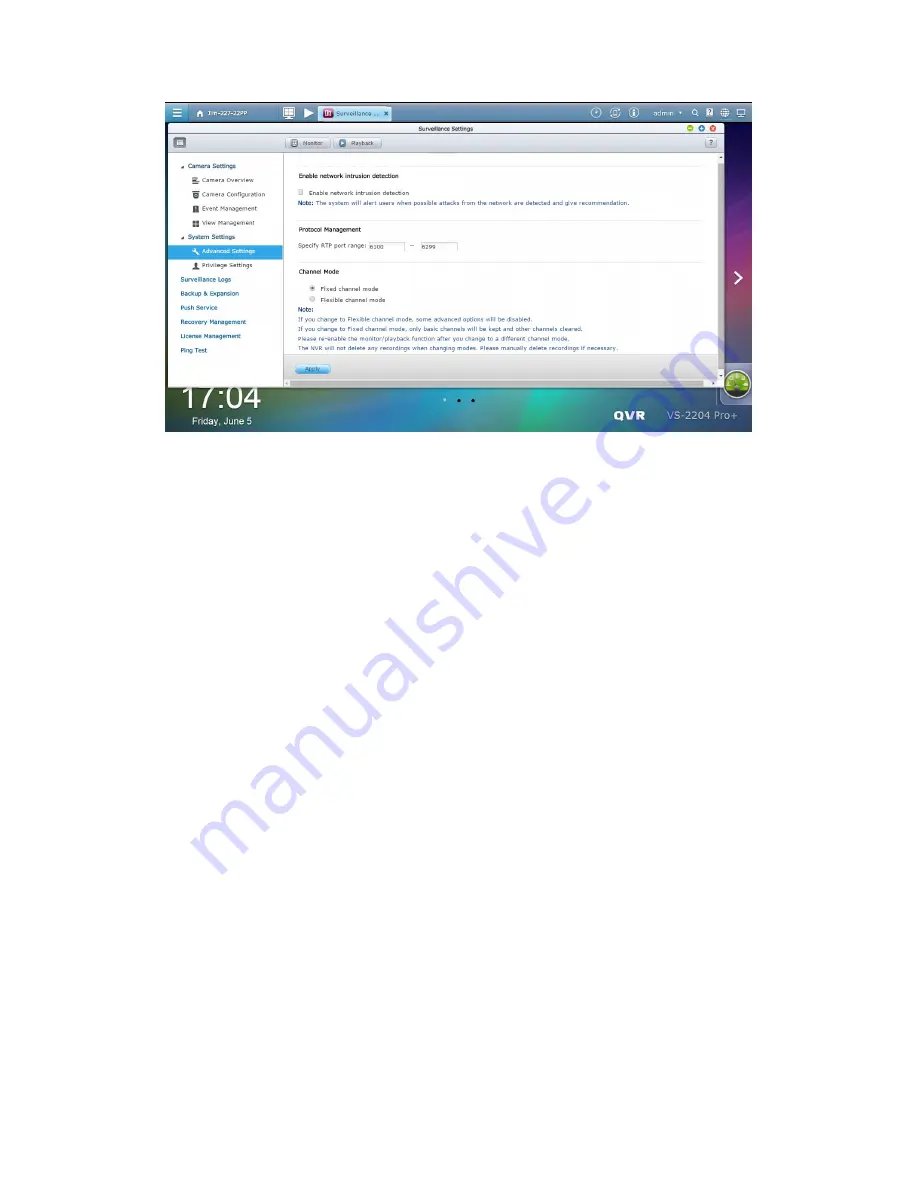
To change the channel mode, go to QVR desktop -> [Surveillance Settings] -> [System
Settings] -> [Advanced Settings]. There is the fixed channel mode (default) and the
flexible channel mode.
After changing to the flexible channel mode, compared with the fixed channel mode,
the maximum recording channels will become 4. Under the flexible channel mode,
the number of actual recording channels will vary depending on the recording
resolutions of added channels. The system will automatically calculate the number of
actual recording channels by the recording resolution index. The recording resolution
index of Full HD channel, HD channel, and D1 channel is 4, 2 and 1. Using the
VS-2212 Pro+ as an example, as long as the amount of recording resolution indexes
does not exceed 48 (=12 * 4), you can add more than 12 cameras.
Note:
1.
If you change to the flexible channel mode, some advanced features will be
disabled, such as user-defined multi-stream, smart recording, dual recording,
edge recording, auto snapshot, advanced event management, auto cruising,
remote replication, storage expansion, and Qstart.
2.
If you change to the fixed channel mode, only basic channels will be retained,
but not other channels.
The recordings of other channels will not be removed, and if necessary can be
manually deleted.
3.
If you are using the QVR client to see the live view and playback recordings,
please re-enable the monitor/playback function after you change to a different
channel mode.
Содержание VIOSTOR
Страница 46: ...46 4 Select the disk configuration 5 In the Summary you can confirm your settings and click Apply to finish ...
Страница 47: ...47 ...
Страница 49: ...49 ...
Страница 90: ...90 ...
Страница 114: ...114 ...
Страница 115: ...115 5 2 6Enable Disable Event Alert To enable event alerts on an E map click ...
Страница 122: ...122 zoom is enabled you can use your mouse wheel to use digital zoom function ...
Страница 140: ...140 Note You cannot play recording files via double click here ...
Страница 142: ...142 ...
Страница 184: ...184 ...
Страница 185: ...185 ...
Страница 194: ...194 ...
Страница 196: ...196 Step2 Enter the Product Authorization Key PAK code to activate the license ...
Страница 217: ...217 10 Confirm the settings and click Next 11 Click Finish to exit the wizard ...
Страница 259: ...259 3 Select a port trunking group to use Click Apply 4 Click here to connect to the login page ...
Страница 264: ...264 ...
Страница 283: ...283 3 Select to change the encryption password or download the encryption key file to the local PC Click Next ...
Страница 292: ...292 Process This tab shows information about the processes running on the NVR ...
Страница 305: ...305 4 Enter a name to register your NVR and click Next ...
Страница 306: ...306 5 The wizard will configure your router automatically ...
Страница 307: ...307 6 Review the summary page and click Finish to complete the wizard ...
Страница 311: ...311 ...
Страница 324: ...324 Step5 Specify your replication schedule ...
Страница 325: ...325 Step6 Click Finish to complete the setup ...
Страница 336: ...336 Step 2 Go to All Apps Step 3 Click Add QSCM Lite to QVR ...
Страница 340: ...340 Step 4 Click Install Manually Step 5 Find the unzipped QSCM Lite and click Install ...
Страница 341: ...341 Step 6 Click OK Step 7 The NVR will then install QSCM Lite ...
Страница 351: ...351 ...


