


80
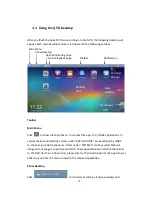
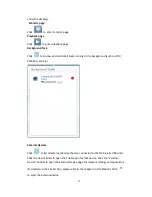
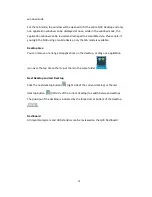
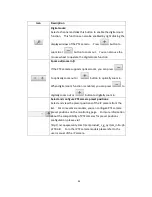
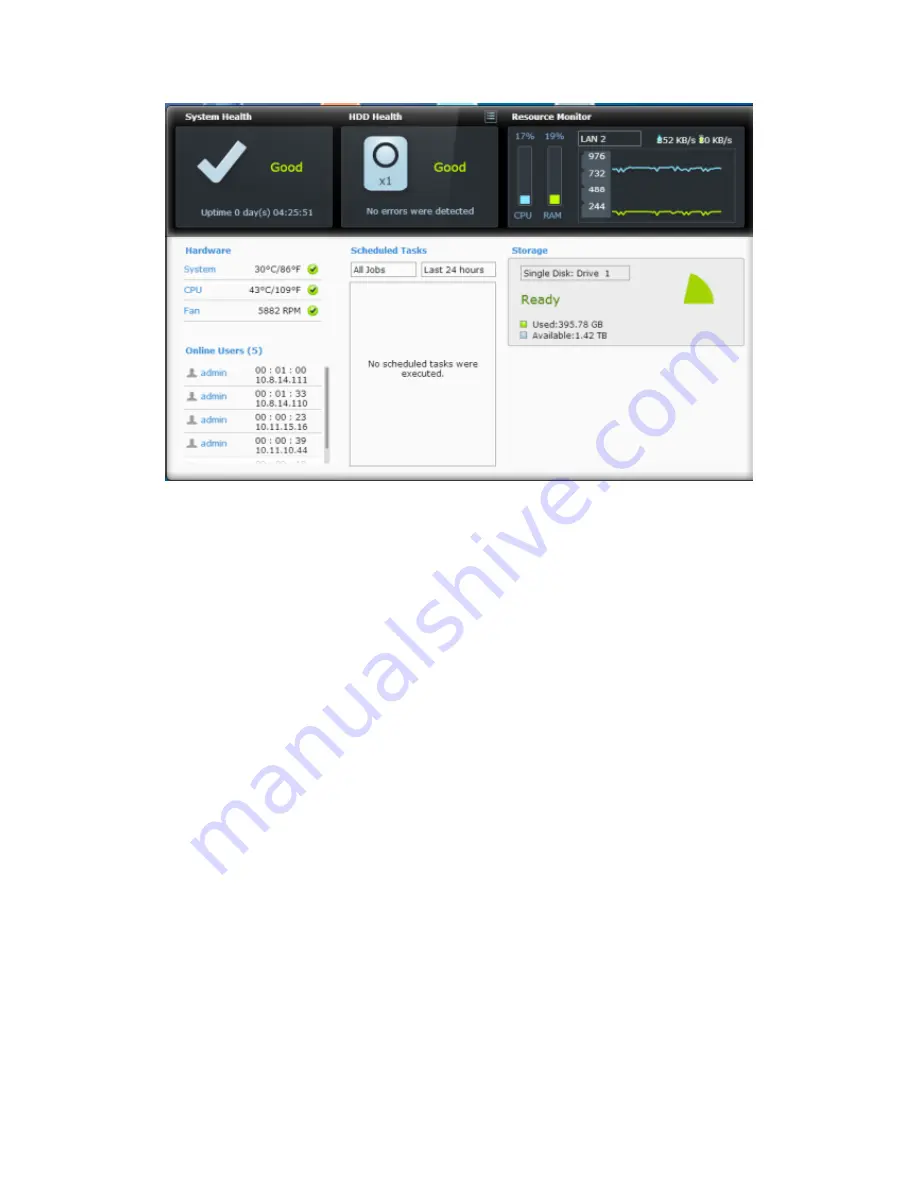
System Health: The status of the NVR system is indicated in this section. Click
the header to open the “System Status” page.
HDD Health: The status of the HDDs currently installed in the NVR will be shown
in here. X1 means that only one HDD is currently installed in the NVR. For
multiple HDDs installed in the NVR, the status indicated is only for the HDD with
the worst condition. Click the “HDD Health” header to open the “HDD SMART”
page in Storage Manager to review the status of each HDD. For details on the
Storage Manager, please refer to the chapter on Storage Manager. Click the icon
to switch between the “HDD Summary” page and the HDD status indicator.
Please note that the color of the HDD symbol will change based on HDD health.
Resource Monitor: The CPU, RAM and bandwidth usage is displayed here. Click
the “Resource Monitor” header to open the corresponding page in System
Status for details. Please note: if the port trunking feature is activated, the
bandwidth statistics are the combined usage of all NICs.
Storage: The shared folder (top five largest folders), volume and storage
statistics are summarized here. Click the “Storage” header to open the
corresponding page in System Status for details.
Hardware: The system and HDD temperatures, fan speeds and hardware usages
are summarized here. Please note: statistics listed here vary based on the NVR
model purchased. Click the “Hardware” header to open the corresponding page
in “System Status” for details.
Online Users: All users currently connected to the NVR are listed here. To
Содержание VIOSTOR
Страница 46: ...46 4 Select the disk configuration 5 In the Summary you can confirm your settings and click Apply to finish ...
Страница 47: ...47 ...
Страница 49: ...49 ...
Страница 90: ...90 ...
Страница 114: ...114 ...
Страница 115: ...115 5 2 6Enable Disable Event Alert To enable event alerts on an E map click ...
Страница 122: ...122 zoom is enabled you can use your mouse wheel to use digital zoom function ...
Страница 140: ...140 Note You cannot play recording files via double click here ...
Страница 142: ...142 ...
Страница 184: ...184 ...
Страница 185: ...185 ...
Страница 194: ...194 ...
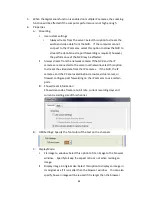
Страница 196: ...196 Step2 Enter the Product Authorization Key PAK code to activate the license ...
Страница 217: ...217 10 Confirm the settings and click Next 11 Click Finish to exit the wizard ...
Страница 259: ...259 3 Select a port trunking group to use Click Apply 4 Click here to connect to the login page ...
Страница 264: ...264 ...
Страница 283: ...283 3 Select to change the encryption password or download the encryption key file to the local PC Click Next ...
Страница 292: ...292 Process This tab shows information about the processes running on the NVR ...
Страница 305: ...305 4 Enter a name to register your NVR and click Next ...
Страница 306: ...306 5 The wizard will configure your router automatically ...
Страница 307: ...307 6 Review the summary page and click Finish to complete the wizard ...
Страница 311: ...311 ...
Страница 324: ...324 Step5 Specify your replication schedule ...
Страница 325: ...325 Step6 Click Finish to complete the setup ...
Страница 336: ...336 Step 2 Go to All Apps Step 3 Click Add QSCM Lite to QVR ...
Страница 340: ...340 Step 4 Click Install Manually Step 5 Find the unzipped QSCM Lite and click Install ...
Страница 341: ...341 Step 6 Click OK Step 7 The NVR will then install QSCM Lite ...
Страница 351: ...351 ...


