177
disconnection or NVR recording failure.
If the action is triggered by a duration event and both settings (i, ii) are
enabled, the NVR will execute the second setting (ii) only.
Click ‘Select from the list’ to select an action setting which has been
configured before.
7.
User-defined Action
Add a self-defined action when an event is triggered. Enter the login account
and password, IP address, port, and the HTTP URL of other surveillance devices
to manage the devices such as fire protection devices, power controller, and air
conditioning control.
Click ‘Select from the list’ to select an action setting which has been configured
before.
7.1.4
View Management
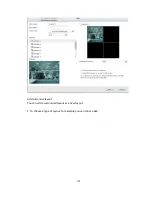
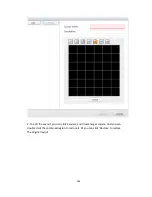
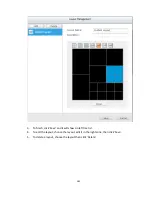
View Management allows users to customize view layouts, and to assign cameras to specific
windows. Users can define view layouts to suit their needs. For example, when the camera
provides a corridor view, users can create a rectangle to fit the corridor view.
View Management provides two modes, normal mode is designed for non-fisheye cameras
Содержание VIOSTOR
Страница 46: ...46 4 Select the disk configuration 5 In the Summary you can confirm your settings and click Apply to finish ...
Страница 47: ...47 ...
Страница 49: ...49 ...
Страница 90: ...90 ...
Страница 114: ...114 ...
Страница 115: ...115 5 2 6Enable Disable Event Alert To enable event alerts on an E map click ...
Страница 122: ...122 zoom is enabled you can use your mouse wheel to use digital zoom function ...
Страница 140: ...140 Note You cannot play recording files via double click here ...
Страница 142: ...142 ...
Страница 184: ...184 ...
Страница 185: ...185 ...
Страница 194: ...194 ...
Страница 196: ...196 Step2 Enter the Product Authorization Key PAK code to activate the license ...
Страница 217: ...217 10 Confirm the settings and click Next 11 Click Finish to exit the wizard ...
Страница 259: ...259 3 Select a port trunking group to use Click Apply 4 Click here to connect to the login page ...
Страница 264: ...264 ...
Страница 283: ...283 3 Select to change the encryption password or download the encryption key file to the local PC Click Next ...
Страница 292: ...292 Process This tab shows information about the processes running on the NVR ...
Страница 305: ...305 4 Enter a name to register your NVR and click Next ...
Страница 306: ...306 5 The wizard will configure your router automatically ...
Страница 307: ...307 6 Review the summary page and click Finish to complete the wizard ...
Страница 311: ...311 ...
Страница 324: ...324 Step5 Specify your replication schedule ...
Страница 325: ...325 Step6 Click Finish to complete the setup ...
Страница 336: ...336 Step 2 Go to All Apps Step 3 Click Add QSCM Lite to QVR ...
Страница 340: ...340 Step 4 Click Install Manually Step 5 Find the unzipped QSCM Lite and click Install ...
Страница 341: ...341 Step 6 Click OK Step 7 The NVR will then install QSCM Lite ...
Страница 351: ...351 ...

