85
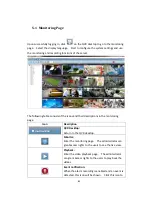
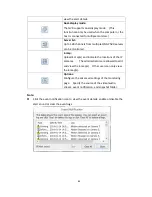
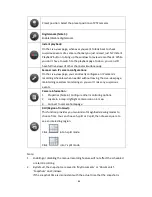
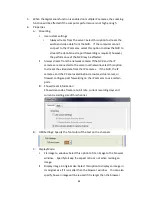
Interactive Control Buttons
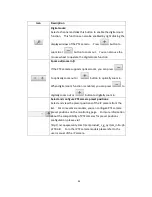
Whenever you move the mouse cursor over a camera channel, the supported
function buttons of the camera will show up for quick access.
Icon
Description
Manual recording (Note 1):
Enable or disable manual recording on the selected channel. The
administrator can enable or disable this option on the surveillance
settings page.
Snapshot (Note 2):
Take a snapshot on the selected channel. When the picture is shown,
right click on it to save it to the computer.
Audio (optional):
Turn on/off the audio support for the monitoring page. For more
information about the compatibility of this feature, please visit
http://nvr.qnapsecurity.com/n/en/product_z_g_qvr/cat_intro.php?hf=ol
d
.
Two-way audio (optional):
Turn on/off the two-way audio support for the monitoring page. For
more information about the compatibility of this feature, please visit
http://nvr.qnapsecurity.com/n/en/product_z_g_qvr/cat_intro.php?hf=ol
d
.
Please note: the two-way audio function is currently only supported by
the latest version of Internet Explorer.
Dewarp fisheye images:
For specific fisheye cameras (Note 3) and the specific camera models
with panomorph lens (Note 4), you can enable/ disable the dewarping
function. After enabling the function, you can then select mount type,
dewarping mode.
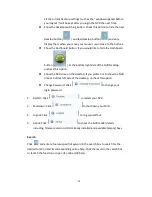
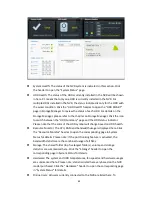
PTZ mode:
1.
Click & Go: Click on the camera screen at any point to align the
center of the screen using this point as the target.
2.
PTZ: Pan/Tilt/Zoom camera control.
3.
Auto cruising: This feature is used to configure the PTZ cameras to
cruise according to the preset positions and the staying time set for
each preset position.
4.
Enable live tracking: Available on Panasonic NS202(A) cameras.
5.
Disable live tracking: Available on Panasonic NS202(A) cameras.
Содержание VIOSTOR
Страница 46: ...46 4 Select the disk configuration 5 In the Summary you can confirm your settings and click Apply to finish ...
Страница 47: ...47 ...
Страница 49: ...49 ...
Страница 90: ...90 ...
Страница 114: ...114 ...
Страница 115: ...115 5 2 6Enable Disable Event Alert To enable event alerts on an E map click ...
Страница 122: ...122 zoom is enabled you can use your mouse wheel to use digital zoom function ...
Страница 140: ...140 Note You cannot play recording files via double click here ...
Страница 142: ...142 ...
Страница 184: ...184 ...
Страница 185: ...185 ...
Страница 194: ...194 ...
Страница 196: ...196 Step2 Enter the Product Authorization Key PAK code to activate the license ...
Страница 217: ...217 10 Confirm the settings and click Next 11 Click Finish to exit the wizard ...
Страница 259: ...259 3 Select a port trunking group to use Click Apply 4 Click here to connect to the login page ...
Страница 264: ...264 ...
Страница 283: ...283 3 Select to change the encryption password or download the encryption key file to the local PC Click Next ...
Страница 292: ...292 Process This tab shows information about the processes running on the NVR ...
Страница 305: ...305 4 Enter a name to register your NVR and click Next ...
Страница 306: ...306 5 The wizard will configure your router automatically ...
Страница 307: ...307 6 Review the summary page and click Finish to complete the wizard ...
Страница 311: ...311 ...
Страница 324: ...324 Step5 Specify your replication schedule ...
Страница 325: ...325 Step6 Click Finish to complete the setup ...
Страница 336: ...336 Step 2 Go to All Apps Step 3 Click Add QSCM Lite to QVR ...
Страница 340: ...340 Step 4 Click Install Manually Step 5 Find the unzipped QSCM Lite and click Install ...
Страница 341: ...341 Step 6 Click OK Step 7 The NVR will then install QSCM Lite ...
Страница 351: ...351 ...

