9
© 2012 OKI DATA CORPORATION All rights reserved
ES9160 MFP / ES9170 MFP
REPLACEMANT OF HDD/PC BOARDS
9 - 23
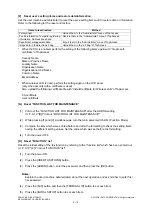
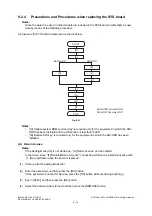
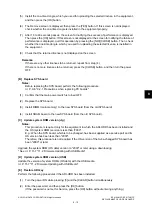
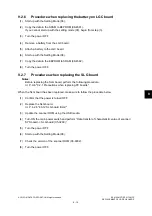
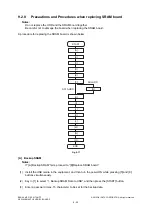
(2)
Enter the password, and then press the [OK] button.
(If the password is not set for Service, press the [OK] button without entering anything.)
(3)
Key in [5] to select "5. Key Backup Restore", and then press the [START] button.
(4)
Key in [2] to select "2. Key FROM to SRAM", and then press the [START] button.
(5)
Wait until the backup of the encryption key is completed. "Operation Complete" is displayed.
(6)
Turn the power OFF after the backup is completed. If you want to perform the backup of the
license, do not restart the equipment but perform from (4) in "[G] Backup license".
[I]
Backup license
Notes:
If "3. License SRAM to FROM" is performed by mistake, carry out the following procedure.
P. 9-28 "[ 1 ] Re-registration when the board is replaced"
(1)
Turn the power ON while pressing [3] and the [CLEAR] button simultaneously.
(2)
Enter the password, and then press the [OK] button.
(If the password is not set for Service, press the [OK] button without entering anything.)
(3)
Key in [5] to select "5. Key Backup Restore", and then press the [START] button.
(4)
Key in [4] to select "4. License FROM to SRAM", and then press the [START] button.
(5)
Wait until the backup of the license is completed. "Operation Complete" is displayed.
(6)
Turn the power OFF after the backup is completed.
[J]
Initialize SRAM board
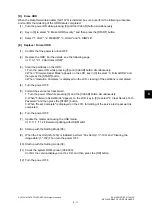
(1)
Start up with the Setting Mode (08).
(2)
Initialize the SRAM error.
1. When “SRAM REQUIRES INITIALIZATION” is displayed on the LCD, check the destination
and then press the [START] button.
If the destination is not correct, key in the correct one and then press the [START] button.
2. After the confirmation message is displayed, press the [INTERRUPT] button.
(3)
Perform the panel calibration (08-9050).
1.Touch the center of “+” mark displayed on the upper left of the LCD.
2.Touch the center of “+” mark displayed on the upper right of the LCD.
3.Touch the center of “+” mark displayed on the lower left of the LCD.
4.Touch the center of “+” mark displayed on the lower right of the LCD.
(4)
Enter the serial number (08-9601).
Key in the serial number on the label attached to the rear cover, and then press the [OK] button.
(5)
If the HDD encryption function has been set, enable it (08-9379).
(6)
If the security mode (08-8911:3) has been set, change its level.
(7)
Turn the power OFF.
Содержание ES9160
Страница 12: ......
Страница 24: ...ES9160 MFP ES9170 MFP 2012 OKI DATA CORPORATION All rights reserved FEATURES 1 2...
Страница 114: ...ES9160 MFP ES9170 MFP 2012 OKI DATA CORPORATION All rights reserved OUTLINE OF THE MACHINE 3 76...
Страница 252: ...ES9160 MFP ES9170 MFP 2012 OKI DATA CORPORATION All rights reserved DISASSEMBLY AND REPLACEMENT 4 138...
Страница 308: ...ES9160 MFP ES9170 MFP 2012 OKI DATA CORPORATION All rights reserved SELF DIAGNOSIS MODES 5 56...
Страница 832: ...ES9160 MFP ES9170 MFP 2012 OKI DATA CORPORATION All rights reserved REMOTE SERVICE 10 38...
Страница 916: ...ES9160 MFP ES9170 MFP 2012 OKI DATA CORPORATION All rights reserved BACKUP FUNCTION 12 8 4 Turn the power OFF...
Страница 920: ...ES9160 MFP ES9170 MFP 2012 OKI DATA CORPORATION All rights reserved BACKUP FUNCTION 12 12...
Страница 922: ...ES9160 MFP ES9170 MFP 2012 OKI DATA CORPORATION All rights reserved WIRE HARNESS CONNECTION DIAGRAMS 13 2...
Страница 1086: ......
Страница 1087: ......

