5.
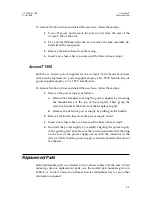
Specify the slaves to be polled as follows:
a.
Select
POLL
.
b.
Select
ENABLE
to specify a slave to be polled (or
DISABLE
to specify
a slave which is no longer to be polled).
c.
Enter the two-digit node address (
01
to
30
) of the slave. Then press
the
Enter
key, followed by the
Esc
key.
d.
Repeat substeps 5b and 5c for additional slaves as desired.
6.
Enable or disable alarm dialout or changes of polling status as fol-
lows:
a.
Press the
Esc
key to return to the
POLL/DIAL
menu and select
DIAL
.
b.
Select
ENABLE
if a change of the slave’s polling status is to cause
an alarm dialout by the master (or
DISABLE
if a dialout on the
change of polling status is no longer desired).
c.
Enter the two-digit node address (
01
to
30
) of the slave. Then press
the
Enter
key, followed by the
Esc
key.
d.
Repeat substeps 6b and 6c for additional slaves as desired.
7.
Press the
Esc
key repeatedly to return to the Main Menu Line.
8.
Verify the polling configuration as described under Viewing the
Chain Port Polling Configuration
later in this chapter.
Note 1:
Dialout for polling status alarms occurs only
if the
DIAL
and
POLL
features are both enabled. If polling
is enabled but
DIAL
is disabled, alerts will occur at the
terminal connected to the master’s Craft Port, but no
dialout will occur on the master’s Supervisory Port.
Note 2:
For modem dialout to operate properly, the
master Access-T must have a legal dialstring defined,
and the Start and Stop times must be different.
Note 3:
The master’s node address need not be enabled
for polling.
ACST-0351-005
Chapter 8
June 1996
Using Access-T as a Master
8-5


