


4-29
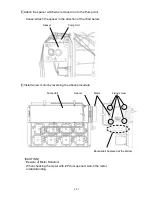
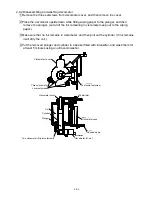
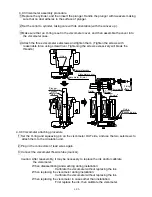
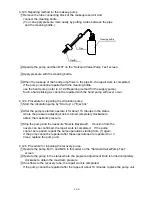
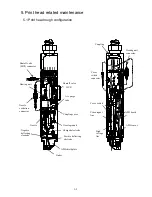
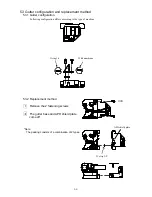
11 Remove the print head fastening screws (4 locations) on the rear surface of the unit and
remove the print head from the unit.
12 Install a new print head by reversing the above procedure.
[NOTE]
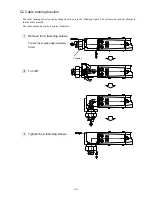
When Head H Clamp is installed into the printer, please install it as 14-core cable
(the thickest cable) shall be placed at the most right end when viewed from the rear of
the printer. Please see the figure above.
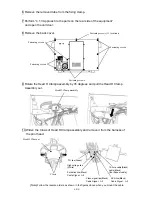
13 Perform
“Ink Replenishment” and adjust the pressure.
Make sure that there is no ink leak.
14 Perform
“Excitation adjustment” and “Auto-phase gain adjustment”.
14-core cable shall be placed at the most right end.
Fastening screws (4 locations)
Содержание IJ RX2
Страница 1: ...Service Manual HITACHI Printer Model RX2 Revision Feb 2014 Version A ...
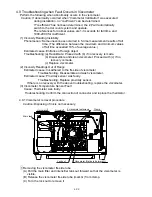
Страница 13: ...1 8 2 External views Rear side 1 2 2 Main body internal ...
Страница 14: ...1 9 1 2 3 Print head ...
Страница 101: ...3 26 Circuit diagram of EZJ127A ...
Страница 102: ...3 27 Circuit diagram of EZJ127B ...
Страница 116: ...3 41 Circuit diagram of EZJ129 ...
Страница 164: ...4 40 5 Reset the time of the R air filter to 0 on the Parts usage time management screen ...
Страница 247: ...7 Attached Drawing 7 1 Circulation System Diagram Circulation System Diagram 7 1 ...
Страница 248: ...7 2 Electrical Connection Diagram 7 2 1 Electrical Connection Diagram RX2 S Standard model 7 2 ...
Страница 249: ...7 3 7 2 2 Electrical Connection Diagram RX2 B Basic model 7 3 ...
Страница 252: ... Nozzle diameter 65μm 7 6 7 4 Dimensions around charge electrode and deflection electrode 循環系統図 ...


