308607
17
Cable Routing and Connection
10.Connect the Keypad Cable
Route and connect the keypad cables (P/N 191393 (25
ft. [7.6 m]) or 191394 (50 ft. [15.3 m)]) between the
keypads and control module connectors. If using the
Administrative or Enhanced Keypad, be sure to con-
nect the cable to the top keypad connector. The bottom
connector is for the bar code reader.
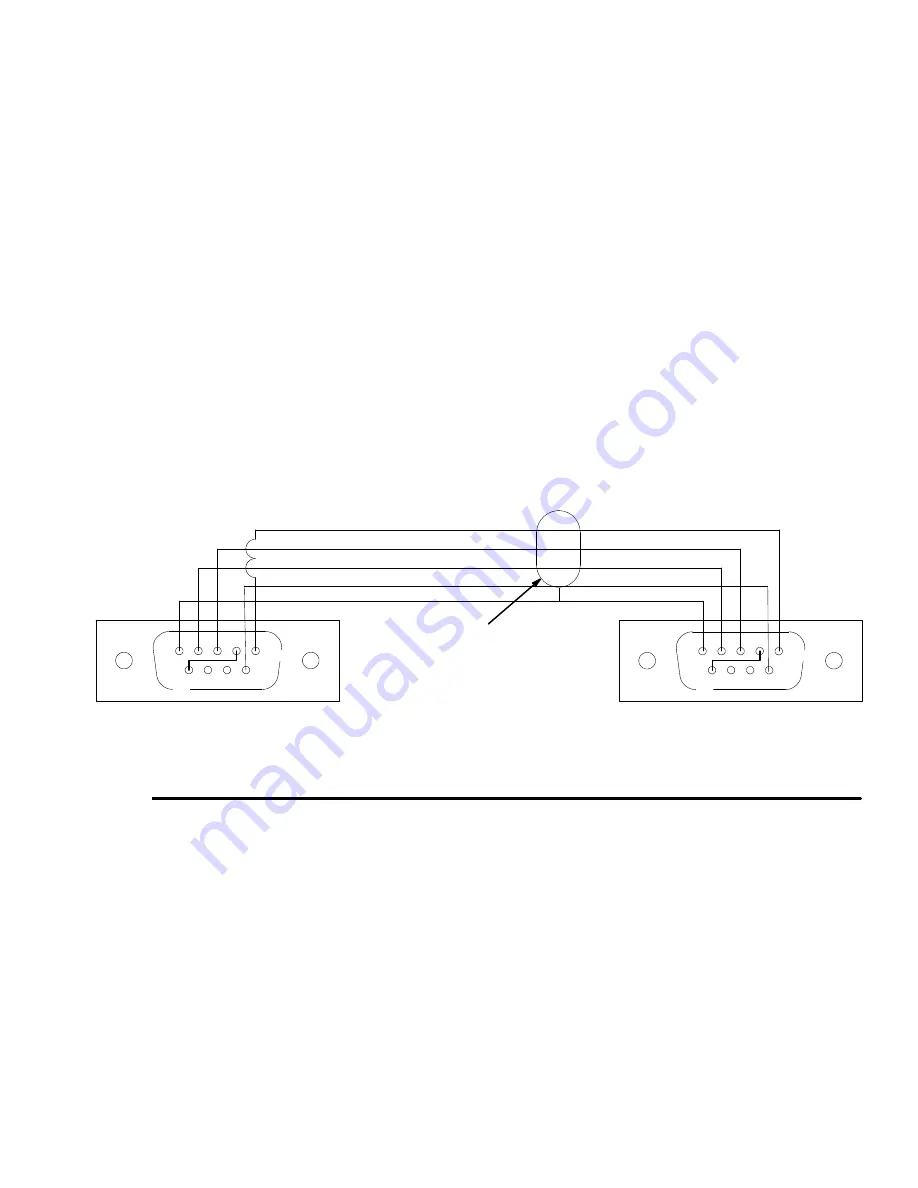
11. Connect the Printer or Computer Cable
Printer
New Style Printer:
Program the DIP switches with the
printer software. See instruction sheet 308818,
included with the printer. Route and connect the printer
cable between the printer and the Master Control
Module connectors. Use the same cables that are used
with the keypads. See Fig. 11.
Old Style Printer:
Set the DIP switches on the bottom
of the printer as shown in Fig. 12. Route and connect
the printer cable between the printer and the Master
Control Module connectors. Use the printer cables
shown in Fig. 12.
Computer
Route and connect the computer cable (P/N 192873
(25 ft. [7.6 m]) or 192874 (50 ft. [15.3 m)]) between the
computer and the Master Control Module connectors.
See Fig. 13.
See page 40 to set up your computer to receive Hori-
zon system data.
12.Visually Check the Wire Connections
The Horizon hardware installation is now complete.
The
Checklist
Steps 1 to 12, page 8, should be
checked off.
Connecting to
New Style
Printer P/N 113774
5
4
1
3
2
9
8
7
6
New Style
Printer P/N 113774
9 Pin D--Sub Male Pin Connector
Master Control Module
9 Pin D--Sub Male Pin Connector
©
¡
Printer cable with connector, P/N 191393 (25 ft. [7.6 m]) or 191394 (50 ft. [15.3 m)])
Fig. 11
green
white
red
ground
receive
transmit
ground
receive
transmit
shield
shield
5
4
1
3
2
9
8
7
6
Black
power
power
Содержание Horizon Fluid Management Systems
Страница 81: ...308607 81 Appendix...
Страница 97: ...308607 97 Blank Forms...


