

386
Upgrade and Maintenance Manual
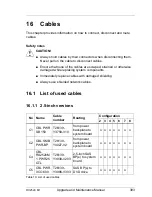
RX2520
M1
Conversion configurations
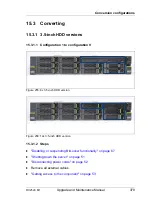
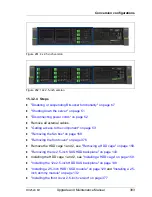
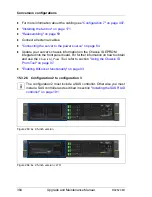
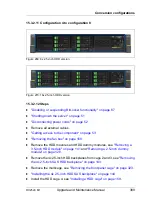
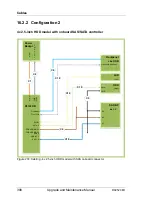
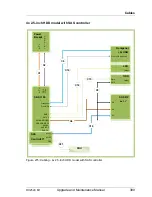
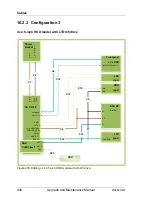
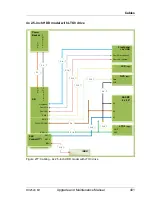
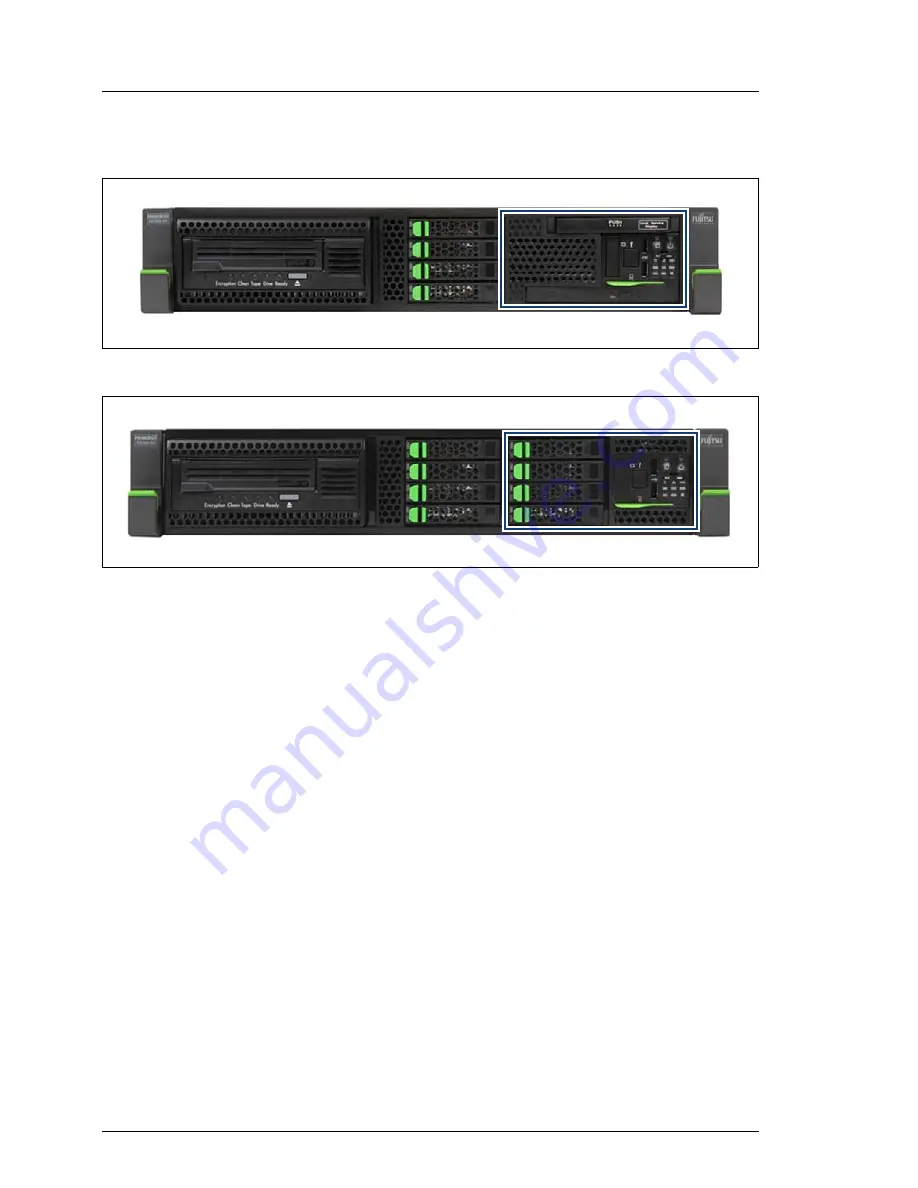
15.3.2.7 Configuration 3 to configuration 6
Figure 265: 4x 2.5-inch v LTO
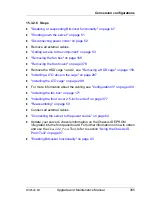
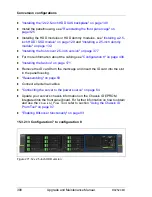
Figure 266: 8x 2.5-inch v LTO
15.3.2.8 Steps
Ê
"Disabling or suspending BitLocker functionality" on page 67
Ê
"Shutting down the server" on page 51
Ê
"Disconnecting power cords" on page 52
Ê
Remove all external cables.
Ê
"Getting access to the component" on page 53
Ê
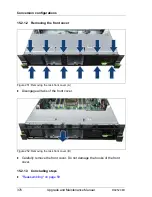
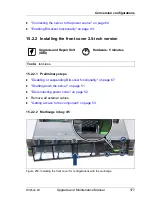
"Removing the fan box" on page 168
Ê
"Removing the front cover" on page 376
Ê
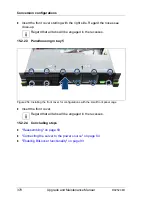
Remove the multicage, see
"Removing the front panel cage" on page 323
.
Ê
Install a 4x 2.5-inch HDD backplane, see
"Installing the 4x 2.5-inch HDD SAS
backplane" on page 144
.
Ê
Install the HDD cage 4, see
"Installing a HDD cage" on page 159
.
Ê
Install the panelhousing, see
"Re-installing the front panel cage" on
page 325
.
Содержание PRIMERGY RX2520 M1
Страница 36: ...36 Upgrade and Maintenance Manual RX2520 M1 Before you start ...
Страница 120: ...120 Upgrade and Maintenance Manual RX2520 M1 Power supply units ...
Страница 162: ...162 Upgrade and Maintenance Manual RX2520 M1 Hard disk drives solid state drives ...
Страница 169: ...RX2520 M1 Upgrade and Maintenance Manual 169 System fan Figure 73 Removing the fan box Ê Remove the two screws ...
Страница 220: ...220 Upgrade and Maintenance Manual RX2520 M1 Expansion cards and backup units ...
Страница 230: ...230 Upgrade and Maintenance Manual RX2520 M1 Main memory ...
Страница 283: ...RX2520 M1 Upgrade and Maintenance Manual 283 Accessible drives Ê Enabling BitLocker functionality on page 93 ...
Страница 310: ...310 Upgrade and Maintenance Manual RX2520 M1 Accessible drives ...
Страница 410: ...410 Upgrade and Maintenance Manual RX2520 M1 Cables ...