


112
Upgrade and Maintenance Manual
RX2520
M1
Power supply units
6.5.3
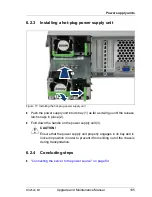
Installing the new hot-plug power supply unit
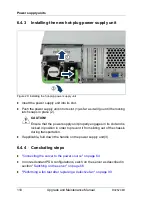
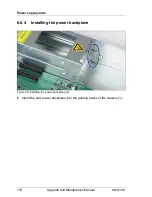
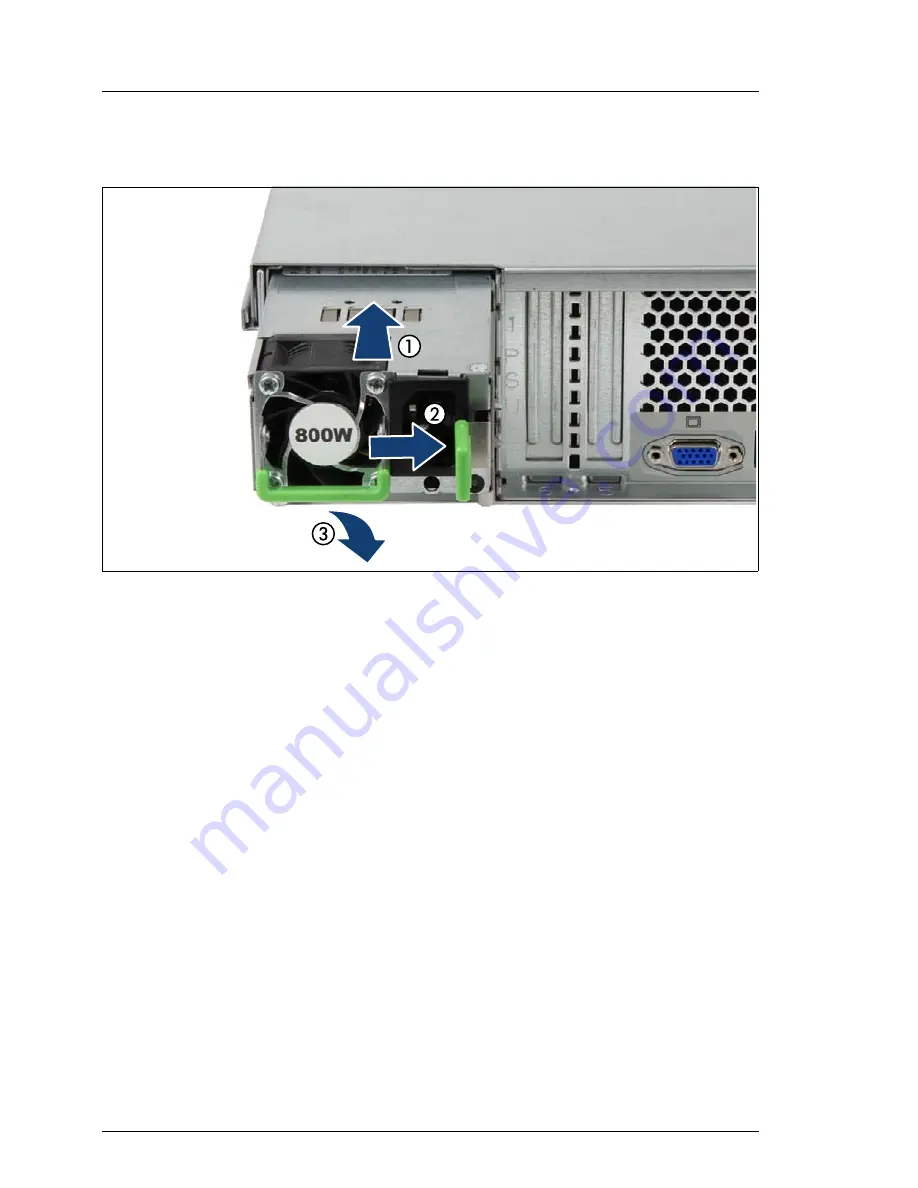
Figure 21: Installing the hot-plug power supply unit
Ê
Insert the power supply unit into its bay.
Ê
Push the power supply unit into its bay (1) as far as it will go until the release
latch snaps in place (2).
I
When upgrading redundant power supply configurations from 450 W
to 800 W power supply unit, please note the following:
After replacing the first power supply unit, the CSS indicator will start
flashing (entry into SEL), indicating an unsupported mixture of power
supply units with different power output.
The CSS indicator LED will stop flashing as soon as the second
power supply unit has been replaced as well.
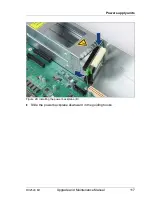
V
CAUTION!
Ensure that the power supply unit properly engages in its slot and is
locked in position in order to prevent it from sliding out of the chassis
during transportation.
Ê
If applicable, fold down the handle on the power supply unit(3).
Содержание PRIMERGY RX2520 M1
Страница 36: ...36 Upgrade and Maintenance Manual RX2520 M1 Before you start ...
Страница 120: ...120 Upgrade and Maintenance Manual RX2520 M1 Power supply units ...
Страница 162: ...162 Upgrade and Maintenance Manual RX2520 M1 Hard disk drives solid state drives ...
Страница 169: ...RX2520 M1 Upgrade and Maintenance Manual 169 System fan Figure 73 Removing the fan box Ê Remove the two screws ...
Страница 220: ...220 Upgrade and Maintenance Manual RX2520 M1 Expansion cards and backup units ...
Страница 230: ...230 Upgrade and Maintenance Manual RX2520 M1 Main memory ...
Страница 283: ...RX2520 M1 Upgrade and Maintenance Manual 283 Accessible drives Ê Enabling BitLocker functionality on page 93 ...
Страница 310: ...310 Upgrade and Maintenance Manual RX2520 M1 Accessible drives ...
Страница 410: ...410 Upgrade and Maintenance Manual RX2520 M1 Cables ...