


RX2520 M1
Upgrade and Maintenance Manual
157
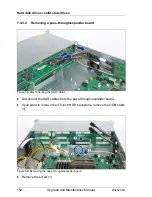
Hard disk drives / solid state drives
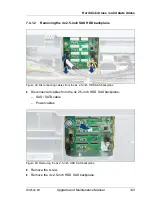
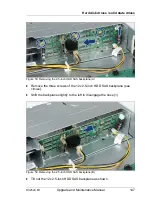
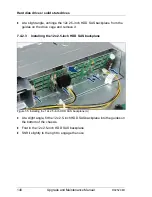
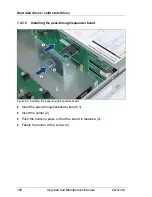
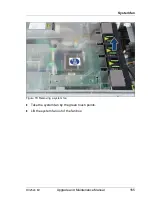
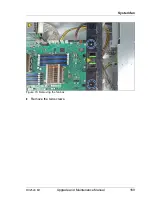
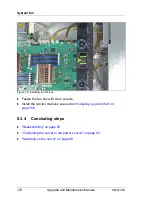
Figure 65: Reconnecting the cables to the pass-through/expander board
Ê
Reconnect the SAS cables to the 3.5-inch HDD SAS / SATA backplane:
– Cable C24 from connector MLC1 on the RAID controller to connector X1
front on the pass-through/expander board (1).
– Cable C24 from connector MLC2 on the RAID controller to connector X1
rear on the pass-through/expander board (2).
I
For a complete cabling overview, please refer to section
"List of used
cables" on page 393
.
7.4.3.6
Concluding steps
Ê
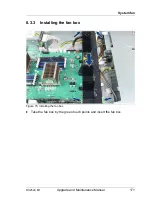
"Installing the fan box" on page 171
Ê
"Reassembling" on page 59
Ê
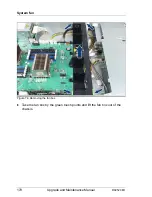
Reinstall all HDD / SSD modules to their original drive bays as described in
section
"Installing 3.5-inch HDD modules" on page 136
.
Ê
"Connecting the server to the power source" on page 64
Ê
"Switching on the server" on page 66
Ê
"Enabling BitLocker functionality" on page 93
MLC 1
MLC 2
Содержание PRIMERGY RX2520 M1
Страница 36: ...36 Upgrade and Maintenance Manual RX2520 M1 Before you start ...
Страница 120: ...120 Upgrade and Maintenance Manual RX2520 M1 Power supply units ...
Страница 162: ...162 Upgrade and Maintenance Manual RX2520 M1 Hard disk drives solid state drives ...
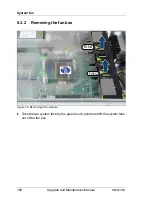
Страница 169: ...RX2520 M1 Upgrade and Maintenance Manual 169 System fan Figure 73 Removing the fan box Ê Remove the two screws ...
Страница 220: ...220 Upgrade and Maintenance Manual RX2520 M1 Expansion cards and backup units ...
Страница 230: ...230 Upgrade and Maintenance Manual RX2520 M1 Main memory ...
Страница 283: ...RX2520 M1 Upgrade and Maintenance Manual 283 Accessible drives Ê Enabling BitLocker functionality on page 93 ...
Страница 310: ...310 Upgrade and Maintenance Manual RX2520 M1 Accessible drives ...
Страница 410: ...410 Upgrade and Maintenance Manual RX2520 M1 Cables ...