Getting Started Testing Fiber
Fiber ID Options
2
2-23
Fiber ID Options
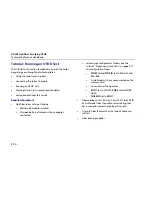
You can create or select fiber IDs as follows:
•
You can create an ID after you press
s
. You can
also highlight a used or unused ID in a list; then press
t
to edit it into a new ID. The next time you press
s
, the tester increments the last character of the
ID you created (the auto increment feature).
•
You can create a list of sequential fiber IDs by
configuring a template on the
Job
tab in Setup.
Select the IDs from the
AUTO SEQ IDs
list after you
press
s
.
•
You can create ID lists in LinkWare software; then
download them to the tester. Select the IDs from the
DOWNLOAD IDs
list after you press
s
.
•
After you press
s
, you can use an ID already
assigned to a record stored in the current folder. This
lets you overwrite existing results or add new results
to an existing record. Select the ID from the
IDs IN
CURRENT FOLDER
list after you press
s
.
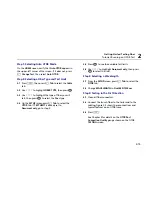
Using the Auto Increment Feature
The auto increment feature increments the last
alphanumeric character in the fiber ID you enter. For
example, if you save a test with the ID “A0”, the tester
increments the ID to “A1” the next time you save a test.
As you save more tests, the ID increments from “A1”
through “A9”; then back to “A0”. Consecutive digits
increment from right to left, but other characters do not.
To use this feature, do the following:
1.
Run a test; then press
s
.
2.
Enter a fiber ID in the
SAVE RESULT IN FIBER ID:
box.
You may need to press
A
Edit ID
to see this box.
3.
Press
s
again.
4.
The next time you press
s
, the incremented fiber
ID appears in the editing box. Press
s
again to
use the ID.
Содержание OF-500 OptiFiber
Страница 12: ...OF 500 OptiFiber Technical Reference Handbook x ...
Страница 18: ...OF 500 OptiFiber Technical Reference Handbook xvi ...
Страница 27: ...Getting Acquainted Powering the Tester 1 1 9 ajt20f eps Figure 1 1 Battery Pack Features ...
Страница 29: ...Getting Acquainted Verifying Operation 1 1 11 ajt56f eps Figure 1 2 Removing the Module ...
Страница 46: ...OF 500 OptiFiber Certifying OTDR Technical Reference Handbook 1 28 ...
Страница 95: ...Using the OTDR Running the OTDR Test 3 3 21 ajt33f eps Figure 3 12 Connecting the OTDR to Spooled Cable ...
Страница 133: ...Using the ChannelMap Function Running the Test 4 4 3 ajt55f eps Figure 4 2 ChannelMap Test Connections ...
Страница 136: ...OF 500 OptiFiber Certifying OTDR Technical Reference Handbook 4 6 ...
Страница 148: ...OF 500 OptiFiber Certifying OTDR Technical Reference Handbook 6 4 ajt61f eps Figure 6 2 Changing the Connector Adapter ...
Страница 192: ...OF 500 OptiFiber Certifying OTDR Technical Reference Handbook 6 48 ...
Страница 196: ...OF 500 OptiFiber Certifying OTDR Technical Reference Handbook 7 4 ajt03f eps Figure 7 2 Using the Visual Fault Locator ...
Страница 254: ...OF 500 OptiFiber Certifying OTDR Technical Reference Handbook 11 36 ...
Страница 256: ...OF 500 OptiFiber Certifying OTDR Technical Reference Handbook ...
Страница 261: ...Loss Test Methods Method A A 2 B B 3 ajt58f eps Figure B 1 Method A A 2 Reference and Test Connections singlemode shown ...
Страница 263: ...B 5 ajt59f eps Figure B 2 Method B A 1 Reference and Test Connections singlemode shown Loss Test Methods Method B A 1 B ...
Страница 265: ...Loss Test Methods Method C A 3 B B 7 ajt60f eps Figure B 3 Method C A 3 Reference and Test Connections singlemode shown ...
Страница 272: ...B 14 OF 500 OptiFiber Certifying OTDR Technical Reference Handbook ...
Страница 274: ...OF 500 OptiFiber Certifying OTDR Technical Reference Handbook C 2 ...
Страница 282: ...OF 500 OptiFiber Technical Reference Handbook 8 ...


