


Getting Started Testing Fiber
Tutorial: Preparing to Save Tests
2
2-11
Tutorial: Preparing to Save Tests
The tutorial in this section guides you through setting up
the tester to save tests.
Step 1: Creating a List of Sequential Fiber IDs
This step assumes the following scenario:
•
You will be testing 12 cables in two patch panels:
cables 1 through 6 in panel A and cables 1 through 6
in panel B.
•
Both panels are located in telecommunications closet
A on the third floor of the building.
•
Your fiber IDs will follow the ANSI/TIA/EIA-606-A
standard for horizontal links. See “About
ANSI/TIA/EIA-606-A Fiber IDs” on page 2- 25 for
details.
1-1
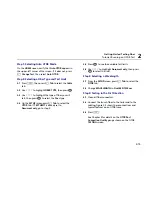
Press
S
; then select
AUTO SEQ TEMPLATE
on
the
Job
tab.
1-2
On the
AUTO SEQUENCE
screen, press
A
Change
Template
; then select
Horizontal
.
1-3
On the
AUTO SEQUENCE
screen press
D
Default
to
transfer the default pattern into the
START ID
and
STOP ID
.
1-4
On the
AUTO SEQUENCE
screen press
B
Edit Start
.
Use the softkeys,
K
N
ML
, and
t
to change
the default ID to 03A-A01 in the
CURRENT START ID
box. Press
s
when you are finished.
1-5
On the
AUTO SEQUENCE
screen press
C
Edit Stop
.
Use the softkeys and
K
NML
to change the
default ID to 03A-B06 in the
CURRENT START ID
box.
Press
s
when you are finished.
1-6
Press
E
Sample List
. You should see a list of 12
sequential fiber IDs: 03A-A01 through 03A-B06. If
the tester beeps instead of showing the list, see
“Solving Problems with Fiber ID Lists” on page 2-27.
1-7
Press
e
to leave the sample list.
1-8
Press
s
when you are finished setting up the list.
The list is saved in the mainframe (not on the
memory card or in the module).
Содержание OF-500 OptiFiber
Страница 12: ...OF 500 OptiFiber Technical Reference Handbook x ...
Страница 18: ...OF 500 OptiFiber Technical Reference Handbook xvi ...
Страница 27: ...Getting Acquainted Powering the Tester 1 1 9 ajt20f eps Figure 1 1 Battery Pack Features ...
Страница 29: ...Getting Acquainted Verifying Operation 1 1 11 ajt56f eps Figure 1 2 Removing the Module ...
Страница 46: ...OF 500 OptiFiber Certifying OTDR Technical Reference Handbook 1 28 ...
Страница 95: ...Using the OTDR Running the OTDR Test 3 3 21 ajt33f eps Figure 3 12 Connecting the OTDR to Spooled Cable ...
Страница 133: ...Using the ChannelMap Function Running the Test 4 4 3 ajt55f eps Figure 4 2 ChannelMap Test Connections ...
Страница 136: ...OF 500 OptiFiber Certifying OTDR Technical Reference Handbook 4 6 ...
Страница 148: ...OF 500 OptiFiber Certifying OTDR Technical Reference Handbook 6 4 ajt61f eps Figure 6 2 Changing the Connector Adapter ...
Страница 192: ...OF 500 OptiFiber Certifying OTDR Technical Reference Handbook 6 48 ...
Страница 196: ...OF 500 OptiFiber Certifying OTDR Technical Reference Handbook 7 4 ajt03f eps Figure 7 2 Using the Visual Fault Locator ...
Страница 254: ...OF 500 OptiFiber Certifying OTDR Technical Reference Handbook 11 36 ...
Страница 256: ...OF 500 OptiFiber Certifying OTDR Technical Reference Handbook ...
Страница 261: ...Loss Test Methods Method A A 2 B B 3 ajt58f eps Figure B 1 Method A A 2 Reference and Test Connections singlemode shown ...
Страница 263: ...B 5 ajt59f eps Figure B 2 Method B A 1 Reference and Test Connections singlemode shown Loss Test Methods Method B A 1 B ...
Страница 265: ...Loss Test Methods Method C A 3 B B 7 ajt60f eps Figure B 3 Method C A 3 Reference and Test Connections singlemode shown ...
Страница 272: ...B 14 OF 500 OptiFiber Certifying OTDR Technical Reference Handbook ...
Страница 274: ...OF 500 OptiFiber Certifying OTDR Technical Reference Handbook C 2 ...
Страница 282: ...OF 500 OptiFiber Technical Reference Handbook 8 ...


