6 8
2
2.36
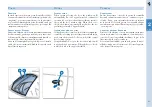
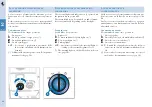
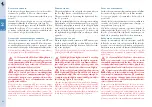
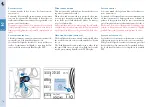
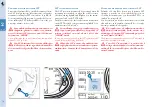
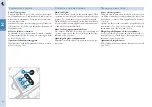
Luci di parcheggio
Le luci di parcheggio funzionano solo con chiave d’av-
viamento in posizione
0
,
II
o con chiave estratta.
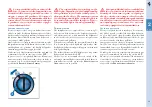
Si inseriscono ruotando il commutatore luci
A
in posi-
zione
F
.
Quando le luci di parcheggio sono accese, sul quadro
strumenti si illumina la relativa spia (vedi pag. 52).
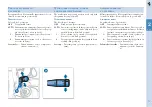
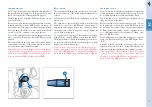
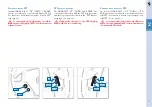
Con le luci di parcheggio inserite, abbassando la leva
sinistra
B
(vedi pag. 67) si accendono solo le luci di
posizione sul lato sinistro, mentre spostandola in alto
si accendono solo quelle sul lato destro.
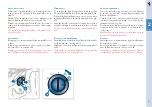
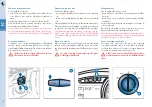
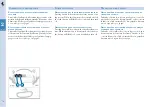
Accensione e spegnimento automatico
Quando il commutatore luci
A
è ruotato su
AUT
e la
chiave di avviamento è in posizione
II
, le luci di posizio-
ne, anabbaglianti e targa si accendono e spengono auto-
maticamente in funzione della luminosità ambientale.
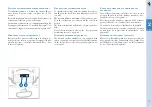
L’accensione luci abbaglianti è possibile solo manualmen-
te, spingendo la leva sinistra
B
in avanti.
Se il comando delle luci abbaglianti è
inserito, si accenderanno ad ogni accen-
sione automatica delle luci. Si consiglia pertan-
to di disinserirle ogni volta che il sensore cre-
puscolare disattiva le luci esterne.
In presenza di nebbia durante le ore diur-
ne, le luci di posizione e anabbaglianti
non vengono accese automaticamente. Il gui-
datore deve sempre essere pronto ad accendere
manualmente le luci, eventualmente anche
quelle retronebbia.
Dopo l’accensione automatica delle luci esterne, è sempre
possibile accendere manualmente le luci retronebbia. Allo
spegnimento automatico delle luci esterne, verranno spente
automaticamente anche le luci retronebbia (se attive). Per-
tanto, alla successiva accensione automatica, l’utente dovrà
riaccendere, se necessario, manualmente le luci retroneb-
bia.
Parking lights
The parking lights work only with the ignition key in
the
0
or
II
positions, or with the key removed.
They are switched on by turning the light switch
A
to
the
F
position.
When the parking lights are on, the respective warning
light will turn on on the instrument panel (see page 52).
With the parking lights turned on, the dipped lights
only on the left-hand side can be turned on by lower-
ing the left-hand lever
B
(see page 67), whereas only
the right-hand dipped lights turn on when you shift it
upwards.
Luces de aparcamiento
Las luces de aparcamiento solamente funcionan con la llave
de contacto en la posición
0
,
II
o con la llave extraída.
Se conectan girando el conmutador de luces
A
a la
posición
F
.
Cuando las luces de aparcamiento están encendidas se
enciende en el cuadro de instrumentos el testigo co-
rrespondiente (véase pág. 52).
Con las luces de aparcamiento conectadas, bajando la
palanca izquierda
B
(véase pág. 67) se encienden las
luces de posición del lado izquierdo, mientras que su-
biéndola se encienden las del derecho únicamente.
Automatic on and off
When the light switch
A
is turned to
AUT
and the igni-
tion key is in position
II
, the position lights, low beam
lights and number plate lights turn on and off accord-
ing to the daylight.
The high beam lights can only be turned on manually by
pushing the left hand lever
B
forwards.
If the high beam lights control is on, they
will turn on whenever the lights are auto-
matically switched on. We recommend there-
fore that you switch them off every time the
twilight sensor deactivates the external lights.
In case of fog during the day, the position
lights and low beams will not be turned
on automatically. The driver must always be
ready to turn the lights on manually, and also
the rear fog lights if necessary.
After the external lights have been switched on automati-
cally, the rear fog lights can always be turned on manually.
When the external lights switch off automatically, the rear
fog lights (if active) will also turn off. The next time the
system is switched on automatically, the user must therefore
switch the rear fog lights on manually, if required.
Encendido y apagado automático
Cuando el conmutador de luces
A
está girado en
AUT
y
la llave de contacto está en la posición
II
, las luces de
posición, cruce y matrícula se encienden y apagan auto-
máticamente en función de la luminosidad ambiental.
El encendido de las luces de carretera solamente es posible
de forma manual, empujando la palanca izquierda
B
ha-
cia adelante.
Si el encendido de las luces de carretera
está conectado, se encenderán en cada
encendido automático de las luces. Por tanto, se
recomienda desconectarlas cada vez que el sen-
sor crepuscular desconecta las luces exteriores.
En presencia de niebla durante las horas
diurnas, le luces de posición y de cruce no
se encienden automáticamente. El conductor
debe estar atento siempre para encender ma-
nualmente las luces, incluso las antiniebla tra-
seras si fuera necesario.
Después del encendido automático de las luces exteriores,
siempre es posible encender manualmente las luces antinie-
bla traseras. Al apagarse automáticamente las luces exte-
riores, también se apagarán automáticamente las luces
antiniebla traseras (si están encendidas). En el siguiente
encendido automático, el usuario deberá volver a encender
si fuera necesario las luces antiniebla traseras manualmente.
Содержание 612 scaglietti
Страница 1: ......
Страница 2: ...1 USO E MANUTENZIONE OWNER S MANUAL USO Y MANTENIMIENTO ...
Страница 23: ...2 2 1 6 7 8 9 10 5 4 3 2 12 11 1 13 1 16 Targhette Data plates Etiquetas ...
Страница 33: ...3 2 1 1 26 ...
Страница 152: ...151 2 7 8 9 5 1 2 3 3 3 3 3 3 4 4 1 1 2 1 6 2 119 Climatizzazione Airconditioningandheatingsystem Climatización ...
Страница 161: ...160 3 3 2 Gruppo motore Engine assembly Grupo motor ...
Страница 197: ...196 4 4 4 Cambio e differenziale Gearbox and differential Cambio y diferencial ...
Страница 207: ...206 4 6 3 13 2 5 4 7 4 7 8 8 1 12 6 9 4 9 4 11 10 4 14 ...
Страница 292: ......

