238
4
4.46
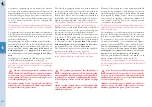
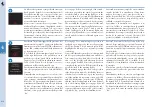
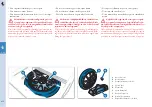
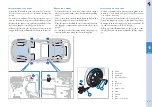
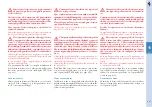
• Appoggiare la base del martinetto su terreno piano e
solido, in corrispondenza di uno dei punti di solleva-
mento
riportati sotto al pianale della vettura.
• Sollevare con prudenza la vettura, azionando il mar-
tinetto fino al distacco della ruota da terra.
Il non corretto posizionamento del mar-
tinetto può provocare la caduta della vet-
tura.
Il martinetto in dotazione deve essere uti-
lizzato unicamente per la sostituzione
delle ruote.
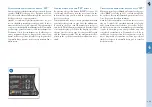
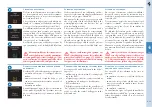
• Svitare completamente le cinque colonnette e rimuo-
vere la ruota.
• Montare la ruota di scorta e avvitare le cinque colon-
nette di fissaggio.
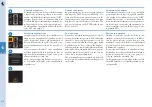
• Abbassare la vettura ed estrarre il martinetto.
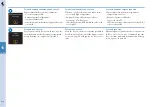
• Serrare a fondo le colonnette, passando alternativa-
mente da una colonnetta a quella diametralmente
opposta.
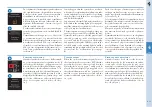
• Riporre la ruota sostituita e gli attrezzi usati nel vano
bagagli, assicurandoli in modo che non vada ad urta-
re i dispositivi presenti nel vano baule.
Appena possibile, assicurare il fissaggio delle colon-
nette, con chiave dinamometrica, alla coppia di 100
Nm.
La ruota di scorta non è provvista del
sensore di monitoraggio pressione pneu-
matici (vedi etichetta sulla trousse della ruota
di scorta). Dopo il montaggio non viene control-
lata dal sistema, ma è conforme al Regolamen-
to Internazionale ECE R64/01. Dopo la sua in-
stallazione si consiglia di recarsi al più vicino
C
ENTRO
A
UTORIZZATO
F
ERRARI
.
• Place the base of the jack on flat, firm ground, in po-
sition with one of the lifting points indicated under-
neath the vehicle underfloor.
• Raise the vehicle carefully, using the jack, until it is
lifted off the ground.
If the jack is not positioned correctly, this
could result in the vehicle falling.
The jack supplied must only be used for
replacing the wheels.
• Apoye la base del gato en terreno plano y sólido, a la
altura de uno de los puntos de elevación
señalados
bajo la plataforma del automóvil.
• Eleve con prudencia el vehículo, accionando el gato
hasta que se separe la rueda del suelo.
La colocación incorrecta del gato puede
provocar la caída del automóvil.
El gato del equipo debe ser utilizado úni-
camente para la sustitución de las rue-
das.
• Unscrew the five stud bolts completely and remove
the wheel.
• Fit the spare wheel and screw up the five stud bolts.
• Lower the vehicle and withdraw the jack.
• Tighten the stud bolts completely, moving diagonal-
ly from one to the next.
• Put the wheel replaced and the tools in the luggage
compartment, ensuring they cannot bag against the
devices fitted in the luggage compartment.
As soon as possible, secure the stud bolt with the torque
wrench, tightening them to a torque of 100 Nm.
The spare wheel is not fitted with a tyre
pressure monitoring sensor (see label on
spare wheel bag). After fitting, it is not moni-
tored by the system, but it does comply with In-
ternational Regulation ECE R64/01. Once it is
fitted, we recommend you visit the nearest A
U
-
THORISED
F
ERRARI
C
ENTRE
.
• Afloje completamente los cinco tornillos y retire la
rueda.
• Monte la rueda de repuesto y apriete los cinco torni-
llos de fijación.
• Baje el automóvil y extraiga el gato.
• Apriete a fondo los tornillos, pasando de uno al dia-
metralmente opuesto.
• coloque la rueda sustituida y las herramientas en el
maletero, asegurándolas de modo que no golpeen los
dispositivos presentes en el hueco maletero.
Apenas sea posible, apriete los tornillos con una llave
dinamométrica a un par de 100 Nm.
La rueda de repuesto no dispone de sen-
sor de monitoreo de la presión de los neu-
máticos (véase la etiqueta en el estuche de la
rueda de repuesto). Después del montaje no está
controlada por el sistema, pero cumple el Re-
glamento Internacional ECE R64/01. Después
de su montaje se recomienda dirigirse al C
EN
-
TRO
A
UTORIZADO
F
ERRARI
más próximo.
Содержание 612 scaglietti
Страница 1: ......
Страница 2: ...1 USO E MANUTENZIONE OWNER S MANUAL USO Y MANTENIMIENTO ...
Страница 23: ...2 2 1 6 7 8 9 10 5 4 3 2 12 11 1 13 1 16 Targhette Data plates Etiquetas ...
Страница 33: ...3 2 1 1 26 ...
Страница 152: ...151 2 7 8 9 5 1 2 3 3 3 3 3 3 4 4 1 1 2 1 6 2 119 Climatizzazione Airconditioningandheatingsystem Climatización ...
Страница 161: ...160 3 3 2 Gruppo motore Engine assembly Grupo motor ...
Страница 197: ...196 4 4 4 Cambio e differenziale Gearbox and differential Cambio y diferencial ...
Страница 207: ...206 4 6 3 13 2 5 4 7 4 7 8 8 1 12 6 9 4 9 4 11 10 4 14 ...
Страница 292: ......

