

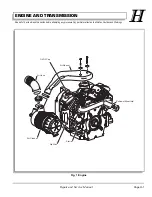


ENGINE AND TRANSMISSION
Page H-4
Repair and Service Manual
Read all of Section B and this section before attempting any procedure. Pay particular attention to all Notes, Cautions and Warnings
Replace dipstick fully into the dipstick tube and firmly
install the oil fill cap.
Changing the Oil Filter
Tool List
Qty. Required
Oil filter wrench, to fit 3" (76 mm) oil filter.................... 1
Oil drain pan ................................................................ 1
Clean cloth .................................................................. 2
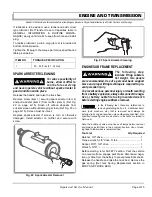
Clean the area around the oil filter and oil drain. Drain
engine oil (Ref Changing the Oil section on page H-3)
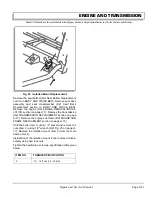
and remove oil filter (Ref Fig. 8 on page H-4). Make sure
the seal comes off with filter and is not stuck to the
engine.
Wipe around the sealing surface of filter mount with a
clean, lint free cloth. Lightly oil the seal on the new filter
with fresh, clean oil. Screw filter on by hand until the seal
contacts the filter mount. Tighten 1/2 to 3/4 turn more.
Refill engine with new oil (Ref Changing the Oil section
on page H-3).
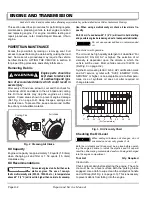
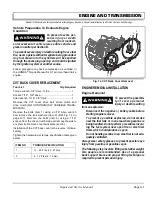
Air Cleaner Maintenance
The filters must be serviced per the Periodic Service
Schedule in Section A for optimum engine life and perfor-
mance.
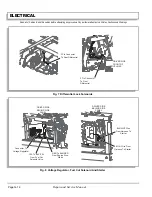
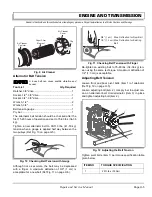
Access the filter by unsnapping the spring clip on each
side of the air cleaner and removing the air cleaner cover
(Ref Fig. 9 on page H-5). If necessary, vacuum or wipe
out any loose dirt or trash from the air cleaner base.
Paper Filter Element Service
Do not use petroleum solvents, pres-
surized water, or compressed air to
clean paper filter element. Doing so will damage the filter and
will damage the engine.
The paper filter element is a dry unit. Do not
use oil on the filter element.
Remove paper filter element and inspect (Ref Fig. 9 on
page H-5). Replace if too dirty to clean or at the first sign of filter
paper deterioration. Clean paper filter by gently tapping on
a flat surface.
Install paper filter element and the air cleaner cover.
Secure end cover with the spring clips.
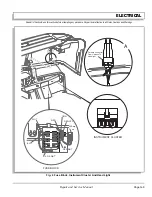
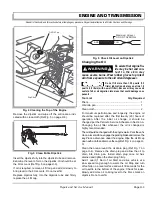
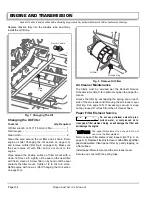
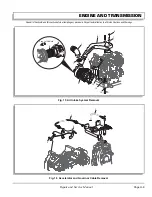
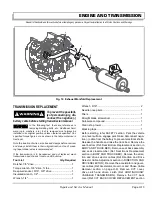
Fig. 7 Changing The Oil
Front of Vehicle
Drain
Plug
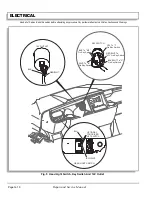
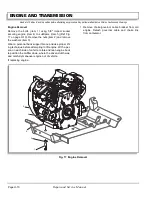
Fig. 8 Remove Oil Filter
Oil Filter
Oil Drain Plug
Содержание ST 4X4
Страница 6: ...Page iv Repair and Service Manual TABLE OF CONTENTS Notes...
Страница 10: ...Repair and Service Manual SAFETY INFORMATION Page viii Notes...
Страница 12: ...GENERAL INFORMATION ROUTINE MAINTENANCE Page A ii Repair and Service Manual Notes...
Страница 24: ...SAFETY Page B ii Repair and Service Manual Notes...
Страница 34: ...BODY AND TRUCKBED Page C ii Repair and Service Manual Notes...
Страница 50: ...BRAKES Page D ii Repair and Service Manual Notes...
Страница 68: ...CONTINUOUSLY VARIABLE TRANSMISSION CVT Page E ii Repair and Service Manual Notes...
Страница 74: ...DIRECTION AND DRIVE SELECTOR Page F ii Repair and Service Manual Notes...
Страница 80: ...ELECTRICAL Page G ii Repair and Service Manual Notes...
Страница 114: ...FRONT SUSPENSION AND STEERING Page J ii Repair and Service Manual Notes...
Страница 128: ...FUEL SYSTEM Page K ii Repair and Service Manual Notes...
Страница 136: ...PAINT Page L ii Repair and Service Manual Notes...
Страница 142: ...REAR AXLE AND SUSPENSION Page M ii Repair and Service Manual Notes...
Страница 152: ...SPEED CONTROL Page N ii Repair and Service Manual Notes...
Страница 160: ...TROUBLESHOOTING Page P ii Repair and Service Manual Notes...
Страница 168: ...WHEELS AND TIRES Page R ii Repair and Service Manual Notes...
Страница 174: ...GENERAL SPECIFICATIONS Page S ii Repair and Service Manual Notes...
Страница 180: ...LIMITED WARRANTY Page T ii Repair and Service Manual Notes...
Страница 182: ...Page T 2 Repair and Service Manual LIMITED WARRANTY Notes...


