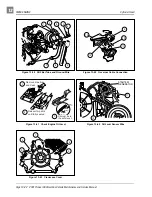


FE350 ENGINE
Oil Pump
Page 13-32 2001 Pioneer 900 Gasoline Vehicle Maintenance and Service Manual
13
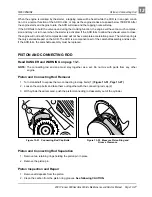
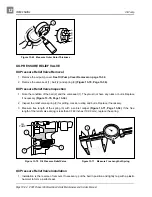
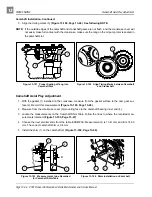
Ignition Coil and Flywheel Removal, Continued:
∆ CAUTION
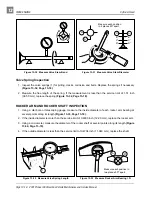
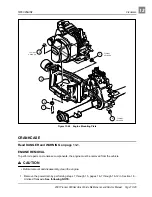
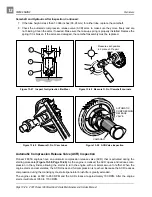
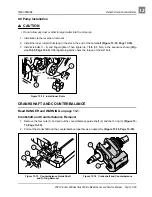
• The flywheel nut has right-hand threads. Turn it clockwise to tighten, or counterclockwise to loosen.
• Do not damage the fan blades with the strap wrench. Do not place screwdriver or pry bar in the fan blades.
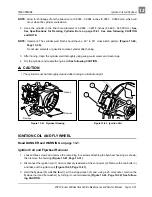
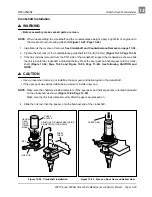
4. Remove the flywheel with a puller.
5. Remove the flywheel key from its groove.
Flywheel Installation
See Engine Assembly on page 13-48.
Ignition Coil Inspection and Repair
See Test Procedure 16, Section 11, Page 11-35.
Ignition Coil Installation
1. Installation is the reverse of removal.
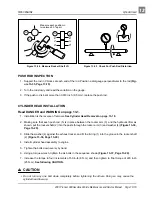
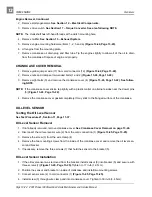
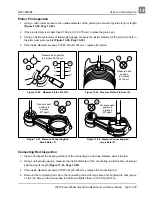
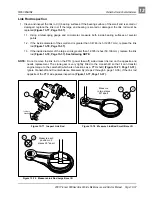
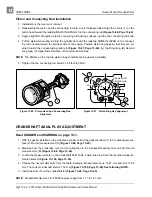
2. While tightening the two bolts (3), use a bronze feeler gauge to adjust the ignition coil air gap to 0.012
in. (0.304 mm) (Figure 13-64, Page 13-32).
3. Tighten the two ignition coil bolts to 30 in-lb (3.4 N·m).
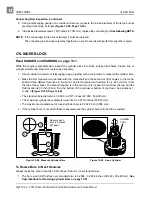
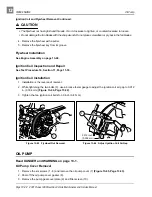
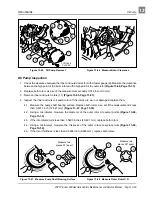
OIL PUMP
Read DANGER and WARNING on page 13-1.
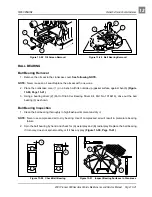
Oil Pump Cover Removal
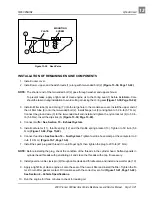
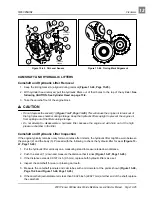
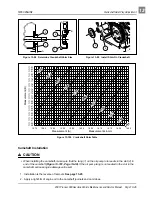
1. Remove the six screws (1 - 6) and remove the oil pump cover (7) (Figure 13-65, Page 13-33).
2. Peel off the oil pump cover gasket (8).
3. Remove the pump gear cover plate (9) and filter screen (10).
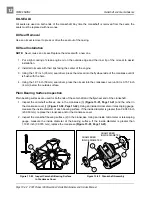
Figure 13-63 Flywheel Nut Removal
Figure 13-64 Adjust Ignition Coil Air Gap
5
7
4
M
F
34
81
0.012 inch
(0.304 mm)
3
Содержание Pioneer 900
Страница 1: ......
Страница 2: ......
Страница 22: ...3...
Страница 88: ...7...
Страница 92: ...8...
Страница 100: ...9...
Страница 108: ...10...
Страница 188: ...12...
Страница 268: ...14...
Страница 272: ...15...
Страница 316: ...16...
Страница 332: ...17...
Страница 341: ......
Страница 342: ......
Страница 343: ......