ELECTRICAL COMPONENTS
Key Switch
2001 Pioneer 900 Gasoline Vehicle Maintenance and Service Manual Page 12-15
12
Diode Installation
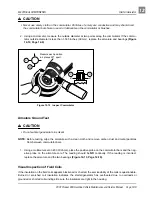
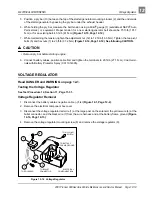
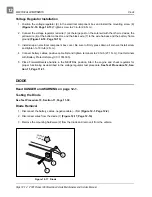
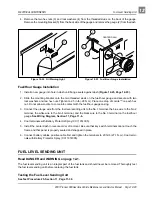
1. Mount the diode to the frame using the mounting hardware. Tighten to 25 in-lb (2.8 N·m) (Figure 12-17,
2. Connect the white 12 gauge wire from the harness to the negative (–) terminal on the diode. Connect
the red 12 gauge wire from the wire harness to the positive (+) terminal on the diode. See following
WARNING.
∆ WARNING
• Incorrect wiring could result in severe injury or death.
• Diode and solenoid connections must have correct polarity.
• Keep all persons clear of engine belts when making final connections.
3. Connect battery cables, positive cable first and tighten the terminals to 20 ft-lb (27.1 N·m). Coat termi-
nals with Battery Protector Spray (CCI 1014305).
KEY SWITCH
Read DANGER and WARNING on page 12-1.
Testing the Key Switch
See Section 11, Test Procedure 4, Page 11-25, and Test Procedure 17, Page 11-36.
Key Switch Removal
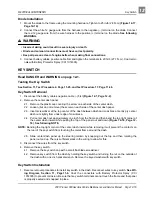
1. Disconnect the battery cables, negative cable (–) first (Figure 12-1, Page 12-2).
2. Remove the center dash panel.
2.1. Remove the plastic cap covering the screw on each side of the center dash.
2.2. Loosen (but do not remove) the screw on each side of the center dash panel.
2.3. Insert screwdriver at the top center of the dash between dash and cowl brace. Gently pry center
dash out slightly from under edge of cowl brace.
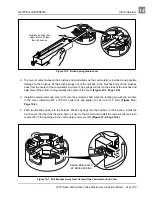
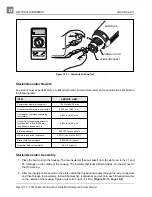
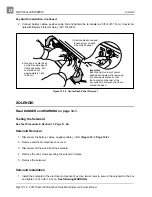
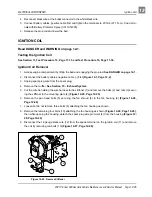
2.4. Pull center dash out approximately one inch from the frame and then bend the top right corner of
the center dash inward while pulling the top of the panel out and down (Figure 12-18, Page 12-
16). See following NOTE.
NOTE: Bending the top right corner of the center dash inward while removing it will prevent the contacts on
the rear of the key switch from touching the metal frame around the dash.
2.5. Slide center dash panel up the steering column by snapping out the top and then rotating the
panel out and up. There is sufficient slack in the wiring to allow for this.
3. Disconnect the wires from the key switch.
4. Remove the key switch:
4.1. Remove the key switch cap with a small, flat-blade screwdriver.
4.2. Remove key switch from the dash by holding the key switch and turning the nut on the outside of
the dash with a one-inch socket wrench. Remove the keyed washer with key switch.
Key Switch Installation
1. Reverse removal procedures to install key switch in the dash. Reconnect wires to key switch. See Wir-
ing Diagram, Section 11, Page 11-6. Coat the connectors with Battery Protector Spray (CCI
1014305) to prevent corrosion. Be sure that key switch terminals cannot touch the frame and that panel
is properly seated and snapped in place.
Содержание Pioneer 900
Страница 1: ......
Страница 2: ......
Страница 22: ...3...
Страница 88: ...7...
Страница 92: ...8...
Страница 100: ...9...
Страница 108: ...10...
Страница 188: ...12...
Страница 268: ...14...
Страница 272: ...15...
Страница 316: ...16...
Страница 332: ...17...
Страница 341: ......
Страница 342: ......
Страница 343: ......

