Network Functions
165
12.12 Initiating a Telnet Session
The ASG Guard Plus supports Telnet sessions over its 10base T connection.
12.12.1 Initiating a Telnet Session: Direct Connect
The following outlines the steps to take to initiate a direct connect Telnet session using a PC
(Windows 95/98 or Windows NT client) on an Ethernet connection to the network:
1.
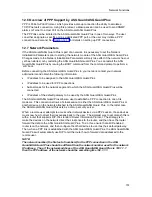
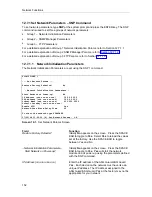
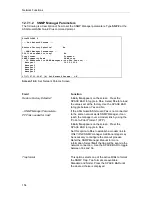
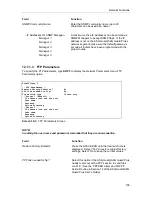
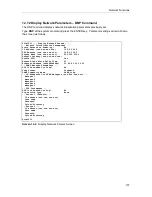
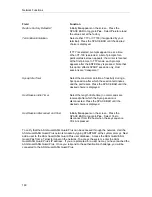
Set up the ASG Guard/ASG Guard Plus to set the IP Address, PPP Address, Default
Gateway and enable RIP. Before an ASG Guard/ASG Guard Plus can support a Telnet
session, it must be configured for network operation. To do this, use the Set Network
Parameters command and select Option 1 (SNP 1). The following set of options will be
presented.
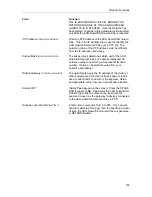
•
IP Address - This is the IP address of the TCP/IP network to which the ASG Guard Plus
is attached via the 10BaseT connection. Consult your Network Administrator for this
address.
•
PPP IP Address - This is the IP address that will be referenced when connecting to the
ASG Guard/ASG Guard Plus via the PPP connection. The entered address should
indicate a network other than the one for the 10BaseT network. It should also be
different than any other network that can be accessed via the 10BaseT LAN.
•
Default Gateway -This should be the default gateway that is used by the ASG
Guard/ASG Guard Plus for its 10baseT connection. The ASG Guard/ASG Guard Plus
will act as the default gateway for the PPP connection.
•
RIP Enabled - This should be set to Yes. Router Information Protocol (RIP) allows
routers on the network to know how to send packets to destination IP addresses. For
example, if you dial into the ASG Guard/ASG Guard Plus from a remote site and
establish a PPP connection with RIP enabled, the ASG Guard/ASG Guard Plus will
broadcast (every 30 seconds) to the network that this connection exists. Routers in the
network then "know" packets destined for the remote site should be sent to the ASG
Guard/ASG Guard Plus (The ’default gateway’ for the remote site).
NOTE:
If you are using protocols such as Telnet or FTP for devices other than the ASG
Guard/ASG Guard Plus, they must also support RIP.
2.
When all the settings have been entered, start the network using the STARTNET command.
If the network is already running and network settings were changed, you MUST reboot the
system. The remote connection will be lost and you will have to reconnect.
3.
From the Windows Start button, click on "Run".
4.
When the "RUN" window appears, type TELNET and the IP address of the ASG Guard/ASG
Guard Plus to be accessed. Click the OK button.
When the connection is made, you will be prompted to authenticate yourself into the ASG
Guard/ASG Guard Plus.
If using another communication package (such as Procomm, HyperTerminal, etc.) see the
section in the respective package on establishing a Telnet session.
Содержание Lucent Technologies Access Security Gateway Guard
Страница 12: ...x Page intentionally left blank ...
Страница 28: ...ASG Guard Overview 16 Page intentionally left blank ...
Страница 36: ...Physical Connections 24 Page intentionally left blank ...
Страница 60: ...Modem Port Setup 48 Page intentionally left blank ...
Страница 82: ...Modifying the User Database 70 Page intentionally left blank ...
Страница 106: ...Action and Event Tables 94 ACTION TABLE WORKSHEET Alarm Message or Internal Event Action Routine Routine Parameters ...
Страница 120: ...Action and Event Tables 108 Page intentionally left blank ...
Страница 158: ...User Connectivity 146 Page intentionally left blank ...
Страница 188: ...Log Functions 176 Page intentionally left blank ...
Страница 236: ...Troubleshooting 224 Page intentionally left blank ...
Страница 252: ...Internal Battery Replacement 240 Page intentionally left blank ...
Страница 258: ...Glossary of Command References 246 Page intentionally left blank ...

