R5905948 /12
Event Master Devices
51
5.
Tighten the two lower screws, then install and tighten the two uppers screws in the rack rail.
How to install S3 or EX in a rack
Use the following steps to rack mount the S3 or the EX:
1.
S3 and EX units are shipped with side rails included in the shipping case and not installed onto the chassis.
These side rails, when they are properly installed and adjusted, assist with the distribution of chassis (and
cable) weight within your rack. Use the following steps to properly adjust the side rails:
1.
Measure and install the two supplied mounting brackets on your rear rack rails.
Image 3-16
2.
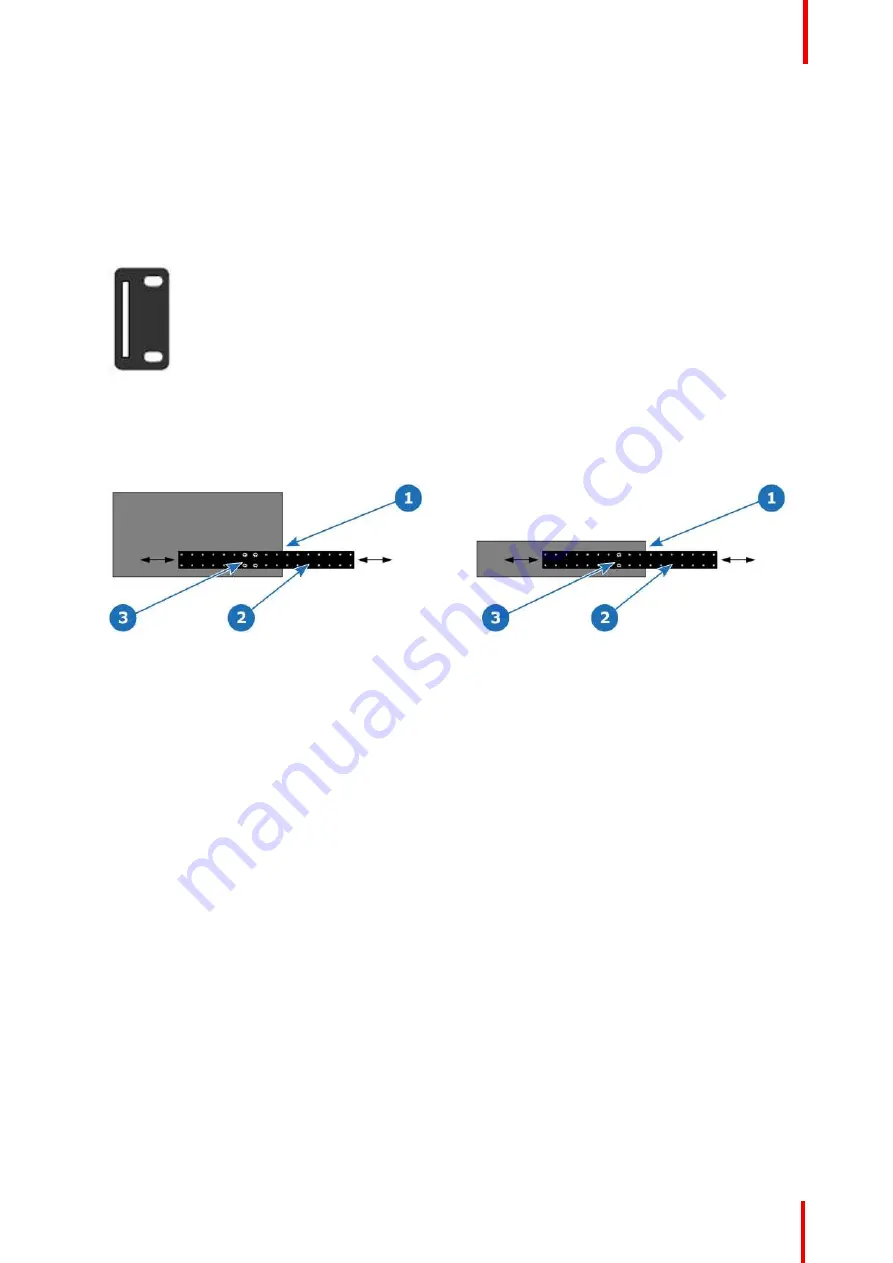
Measure the distance between the front and rear rack rails. Remove the mounting screws that secure each
side rail to the chassis, and then adjust the spacing of each side rail as necessary. The S3 uses four
mounting screws on each side rail; the EX uses two mounting screws on each side rail.
Image 3-17: S3
–
4K series side rail and mounting screws
1
Chassis rear
2
Side rail
3
Mounting screws
Image 3-18: EX expansion box side rail and mounting screws
1
Chassis rear
2
Side rail
3
Mounting screws
3.
Re-install the mounting screws. When properly adjusted, the end of each side rail will protrude through the
slot in the rear mounting bracket, once the chassis is rack mounted.
2.
Lift the chassis, and while supporting it, slide the side rails through the slots in the rear mounting brackets.
3.
While continuing to support the chassis, install and tighten the two lower screws.
4.
Finally, install and tighten the two uppers screws in the rack rail.
Содержание Event Master E2 Series
Страница 1: ...ENABLING BRIGHT OUTCOMES User s Guide Event Master Devices...
Страница 12: ...R5905948 12 Event Master Devices 12...
Страница 24: ...R5905948 12 Event Master Devices 24 Safety...
Страница 52: ...R5905948 12 Event Master Devices 52 General...
Страница 82: ...R5905948 12 Event Master Devices 82 Hardware orientation...
Страница 102: ...R5905948 12 Event Master Devices 102 Front Panel Menu orientation...
Страница 272: ...R5905948 12 Event Master Devices 272 Image 6 137 EM GUI orientation...
Страница 304: ...R5905948 12 Event Master Devices 304 Updating firmware...
Страница 326: ...R5905948 12 Event Master Devices 326 Image 9 28 General operation example...
Страница 382: ...R5905948 12 Event Master Devices 382 Preventive maintenance actions...
Страница 386: ...R5905948 12 Event Master Devices 386 14 2 Process Overview Flow chart Image 14 2 E2 Maintenance...
Страница 444: ...R5905948 12 Event Master Devices 444 E2 Maintenance...
Страница 448: ...R5905948 12 Event Master Devices 448 15 2 Process Overview Flow chart Image 15 2 S3 Maintenance...
Страница 528: ...R5905948 12 Event Master Devices 528 EC 200 EC 210 Maintenance...
Страница 569: ...569 R5905948 12 Event Master Devices Troubleshooting C...
Страница 572: ...R5905948 12 Event Master Devices 572 Troubleshooting...
Страница 583: ...R5905948 12 Event Master Devices 583 Index...


