


Working with Workspace Files
20
NetLinx Studio - Instruction Manual
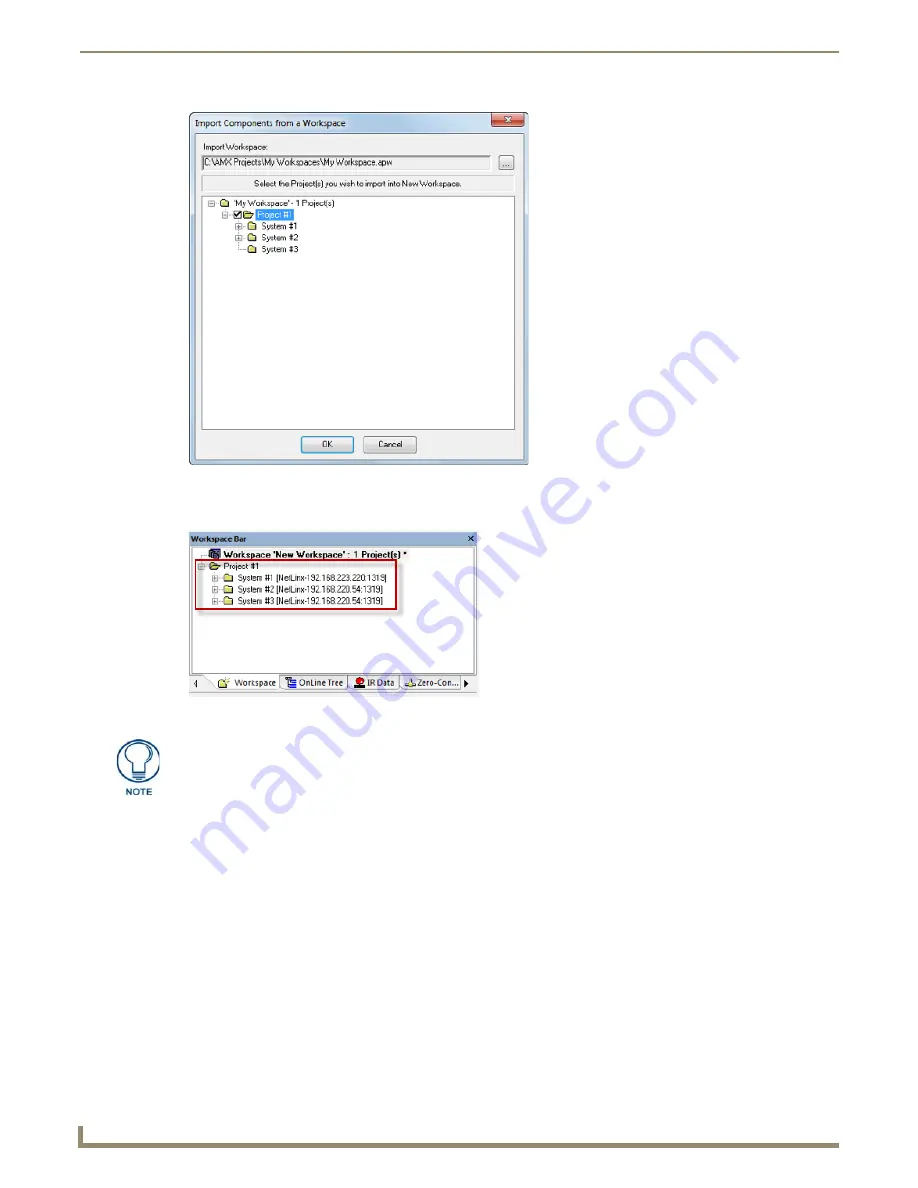
4.
Click
OK
to close this dialog. The selected Project (and the Systems it contains) is now indicated in the current
Workspace (FIG. 37).
Removing a Project from the Workspace
When you remove a Project from the open Workspace, no files are actually deleted from the hard drive; the Project is
simply removed from the open Workspace.
1.
Click to select the Project that you want to remove (in the Workspace tab of the Workspace Bar).
2.
Select
Remove Project
from the Project menu.
3.
When prompted, click
Yes
to confirm that you want to remove the selected Project.
FIG. 36
Import Components From a Workspace dialog
FIG. 37
Workspace indicating imported project
If the selected Project(s) contain any identifiers that are already being used by the
target Workspace, the program prompts you to change them. In this case, use the
Import Name Change dialog to specify a new identifier for the imported Project.
Содержание NetLinx Studio
Страница 40: ...Working with Projects 28 NetLinx Studio Instruction Manual...
Страница 148: ...Communication Settings 136 NetLinx Studio Instruction Manual...
Страница 160: ...Working with Online Devices 148 NetLinx Studio Instruction Manual...
Страница 178: ...File Transfer Operations 166 NetLinx Studio Instruction Manual...
Страница 208: ...Tools Menu Options 196 NetLinx Studio Instruction Manual...
Страница 229: ...Setting Program Preferences 217 NetLinx Studio Instruction Manual...


