


Communication Settings
122
NetLinx Studio - Instruction Manual
Manually Entering the Master’s IP Address Information
1.
In the
Communication Settings
dialog, click
New
to open the
New TCP/IP Setting
dialog (FIG. 189).
2.
Enter the
TCP/IP Address
for the target Master Controller.
3.
Enter a
Description
.
4.
Leave the
Automatically Ping the Master to ensure availability
option selected.
5.
Enter the
User Name
and
Password
required by the target Master (only if the Master is secured).
6.
Click
OK
to close this dialog and return to the
Communication Settings
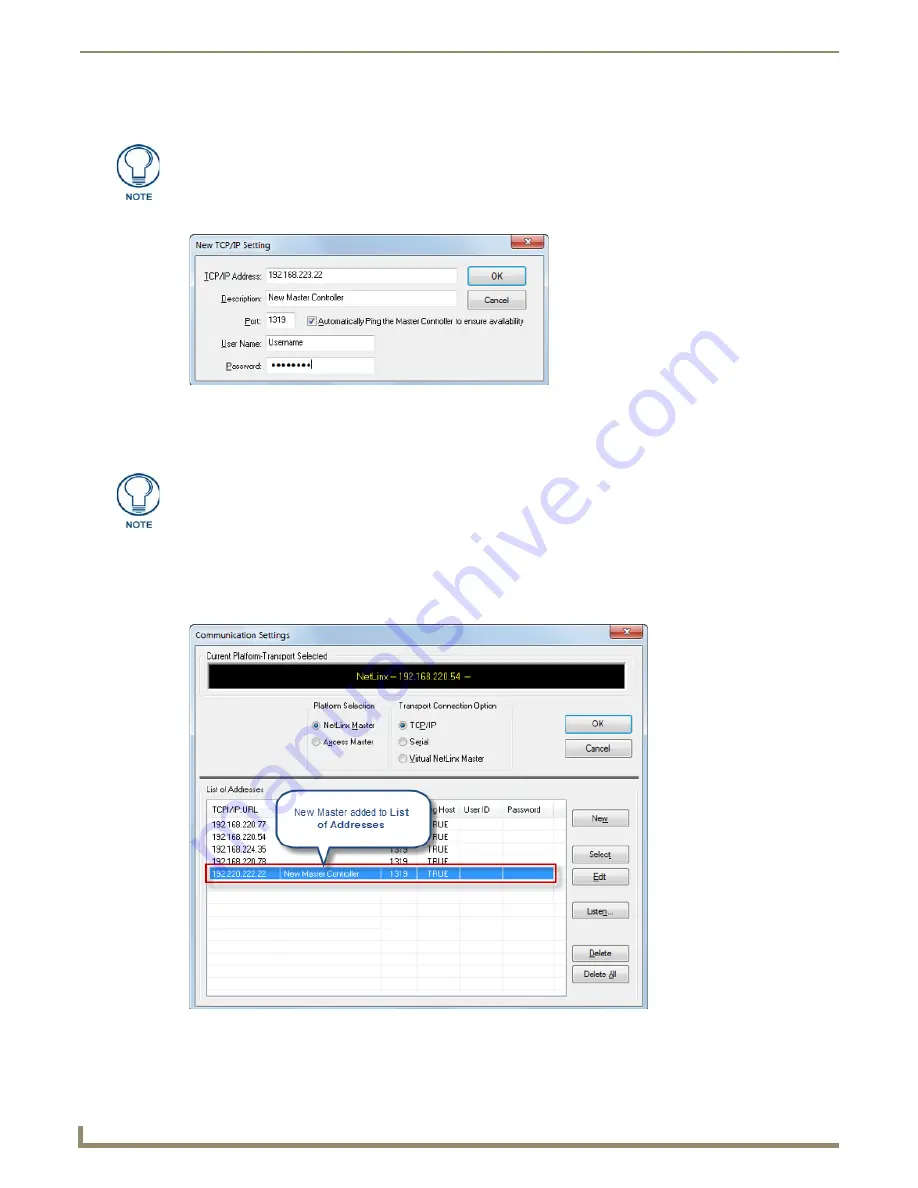
dialog. The new Master’s IP Address is
indicated in the
List of Addresses
(FIG. 190).
7.
Select the new Master connection in the
List of Addresses
. This populates the Current Platform-Transport Selected
field with the selected connection (FIG. 191).
Click Settings > Master Communications Settings to open the Master
Communication Settings dialog, and click the Communication Settings button to
open the Communication Settings dialog.
FIG. 189
New TCP/IP Setting dialog
The Port should always be set to 1319 (default setting). Do not change the Port
assignment.
FIG. 190
List of Addresses, indicating new Master Controller
Содержание NetLinx Studio
Страница 40: ...Working with Projects 28 NetLinx Studio Instruction Manual...
Страница 148: ...Communication Settings 136 NetLinx Studio Instruction Manual...
Страница 160: ...Working with Online Devices 148 NetLinx Studio Instruction Manual...
Страница 178: ...File Transfer Operations 166 NetLinx Studio Instruction Manual...
Страница 208: ...Tools Menu Options 196 NetLinx Studio Instruction Manual...
Страница 229: ...Setting Program Preferences 217 NetLinx Studio Instruction Manual...


