


File Transfer Operations
151
NetLinx Studio - Instruction Manual
This initiates the transfer of every file listed in the
Send
tab, in the order in which they are listed (top to
bottom).
The progress and status of each file transfer is indicated in the
File Transfer Status
tab of the Output Bar.
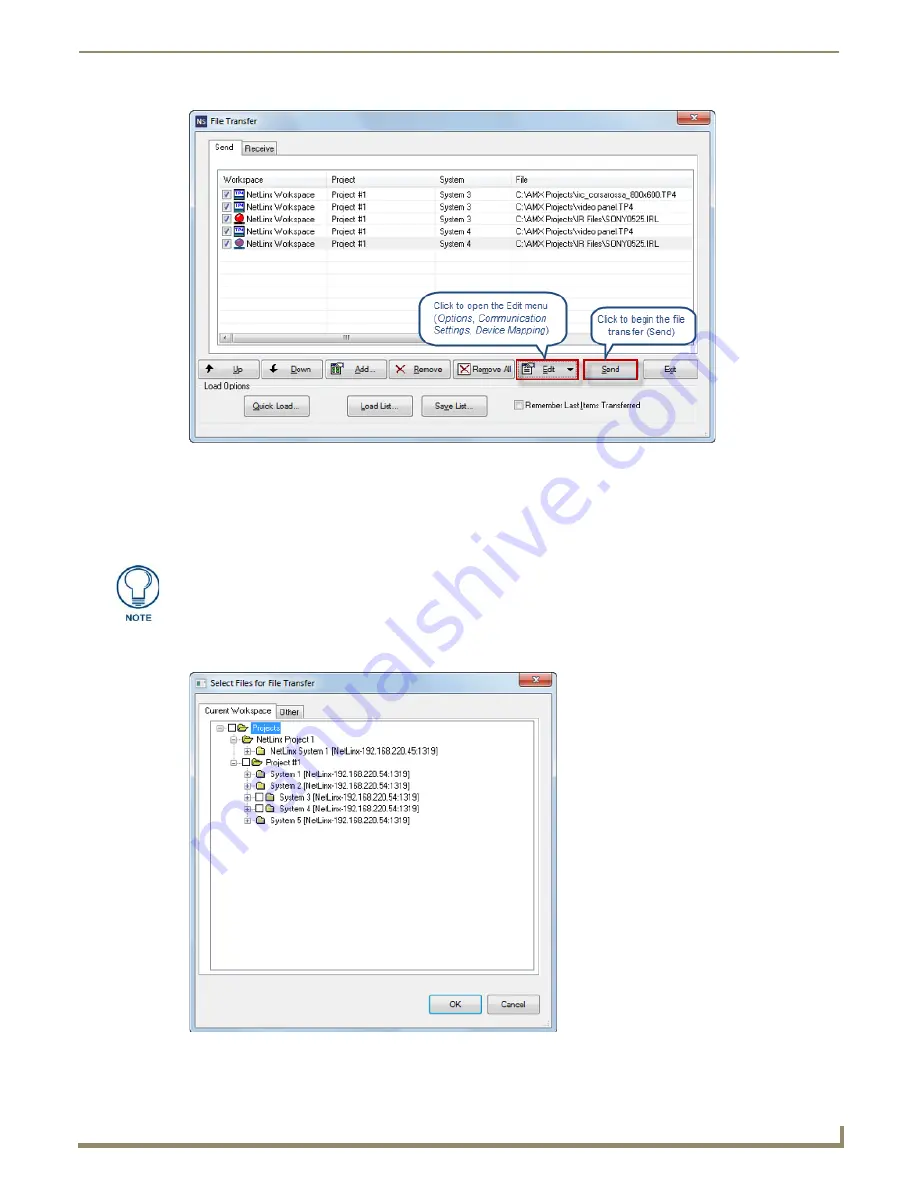
Adding Workspace Files via the "Select Files for File Transfer" dialog
1.
In the
File Transfer
dialog (
Send
tab), click the
Add
command button to open the
Select Files For Transfer
dialog
(FIG. 230).
FIG. 229
File Transfer dialog (Send tab) - indicating files to send
Files cannot be added to the Send tab unless they have device mapping information.
Complete all device mapping assignments before attempting to send files. See the
Device Mapping
section on page 67
for details.
FIG. 230
Select Files For File Transfer dialog (Current Workspace tab)
Содержание NetLinx Studio
Страница 40: ...Working with Projects 28 NetLinx Studio Instruction Manual...
Страница 148: ...Communication Settings 136 NetLinx Studio Instruction Manual...
Страница 160: ...Working with Online Devices 148 NetLinx Studio Instruction Manual...
Страница 178: ...File Transfer Operations 166 NetLinx Studio Instruction Manual...
Страница 208: ...Tools Menu Options 196 NetLinx Studio Instruction Manual...
Страница 229: ...Setting Program Preferences 217 NetLinx Studio Instruction Manual...


