
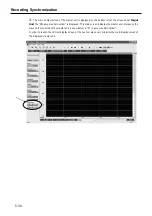


Recording Synchronization
5-31
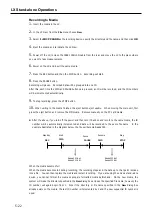
4.
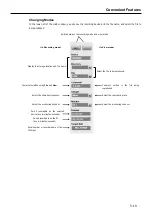
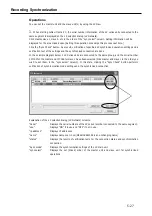
When LX Navi is re-launched from a PC, the LX selection dialog (LX Network) indicated in step 1 is displayed.
In order to launch the LX Navi display screen set to the slave unit, click the box in the <serial> field of LX main
unit set to the slave unit and click [OK]. (If the background of the check box is grey, click on it twice, confirm
that a normal check mark is displayed and click [OK].
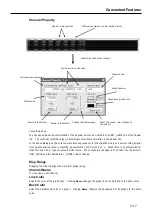
The main LX Navi display screen of the selected slave unit will now be shown. In the bottom left of the screen
under Target Unit the “S*/name or serial number” is displayed. This main screen indicates the slave unit.
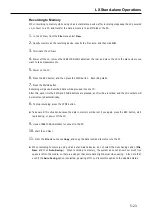
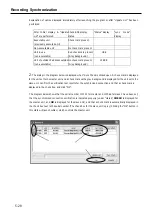
Open the main display for other slave units connected in the same manner. While maximizing or minimizing the
main display screen of the master unit and each slave unit, set each recording condition of the LX main unit.
5
.
If all LX main unit settings of synchronized recording end, close the main screen of all slave units, except for
the main screens of the master unit and slave units that require monitoring while recording.
Recording can be started and finished by operating the main window of the master unit.
6.
Close LxNavi in the opposite order to which it was started (slave n...., slave 1, master).
Summary of Contents for LX Series
Page 2: ......
Page 10: ...Contents viii...
Page 26: ...Sampling Frequency and Number of Channels 1 16...
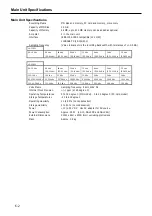
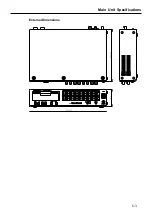
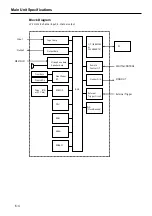
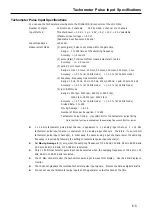
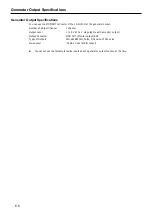
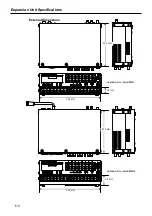
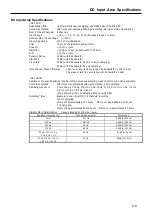
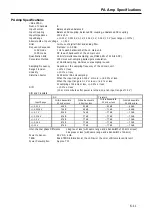
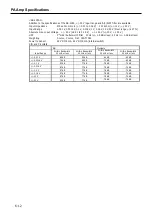
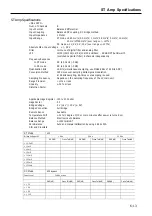
Page 117: ...Main Unit Specifications 6 3 External Dimensions...
Page 142: ...Recording Synchronization Specifications 6 28...
Page 146: ...Note 7 4 Note...
Page 147: ......