


LX Stand-alone Operations
5-22
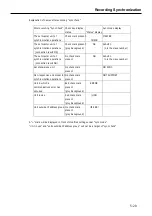
Recording to Media
1.
Insert the media in the LX.
2.
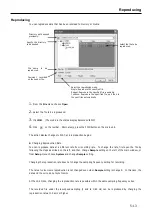
In the LX Navi, from the
File
menu choose
New
.
3.
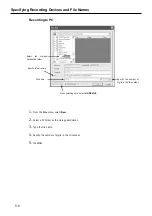
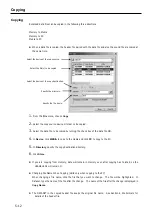
Select the MO/PC CARD as the recording device, specify the directory and file name, and then click OK.
4.
Eject the media, and terminate the LX Navi.
5.
Power off the LX, remove the IEEE 1394/LAN cable from the rear, and move the LX to the place where
you want to take measurements.
6.
Power on the LX and insert the same media.
7.
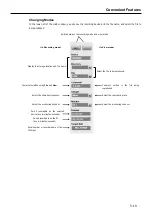
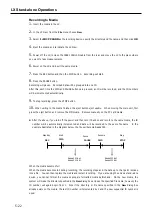
Press the REC button and then the FWD button. Recording will start.
8.
Press the PAUSE button.
Recording will pause. Recorded data will be grouped into one ID.
After this, each time the FWD and PAUSE buttons are pressed, an ID will be recorded, and the ID numbers
will be incremented automatically.
9.
To stop recording, press the STOP button.
10.
When writing to the media finishes, the eject button eject usable. When moving the main unit, first
press the eject button and remove the MO media. Remove manually on the PC card media.
z
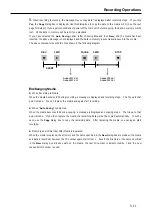
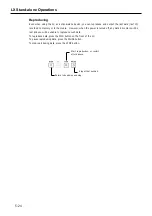
After the above, if you turn off the power and then turn it back on and record to the same media, the ID
number will be automatically incremented and data will be recorded to the same file name. In the
example illustrated in the diagram below, the file will become Aaaaa003.
When the media becomes full
When the media becomes full during recording, the recording stops and the data up to that point is made
into a file. You can then replace the media and restart recording. If you are using the LX as a stand-alone
device, you cannot format the media so prepare formatted media beforehand. On the new media, the
system will make the directory specified in the
New
dialog box and use the specified file name; however, the
ID number will again begin from 1. Also if the directory or file name specified in the
New
dialog box
already exists on the media, the last ID number is incremented by 1 and the new sequential ID number is
used.
REC
FWD
PAUSE FWD
STOP
Aaaaa001.dat
Aaaaa001.hdr
Aaaaa002.dat
Aaaaa002.hdr
Standby Start
Resume
Pause
Stop
Summary of Contents for LX Series
Page 2: ......
Page 10: ...Contents viii...
Page 26: ...Sampling Frequency and Number of Channels 1 16...
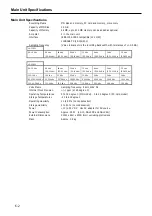
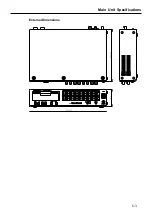
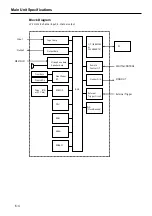
Page 117: ...Main Unit Specifications 6 3 External Dimensions...
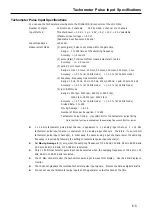
Page 142: ...Recording Synchronization Specifications 6 28...
Page 146: ...Note 7 4 Note...
Page 147: ......