background image

2

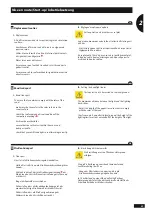
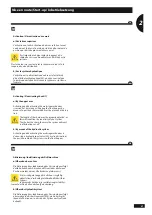
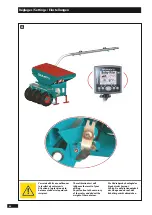
L’essai de débit va conditionner 

le résultat de votre semis

Attention à la précision de la 

balance et déduire le poids du 

récipient.

The calibration test will 

influence the result of your 

drilling.

Pay attention to the accuracy 

of the scales and deduct the 

weight of the container.

Die Abdrehprobe bedingt das 

Ergebnis der Aussaat.

Achten Sie auf die Genauigkeit 

der Waage und darauf, das 

Behältergewicht abzuziehen.

A

52

Réglages /Settings / Einstellungen

Summary of Contents for Xeos TF

Page 1: ...www sulky burel com E Mail info sulky burel com Adresse postale SULKY BUREL CS 20005 35538 NOYAL SUR VILAINE CEDEX France Xeos TF Semoir à grains Notice originale Original Instructions Originalbetriebsanleitung 17 05 2018 A LIRE ATTENTIVEMENT AVANT D UTILISER LA MACHINE PLEASE READ CAREFULLY BEFORE USING THE MACHINE VOR INBETRIEBNAHME SORGFÄLTIG LESEN ...

Page 2: ......

Page 3: ...ch damit Sie ihren Xeos TF richtig benutzen und alle seine Möglichkeiten voll nutzen können Zögern Sie nicht uns Ihre eigenen Beobachtungen und Erfahrungen mitzuteilen die für die Verbesserung unserer Produkte immer nützlich sein können Wir wünschen Ihnen viel Erfolg mit Ihrem Xeos TF und verbleiben mit freundlichen Grüßen J BUREL Präsident Cher Client Vous avez choisi notre Xeos TF et nous vous r...

Page 4: ...abricant et adresse Manufacturer s name and address Name und Adresse des Herstellers Nom de la personne autorisée a constituer le dossier technique et adresse Name and address of the person authorised to compile the technical specifications Name und Adresse des für die Zusammenstellung der technischen Unterlagen Bevollmächtigten Description de la machine Machine Description Beschreibung der Maschi...

Page 5: ...de cisaillement peuvent exister sur les organes commandés à distance notamment ceux asservis hydrauliquement 25 Avant de descendre du tracteur ou préalablement à toute intervention sur la machine couper le moteur retirer la clé de contact et attendre l arrêt complet de toutes les pièces en mouvement 26 Ne pas stationner entre le tracteur et la machine sans avoir préalablement serré le frein de par...

Page 6: ... faut impérativement que la prise de force soit débrayée que le moteur soit coupé et la clé de contact retirée 2 Contrôler régulièrement le serrage des vis et des écrous Resserrer si nécessaire 3 Avant de procéder à des travaux d entretien sur une machine en position relevée étayer celle ci à l aide d un moyen approprié 4 Lors du remplacement d une pièce travaillante pale pour les distributeurs ou...

Page 7: ...hine when it is loaded PROPER USE OF THE MACHINE 1 The machine must only be used for tasks for which it has been designed The manufacturer will not be liable for any damage caused by using the machine for applications other than those specified by the manufacturer 2 Using the machine for purposes other than those originally intended will be done so entirely at the user s risk 3 Proper use of the m...

Page 8: ...ropriate tools 5 To protect the environment it is forbidden to throw away oil grease or filters of any kind Give them to specialist recycling firms 6 Before operating on the electric circuit disconnect the power source 7 Protective devices likely to be exposed to wear and tear should be checked regularly Replace them immediately if they are damaged 8 Spare parts should comply with the standards an...

Page 9: ...angezogen und oder Keile unter die Räder gelegt zu haben 27 Vor jedem Eingriff an der Maschine kontrollieren ob diese nicht ungewollt in Betrieb gesetzt werden kann 28 Die Aufhängöse nicht zum Heben der gefüllten Maschine benutzen BESTIMMUNGSGEMÄSSE VERWENDUNG DER MASCHINE 1 Die Maschine darf nur für die Arbeiten eingesetzt werden für die sie geplant ist Bei Beschädigung der Maschine infolge einer...

Page 10: ...treuern oder Schare bei Drillmaschinen Schutzhand schuhe tragen und nur geeignete Werkzeuge benutzen 5 Zum Schutz der Umwelt ist es verboten Öl Fett und Filter jeder Art wegzuwerfen oder auszugießen Sie sind von darauf spezialisierten Unternehmen zu entsorgen 6 Vor Eingriff an der elektrischen Leitung die Stromzufuhr unterbrechen 7 Verschleiß ausgesetzte Schutzvorrichtungen müssen regelmäßig kontr...

Page 11: ... RÉGLAGES Pages A Réglage du débit 48 53 B Traceurs 54 55 C Réglage de terrage des rampes repliables 56 57 D Réglage de terrage des rampes rigides 58 59 E Réglage de la herse de recouvrement 60 61 F Jalonnage 62 65 G Utilisation de la trémie frontale avec de l engrais 66 69 ENTRETIEN Pages A Vérification 70 71 B Démontage Remontage du doseur 72 73 C Nettoyage 74 75 D Graissage 74 75 E Positions Au...

Page 12: ...the hopper 46 47 SETTINGS Pages A Setting the flow 48 53 B Markers 54 55 C Folding bar depth setting 56 57 D Rigid bar depth setting 58 59 E Adjusting the covering harrow 60 61 F Tramlining 62 65 G Using the front hopper with fertilizer 66 69 MAINTENANCE Pages A Verification 70 71 B Removing reinstalling the doser 72 73 C Cleaning 74 75 D Lubrication 74 75 E Sticker positions 76 77 F Storage 76 77...

Page 13: ...Saatmenge 48 53 B Spurreißer 54 55 C Einstellung der Ablagetiefe bei klappbarem Saatgestänge 56 57 D Einstellung der Ablagetiefe bei festem Saatgestänge 58 59 E Einstellung des Saatstriegels 60 61 F Fahrgassenmarkierung 62 65 G Verwendung des Fronttanks mit Dünger 66 69 WARTUNG Seite A Kontrolle 70 71 B Ausbau und Wiedereinbau des Dosierorgans 72 73 C Reinigung 74 75 D Schmierung 74 75 E Sicherhei...

Page 14: ...he machine up when turning in the field It is not advisable to turn too tightly when drilling Sulky cannot be held liable in any way in the event of an accident arising due to the use of the machine that does not comply with the instructions Beim Aussäen muss die Maschine beim Wenden im Feld unbedingt angehoben werden Es ist nicht zu empfehlen beim Säen zu enge Kurven zu fahren Die Haftung von Sul...

Page 15: ...el firmly consolidated ground where the harvest residues have been properly incorporated beforehand The presence of stones rocks stumps or other obstacles must be taken into account The drill must be driven appropriately The operating speed for drilling must not exceed 12 km h However it s compulsory to adapt the speed according to the soil cultivation tool in this case check in the user book and ...

Page 16: ...ot lift the seed drill unless the seed box is empty Make sure that there is no one around the machine during handling operations Do not use the handling rings of the coulter bars when they are coupled to the cultivator Drillmaschine nur bei leerem Tank anheben Sicherstellen dass sich keine Fremdkörper im Tank befinden Die Handhabungsringe des Saatgestänges nicht benutzen wenn sie am Bodenbearbei t...

Page 17: ...n the event of any complaint please contact your dealer B Handling the seed box Only the welded rings provided should be used to handle the Xeos tf seed drill C Handling the rigid coulter bar To manipulate the coulter bar use only the rings provided for this purpose Check that the coulter bar is not connected to any other element cables pipes D Handling the folding coulter bar To manipulate the co...

Page 18: ... 1 5 E 18 Mise en route Start up Inbetriebsetzung ...

Page 19: ...d power harrow It should not have any contact between the drill and the soil Be sure that all the pipe have a constant way down If necessary cut the pipe F Side pipe Make sure that there is a slope of at least 1 5 towards the rear The side pipe must be fastened by your dealer The pipe has to be supported at least by its two ends G Couling the hopper You are advised to use the lowest lower anchor p...

Page 20: ...pulation Correct seed drill harrow posi tioning depends on mounting the triangle correctly Make sure that there is no one around the machine during handling operations Die gute Positionierung der Drillmaschine Egge hängt von der richtigen Montage des Dreiecks ab Sich vergewissern daß sich dabei niemand im Maschinen bereich aufhält H 20 Mise en route Start up Inbetriebsetzung ...

Page 21: ...the operating manual This operation should be carried out on perfectly level ground and the seed drill must be stable Check that the area is clear and no one is standing next to the machine I Disconnect the side pipe and remove it from its central support II Remove all of the hydraulic and electric connectors III Fit the parts and IV Move the tie rod from position 1 to position 2 H Attelage détela...

Page 22: ...la manipulation Check that the Xeos is perfectly stable on its parking supports Carry out the operations in the correct order Make sure that there is no one around the machine during handling operations Prüfen ob der Xeos fest auf seinen Stützen liegt Rei henfolge der Arbeitsgänge einhalten Sich vergewissern daß sich dabei niemand im Maschinen bereich aufhält H 22 Mise en route Start up Inbetriebs...

Page 23: ... bar on either side of the drill and do not forget the central support Find the neutral point on the mobile tie rods placed on the supports VIII Remove the cylinders option or upper tie rods IX Unlock the closing clamps on the Packer roller The tie rod must be 640mm long H V Déverrouiller les crochets VI A l aide du tirant lever la tête afin de la dégager de son support VII Placer les béquilles de...

Page 24: ...ply Make sure that the hydraulic push pull connector is kept clean Wir empfehlen eine Direkt versorgung ab Batterie zur Vermeidung von Mikroabschal tungen Push Pull Hydraulikstecker sauber halten Montage sans sélecteur Assembly without selector Montage ohne Wählschalter Montage avec sélecteur Assembly with selector Montage mit Wählschalter De série Option En repliable uniquement I Standard Optiona...

Page 25: ...d to operate it with hydraulics Coulter bar Folding the rear unit case with a folding coulter bar requires a single acting spool valve Manipulating markers requires a double acting spool valve Using hydraulic depth modulation requires a double acting spool valve Hydraulic lift for the coulter bar is available only with the hydraulic selector optional The hydraulic selector operates with a double a...

Page 26: ...les prises hydrauliques Push Pull We recommend that the unit is connected directly to the battery to ensure a constant power supply Make sure that the hydraulic push pull connector is kept clean Wir empfehlen eine Direkt versorgung ab Batterie zur Vermeidung von Mikroabschal tungen Push Pull Hydraulikstecker sauber halten AVEC SÉLECTEUR DE FONCTION WITH FUNCTION SELECTOR MIT FUNKTIONSWAHLSCHALTER ...

Page 27: ...Funktionswahlschalter 2 Direkt Spurreißer I TF hydraulic assembly 1 With function selector 2 Direct marker I Montage hydraulique TF 1 Avec sélecteur de fonction 2 Direct traceur I 27 FR EN DE 2 Mise en route Start up Inbetriebsetzung ...

Page 28: ... batterie pour éviter toute microcoupure We recommend that the unit is connected directly to the battery to ensure a constant power supply Wir empfehlen eine Direkt versorgung ab Batterie zur Vermeidung von Mikroabschal tungen J 28 Mise en route Start up Inbetriebsetzung ...

Page 29: ...chine Lighting power Pilot unit controls and the electrics hydraulics function optional Note When your unit is equipped with electro hydraulic functions hydraulic selector as optional you are required to use the cable when you only want to use the rotary harrow J Branchement Electrique Le faisceau électrique de votre combiné de semis avec trémie frontale intègre toutes les fonctions électriques de...

Page 30: ...ow this can cause blockages in the pipes If the fan speed is too fast the grain will be thrown out of the furrow and it will not be pos sible to judge whether or not the depth setting is correct Carry out adjustments to the fan flap with the tractor stopped Caution oil may be under pressure Vor Beginn der Feldarbeiten ist eine Bestätigung der Tur binendrehzahl unerlässlich Eine ungeeignete Tur bin...

Page 31: ...to be made on the tractor when using the fan s hydraulic drive system Please consult your dealer Free return is essential The return pressure must be lower than 10 bar in order for the hydraulic motor to function correctly Check the cleanliness of the fan s suction screen regularly in order to ensure that the pneumatic system functions correctly Always clean the hydraulic fittings correctly When s...

Page 32: ... a1 M M La charge sur l essieu avant du tracteur doit être égale au moins à 20 du poids à vide du tracteur The weight on the tractor s front axle should be at least 20 of the unladen weight of the tractor Die vordere Achslast des Schleppers muss mindestes 20 des Schleppereigengewichts betragen Trémie 1000l Tasse AV Trémie 1000l seule Trémie 1800l Tasse AV Trémie 1800l seule L 32 Mise en route Star...

Page 33: ...st avant ou mesurer b m Empattement du tracteur Consulter la notice d utilisation ou la carte grise du tracteur ou mesurer c m Distance entre l axe attelage inférieur et le centre de l essieu arrière d m Distance entre l axe attelage inférieur et le centre de gravité de la machine Consulter les caractéristiques techniques de la machine Voir chapitre Caractéristiques d2 m Distance du centre de grav...

Page 34: ...charge sur l essieu avant du tracteur doit être égale au moins à 20 du poids à vide du tracteur The weight on the tractor s front axle should be at least 20 of the unladen weight of the tractor Die vordere Achslast des Schleppers muss mindestes 20 des Schleppereigengewichts betragen 1000 l hopper with Front packer 1000 l hopper alone 1800 l hopper with Front packer 1800 l hopper alone L 34 Mise en...

Page 35: ...tor and the front ballast or measure b m Wheelbase of tractor Consult the instruction manual or the tractor s registration documents or measure c m Distance between the lower linkage pins and the centre of the rear axle d m Distance between the lower linkage pins and the centre of gravity of the machine Consult the technical characteristics of the machine see section Characteristics d2 m Distance ...

Page 36: ... sur l essieu avant du tracteur doit être égale au moins à 20 du poids à vide du tracteur The weight on the tractor s front axle should be at least 20 of the unladen weight of the tractor Die vordere Achslast des Schleppers muss mindestes 20 des Schleppereigengewichts betragen Saatguttank 1000 l Frontpacker Saatguttank 1000 l alleine Saatguttank 1800 l Frontpacker Saatguttank 1800 l alleine L 36 M...

Page 37: ...m Radabstand Schlepper Siehe Handbuch oder Fahrzeugschein des Schleppers oder messen c m Abstand zwischen unterer Ankupplungsachse und dem Achsmittelpunkt hinten d m Abstand zwischen unterer Ankupplungsachse und dem Schwerpunkt der Maschine Technische Daten der Maschine einsehen siehe Kapitel Technische Daten d2 m Abstand vom Kreiseleggen Schwerpunkts d3 m Abstand vom Schwerpunkt der Drillmaschine...

Page 38: ...oute en vigueur Make sure there is no one around the seed drill before starting Strictly observe all driving code regulations Vergewissern Sie sich vor jedem Manöver dass sich niemend im näheren Umfeld der Drill maschine befindet Die Vorschriften der geltenden Straßenverkehrs ordnung sind zu beachten M 38 Mise en route Start up Inbetriebsetzung ...

Page 39: ...ultivator is within the max road transport width check that your drill s road lights are all working correctly II Setting the headlight lenses This operation is to be carried out on level ground The maximum distance between the light and the lighting limit is 30m Adjust the length of the upper tie rod in order to comply with the rules of the road 15m from a wall on perfectly level ground the heigh...

Page 40: ...M 40 Mise en route Start up Inbetriebsetzung ...

Page 41: ...ength of the chain must be properly adjusted as this will condition the sensitivity of your system The shorter the chain the more the system will react to distribution cut off b By means of the hydraulic system Activating and deactivating the metering mechanism is done using a hydraulic spool valve SA a cylinder indicates the position in which the system is on the front hopper M Activation Désacti...

Page 42: ...eur Make sure there is no one around the seed drill before starting Strictly observe all driving code regulations Vergewissern Sie sich vor jedem Manöver dass sich niemend im näheren Umfeld der Drill maschine befindet Die Vorschriften der geltenden Straßenverkehrs ordnung sind zu beachten N 42 Mise en route Start up Inbetriebsetzung ...

Page 43: ...er provides greater freedom of manoeuvrability and considerable time savings Nevertheless we recommend the following procedure Fold the marker back up Reduce the engine speed Deactivate the metering mechanism or raise the hopper Raise the machine it may be necessary to disengage the PTO depending on the configuration of the tractor Turn around Lower the machine gradually return the PTO to the corr...

Page 44: ...elle en dehors du chargement The steps must be raised when working and during transport Do not stand on the platform unless loading Die Treppe muß bei Arbeit und Transport hochgeklappt sein Aufenthalt auf dem Ladesteg außer beim Beladen verboten P 44 Mise en route Start up Inbetriebsetzung ...

Page 45: ...platform Only load the seed drill when the hopper is resting on the ground Loading the drill or climbing onto the deck during operation is strictly forbidden P Passerelle de chargement Charger le semoir uniquement lorsque la trémie est posée à terre Il est interdit de charger ou de monter sur la passerelle lorsque l ensemble est en mouvement 45 FR EN DE 2 Mise en route Start up Inbetriebsetzung ...

Page 46: ...agitator shaft Check that there are no foreign bodies in the seed box It is recommended not to leave grain inside the seed box to avoid possible damage by rodents Climbing onto the machine during operation is strictly forbidden Auf die Drehung der Rührwelle achten Kontrollieren ob sich kein Fremdkörper im Kasten befin det Zum Vermeiden von even tuellen Beschädigungen durch Nagetiere keine Körner i...

Page 47: ...for small seed and in the higher position for large grains Close the cover after filling and fasten it on both sides to prevent water getting inside Note in order to prevent damage caused by rodents make sure that you do not leave any seed inside the hopper Q Remplissage de la trémie Ouvrir le couvercle de trémie Vérifier qu aucun corps étranger ne se trouve dans la trémie Un capteur de niveau rég...

Page 48: ...vec le pignon noir Do not try to force the red cog into the black cog in order to engage it Turn the red cog by hand to match it up with the black cog s teeth Nicht gewaltsam versuchen das rote Ritzel in das schwarze zu stecken Rotes Ritzel mit der Hand drehen bis dessen Zähne mit dem schwarzen Ritzel übereins timmen A 48 Réglages Settings Einstellungen ...

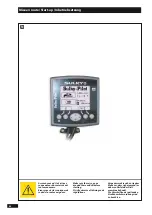
Page 49: ...ee chapter for setting values 1 Airflow Adjust the fan speed to 4400 rpm and position the choke according to the type of seed used as indicated in the table opposite Please note that all of these operations should only be carried out when the seed drill is stopped A Réglage du débit Veuillez vous référer à la notice de la console pilot Réglage de la distribution voir chapitre pour les valeurs de r...

Page 50: ...1 2 4 3 5 Bien suivre les indications de réglage Follow the setting recommen dations carefully Einstellhinweise sorgfältig befolgen A 50 Réglages Settings Einstellungen ...

Page 51: ...the housing located to the left of the metering mechanism normal or micro speed Unscrew the knob to open the cover Engage the red cog in the black cog on the left hand side to work at Normal speed a Slide out the red cog towards the metering wheel right hand side to switch to Micro speed b Ensure that the cog is correctly seated in its detent A 2 Sélection de la vitesse de rotation du doseur En fo...

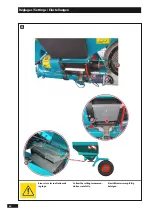
Page 52: ...récipient The calibration test will influence the result of your drilling Pay attention to the accuracy of the scales and deduct the weight of the container Die Abdrehprobe bedingt das Ergebnis der Aussaat Achten Sie auf die Genauigkeit der Waage und darauf das Behältergewicht abzuziehen A 52 Réglages Settings Einstellungen ...

Page 53: ...ose the emptying shutter Pour the seed into the hopper Open the isolation shutter of the metering mechanism in seeding position Switch the red lever to calibration test position Then lock it in place using the indexer Place the calibration test sack under the metering mechanism to collect the seed during the test Ensure that the sack is positioned correctly so that no seed is lost during the test ...

Page 54: ...r sous les traceurs Secure the markers for trans port Release oil pressure before unhitching the drill No stopping below the mar kers Spurreißer beim Transport blockieren Öldruck vor Abkuppeln der Drillmaschine zurücknehmen Nicht unterhalb der Spurreißer stehen bleiben B 54 Réglages Settings Einstellungen ...

Page 55: ...e Anleitung einsehen B Markers The markers are installed on the SULKY power harrow Please refer to the corresponding instructions B Traceurs Les traceurs sont installés sur la herse rotative SULKY Veuillez consulter la notice correspondante 55 FR EN DE 3 Réglages Settings Einstellungen ...

Page 56: ...hauteur de réglage du semoir par rapport au sol Make sure that the drill setting height in relation to the ground is correct Einstellhöhe der Drill maschine in Bezug auf den Boden ein halten C 56 Réglages Settings Einstellungen ...

Page 57: ... via one or two handles per folding section Use the mark to obtain the same position on the left and on the right b Soc Unidisc LS 2 30 The Unidisc has been designed to work on trashy or min till ground Centralised handle adjustment cf Suffolk coulter C Réglage de terrage des rampes repliables a Soc trainant LS 3 20 Réglage centralisé par une ou deux manivelles par section de repliage Utiliser le ...

Page 58: ...1 1 IIII IIII III III II II I I D 58 Réglages Settings Einstellungen ...

Page 59: ... grains from the furrow In this case the depth is controlled by the parallelogram linkage and the furrow is closed by the rear harrow b Setting the drilling depth If the depth is not set by means of the following wheels see previous point Adjust the tie rods to increase or reduce the drilling depth Use the scale I located on the side of the connecting rod to ensure equal left and right adjustment ...

Page 60: ...2 1 1 2 4 3 E 60 Réglages Settings Einstellungen ...

Page 61: ... the pins on the clevises The pressure is adjusted by compressing or decompressing the spring This adjustment is made with the help of the depth crank placed on the peg wheel Note For greater simplicity and ease adjustments should always be carried out with the seed drill resting on the ground If you are experiencing difficulties with adjustments with the levelling harrow raise the harrow with one...

Page 62: ...age For the tramline system to function well make sure that the electrical connections are correctly made Maintain the pressure on the hydraulic valve lever for a few seconds before and after tramlining Zur guten Funktion der Fahr gassenschaltung muß der elek trische Anschluß korrekt sein Schalthebel des Hydraulik steuerventils vor und nach Markierungsfahrt einige Sekunden lang drücken F 62 Réglag...

Page 63: ... treatments with equipment whose widths are in multiples of the working width of the drill Operation Post emergence tramlining Remote shut off of the distribution head elements corresponding to the tracks of the spreader or crop sprayer Place the connection clips on the rows in question Close again Access to the head is via the rear of the machine this operation must be carried out by trained pers...

Page 64: ...nt des jalonneurs de pré levée Keep clear of the working area of the preemergence tramli ning system Aufenhalt im Arbeitsbereich der Vorauflauf Markierer untersagt Position transport Transport position Transportstellung F 64 Réglages Settings Einstellungen ...

Page 65: ...an be adjusted by altering disc penetration in the soil You are advised to set the disc to operate along the edge of the last drilled row so as to throw the earth on the rows that have been disengaged Adjusting the track The tramline track can be adjusted between 1 6 m and 2 25 m This is done by a Sliding the disc shaft through the arm b By inverting the left and right shafts to change the offset ...

Page 66: ...1 1 2 G 66 Réglages Settings Einstellungen ...

Page 67: ...environmental standardsinforce Ingeneralfertiliserinbigbagshasbettertechnical characteristicsthanfertiliserstoredinbulk Avoidstoringbig bagsoutside Thecharacteristicsofagoodfertiliserare Hard dry notfriable Storedintheshadeinawell ventilatedarea Productmanufacturedrecently Technicalverifications Inspectingthedeliverychuteandthemeteringdeviceevery hourisrecommendedtoensuretheyareworkingproperly A v...

Page 68: ...1 1 2 G 68 Réglages Settings Einstellungen ...

Page 69: ...hemeteringmechanismandto emptyitinordertopreventanybulkloadingofthe productduringthenight Startingworkonsiteagain Everymorningwhenworkonthesiterestartsitisessentialto drythepneumaticcircuit Operate the fan at its nominal speed without product This must be done for a minimum of 10 minutes After 10 minutes check the following parts Metering device Injector Pneumatic transport circuit Delivery chute ...

Page 70: ...1 A 70 Entretien Maintenance Wartung ...

Page 71: ...ng mechanism to work correctly Check its condition passing your hand under the emptying shutter before each drilling season Replace it if necessary Make sure on a daily basis that the seeds flow correctly into the pneumatic system up to the coulter unit Check regularly The cleanliness as well as the correct functioning of the distribution head The condition and the cleanliness of the pneumatic tra...

Page 72: ...B 72 Entretien Maintenance Wartung ...

Page 73: ...th sprocket Open the groove to maximum Put the 15 tooth sprocket red in large seed position on the left Remove the bearing pin Lower the plate using the ring at the bottom This movement must enable the main body s plate to be freed in the upper part Remove all the parts Inspection Once your doser has been removed clean the bearing dry You must never use water The bearing must turn freely and witho...

Page 74: ...ute pres sion sur les transmissions et les composants électroniques Avoid excessive use of high pressure cleaners on transmission and electronic components Hochdruckreiniger nicht übermäßig für Getriebe und Elektronikteile benutzen C 74 Entretien Maintenance Wartung ...

Page 75: ...f the head is clean every day D Lubrication Lubricate the machine regularly at the start and end of each campaign and after cleaning Grease The markers grease fittings every 50 hours The depth crank shaft bearing every 50 hrs Front packer every 50 hours Your Xeos TF drill s metering device is primarily made of plastic This being the case it does not need to be lubricated Lubricating the metering d...

Page 76: ...E 76 Entretien Maintenance Wartung ...

Page 77: ...r should be completely empty The seed drill should have been properly washed whilst avoiding spilling water on the electric elements the bearings and the roller bearings Grease the parts that need it Protecting your seed drill with an oil diesel mix is prohibited The drill consists of a number of plastic elements that are totally incompatible with such practices Unhitch your seed drill in a dry le...

Page 78: ... éviter les dégâts causés par les rongeurs It is essential to empty the hopper after sowing to avoid any damage caused by rodents Der Tank muss unbedingt nach der Arbeit geleert werden um Beschädigung durch Nagetiere zu vermeiden G 78 Entretien Maintenance Wartung ...

Page 79: ...without forgetting to empty the metering mechanism flutes by turning the wheel Never leave seed in the hopper over a long period of time Leave the shutters open when the machine is in storage If the screen is not in place when emptying the hopper it is important to disconnect all of the electrical power supply cables G Vidange de la trémie La vidange de la trémie se fait en ouvrant la trappe de vi...

Page 80: ...ières à adapter au sol et au semis Every accessory relates to special conditions which need to be adapted to the soil and the seed Jede Ausrüstung entspricht besonderen Bedingungen und ist dem Boden und der Saat anzupassen A 80 Equipements Accessories Ausrüstungen ...

Page 81: ...ound and tighten Adjustment To determine the limiter setting a block whose height corresponds to the required sowing depth may be used In difficult soil conditions however you are advised to add on a few centimetres With this equipment it is also recommended to increase the depth control pressure on the coulter units A Limiteur de profondeur contrôle de la profondeur en sol souple Montage du limit...

Page 82: ...B 82 Equipements Accessories Ausrüstungen ...

Page 83: ...r ist in das Pilot Gerät integriert B Areameter The hectare counter is integrated within the Pilot console B Compteur d hectares Le compteur d hectare est intégré à la console Pilot 83 FR EN DE 5 Equipements Accessories Ausrüstungen ...

Page 84: ...2 1 2 C 84 Equipements Accessories Ausrüstungen ...

Page 85: ...osition is the same between the forward row and the rear row In less favourable circumstances e g when the combined harrow and seed drill are out of line the position of the forward row and the rear row may not match Check the performance of the depth setting after a few dozen metres or so NB Check the torque of all the screws after the first few times the wheel has been used C Roues de réappui 40...

Page 86: ...D 86 Equipements Accessories Ausrüstungen ...

Page 87: ...sing the hydraulic selector optional The hydraulic selector is installed on your HRW Cultiline This being the case please refer to the HRW instruction manual D Utilisation du sélecteur hydraulique option Le sélecteur hydraulique est installé sur votre HRW cultiline A ce titre veuillez consulter la notice HRW 87 FR EN DE 5 Equipements Accessories Ausrüstungen ...

Page 88: ...E 88 Equipements Accessories Ausrüstungen ...

Page 89: ...ore applying pressure from the tractor Use the front lift in floating position The front packer must be lubricated on a regular basis see the section on lubrication A steering lock is available You are strongly advised not to use it when working it may be used for road transport The front packer should never be in contact with the road surface when travelling by road E Utilisation du tasse avant L...

Page 90: ...F 90 Equipements Accessories Ausrüstungen ...

Page 91: ...en des Fachhändlers F Green drilling kit optional A distribution head kit is available Its installation is the responsibility of the dealer F Kit de semis vert option Un kit tête de distribution est disponible Son installation est à la charge du revendeur 91 FR EN DE 5 Equipements Accessories Ausrüstungen ...

Page 92: ...A 92 Caractéristiques techniques Technical specifications Technische Daten ...

Page 93: ...ease note the following information when you take delivery of your machine Machine number Machine type Accessories A Identification Lors de la prise en charge de votre machine notez les informations suivantes Numéro de la machine Type de machine Accessoires 93 FR EN DE 6 Caractéristiques techniques Technical specifications Technische Daten ...
Page 94: ... 28 32 Ecartements cm 15 12 5 14 6 12 5 14 3 12 5 Largeur au transport 3 00m 3 50m 4 00m Masse Kg 616 664 673 725 762 810 Distance d3 centre de gravité du semoir en mm 1574 1295 1586 1092 1358 1278 Ligne de semis repliable Unisoc 4 00m 4 50m 5 00m 6 00m Nb de rangs 28 32 32 36 32 40 40 Ecartements cm 14 3 12 5 14 12 5 15 6 12 5 15 Largeur au transport 3 00m Masse Kg 689 714 728 758 741 795 822 Dis...

Page 95: ... centre de gravité du semoir en mm 1685 1685 1685 Ligne de semis repliable Cultidisc 4 00m 4 50m 5 00m 6 00m Nb de rangs 28 30 32 40 Ecartements cm 14 3 15 15 6 15 Largeur au transport 3 00m Masse Kg 1450 1550 1600 1850 Distance d3 centre de gravité du semoir en mm 2150 2080 2020 1950 Trémie Trémie 1000l seule Trémie 1800l seule Trémie 1000l Tasse AV Trémie 1800l Tasse AV Trémie 1000L Porte masse ...

Page 96: ...4 28 28 32 Spacing cm 15 12 5 14 6 12 5 14 3 12 5 Transport width 3 00m 3 50m 4 00m Weight kg 616 664 673 725 762 810 Distance d3 seed drill centre of gravity in mm 1574 1295 1586 1092 1358 1278 Unisoc folding drilling toolbar 4 00m 4 50m 5 00m 6 00m No of rows 28 32 32 36 32 40 40 Spacing cm 14 3 12 5 14 12 5 15 6 12 5 15 Transport width 3 00m Weight kg 689 714 728 758 741 795 822 Distance d3 see...

Page 97: ... centre of gravity in mm 1685 1685 1685 Cultidisc folding drilling toolbar 4 00m 4 50m 5 00m 6 00m No of rows 28 30 32 40 Spacing cm 14 3 15 15 6 15 Transport width 3 00m Weight kg 1450 1550 1600 1850 Distance d3 seed drill centre of gravity in mm 2150 2080 2020 1950 Hopper 1000 l hopper alone 1800 l hopper alone 1000 l hopper with Front packer 1800 l hopper with Front packer 1000 l hopper Weight ...

Page 98: ...zahl 20 24 24 28 28 32 Abstände cm 15 12 5 14 6 12 5 14 3 12 5 Transportbreite 3 00 m 3 50 m 4 00 m Gewicht kg 616 664 673 725 762 810 Entfernung d3 Drillmaschinen Schwerpunkt in mm 1574 1295 1586 1092 1358 1278 Klappbare Aussaatlinie Unisoc 4 00 m 4 50 m 5 00 m 6 00 m Reihenzahl 28 32 32 36 32 40 40 Abstände cm 14 3 12 5 14 12 5 15 6 12 5 15 Transportbreite 3 00 m Gewicht kg 689 714 728 758 741 7...

Page 99: ...n Schwerpunkt in mm 1685 1685 1685 Klappbare Aussaatlinie Cultidisc 4 00 m 4 50 m 5 00 m 6 00 m Reihenzahl 28 30 32 40 Abstände cm 14 3 15 15 6 15 Transportbreite 3 00 m Gewicht kg 1450 1550 1600 1850 Entfernung d3 Drillmaschinen Schwerpunkt in mm 2150 2080 2020 1950 Saatguttank Saatguttank 1000 l alleine Saatguttank 1800 l alleine Saatguttank 1000 l Frontpacker Saatguttank 1800 l Frontpacker Saat...

Reviews: