


Using Objet Studio
5–70
DOC08010 Rev. A (DRAFT 1)
Setting the
Printer
Connection
When
ȱ
an
ȱ
Objet
ȱ
3D
ȱ
printer
ȱ
is
ȱ
installed,
ȱ
the
ȱ
server
ȱ
computer
ȱ
is
ȱ
connected
ȱ
to
ȱ
that
ȱ
printer.
ȱ
Normally,
ȱ
there
ȱ
should
ȱ
be
ȱ
no
ȱ
reason
ȱ
to
ȱ
change
ȱ
this
ȱ
connection.
ȱ
Occasionally,
ȱ
however,
ȱ
you
ȱ
may
ȱ
need
ȱ
to
ȱ
reset
ȱ
the
ȱ
connection,
ȱ
to
ȱ
connect
ȱ
the
ȱ
server
ȱ
to
ȱ
another
ȱ
printer,
ȱ
or
ȱ
to
ȱ
use
ȱ
Objet
ȱ
Studio
ȱ
in
ȱ
off
Ȭ
line
ȱ
mode
ȱ
(without
ȱ
a
ȱ
printer
ȱ
connection).
To set (or change) the printer connection:
1. On
ȱ
the
ȱ
Job
ȱ
Manager
ȱ
ribbon,
ȱ
in
ȱ
the
ȱ
3D
ȱ
Printer
ȱ
group,
ȱ
click
ȱ
.
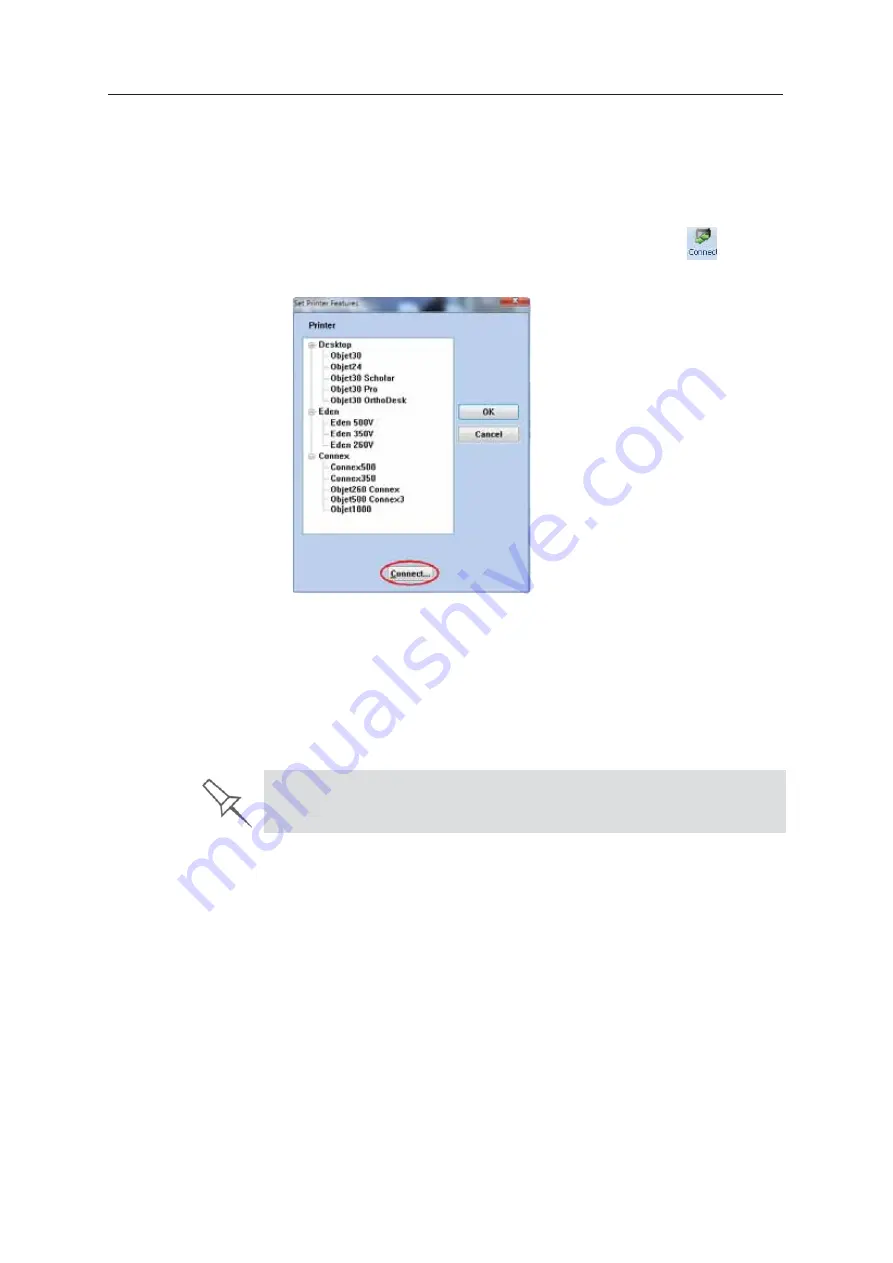
2. In
ȱ
the
ȱ
Set
ȱ
Printer
ȱ
dialog
ȱ
box,
ȱ
click
ȱ
Connect
.
Figure 5-102: Connecting to a printer (A)
3. Enter
ȱ
the
ȱ
computer
ȱ
name
ȱ
or
ȱ
its
ȱ
IP
ȱ
address,
ȱ
or
ȱ
click
ȱ
Browse
ȱ
to
ȱ
find
ȱ
and
ȱ
select
ȱ
it.
Figure 5-103: Connecting to a printer (B)
4. Click
ȱ
OK
.
When
ȱ
the
ȱ
connection
ȱ
is
ȱ
established,
ȱ
Objet
ȱ
Studio
ȱ
is
ȱ
configured
ȱ
to
ȱ
prepare
ȱ
ȱ
jobs
ȱ
for
ȱ
that
ȱ
printer.
If you can see the material levels in the Job Manager screen (see
figure 5-101 on page 68), Objet Studio is connected to the printer.


