Chapter 2. Unpacking and Installation
EK–SMCPP–UG. A01
2–13
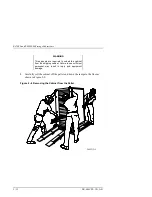
2.2.4 Moving the ESA10000 to It’s Designated Site
WARNING
Using extreme caution when rolling the cabinet
across the floor. Failure to raise all leveler feet
and to provide a clear path for the cabinet's
casters may result in the cabinet tipping over and
injury to personnel.
Once the cabinet rack space is configured as desired, the cabinet may be rolled to
its final installation position. Secure loose cabinet cables up and out of the way
when rolling the cabinet.
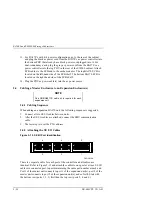
2.2.5 Joining Adjacent ESA10000s
NOTE
Skip to Section 2.2.7 “Leveling the Cabinet” if you
do not have to join adjacent ESA10000 cabinets.
A cabinet joiner kit comes secured within the ESA10000 packaging. Use the
joiner kit to join two ESA10000 cabinets. In the joiner kit are instructions to
position the cabinets, to remove the side panels, to install the necessary joiner kit
hardware, to use the supplied Allen wrench, and how to complete the procedure
by installing trim pieces onto the cabinets. The following text will also help you
to start and complete the joining procedure, as you are referring to the
instructions contained in the joiner kit.
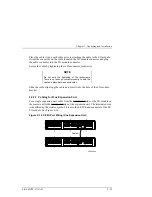
When joining two ESA10000’s, the recommended configuration is to have the
cabinet that resides on the left (viewed from the front) to have two BA370’s
installed with no controllers and for the cabinet that resides on the right to have
one BA370 in the bottom position with controllers installed in that BA370.


