


361
15. Troubleshooting
Understanding display messages
Messages appear on the control panel display to indicate the machine’s status
or errors. Refer to the tables below to understand the messages’ and their
meaning, and correct the problem, if necessary.
•
You can resolve the error with the guideline from the computer’s
Printing Status program window (see "Using Samsung Printer Status" on
page 279).
•
If a message is not in the table, reboot the power and try the printing job
again. If the problem persists, call a service representative.
•
When you call for service, provide the service representative with the
contents of display message.
•
Some messages may not appear on the display depending on the
options or models.
•
[error number] indicates the error number.
•
[tray type] indicates the tray number.
•
[color] indicates the color of toner.
9
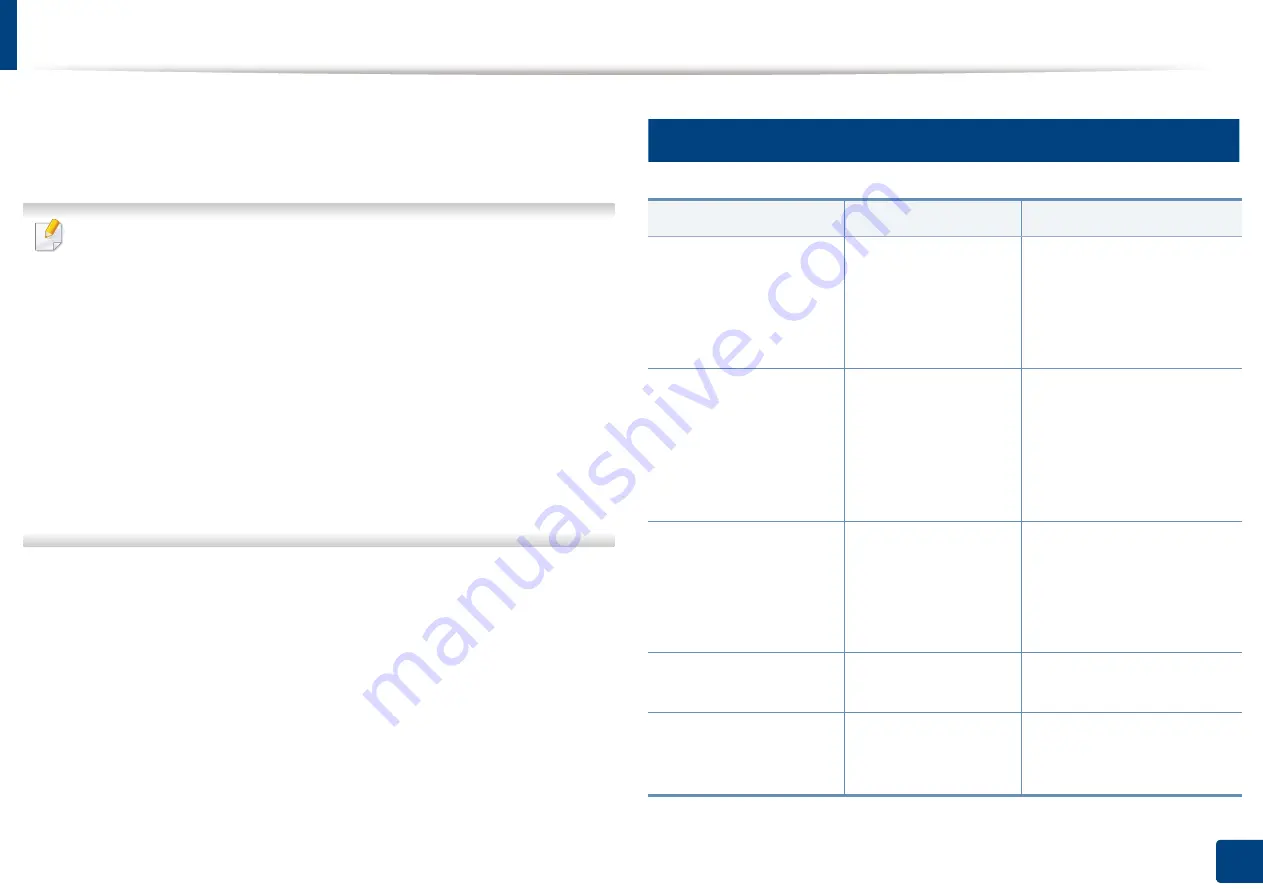
Paper Jam-related messages
Message
Meaning
Suggested solutions
•
Original paper jam
inside the scanner
•
Original paper jam in
the exit area of
scanner
The loaded original
document has
jammed in document
feeder.
Clear the jam (see "Clearing
original document jams" on
page 351).
•
Paper jam at the top
of duplex path
•
Paper jam at the
bottom of duplex
path
Paper has jammed
during duplex
printing. This is
applicable only to
machines with this
feature.
Clear the jam (see "Clearing
paper jams" on page 332).
•
Paper jam inside of
machine
•
Paper jam inside of
machine. Please
remove the paper
Paper has jammed
inside the machine.
Clear the jam (see "Inside the
machine" on page 340).
Paper jam in exit area
Paper has jammed in
the paper exit area.
Clear the jam (see "In the exit
area" on page 345).
Paper jam in MP tray
Paper has jammed in
the multi-purpose
tray.
Summary of Contents for Multifunction MultiXpress K325 Series
Page 295: ...Redistributing toner 295 14 Maintenance 4 X322x X328x series ...
Page 296: ...Redistributing toner 296 14 Maintenance 5 K325x K330x series ...
Page 298: ...Replacing the toner cartridge 298 14 Maintenance 6 X322x X328x series ...
Page 299: ...Replacing the toner cartridge 299 14 Maintenance 7 K325x K330x series ...
Page 301: ...Replacing the imaging unit 301 14 Maintenance 8 X322x X328x series ...
Page 302: ...Replacing the imaging unit 302 14 Maintenance 9 K325x K330x series ...
Page 303: ...Replacing the imaging unit 303 14 Maintenance ...
Page 305: ...Replacing the waste toner container 305 14 Maintenance 10 X322x X328x series ...
Page 306: ...Replacing the waste toner container 306 14 Maintenance 11 K325x K330x series ...
Page 312: ...Cleaning the machine 312 14 Maintenance X322x X328x series ...
Page 313: ...Cleaning the machine 313 14 Maintenance K325x K330x series ...
Page 315: ...Cleaning the machine 315 14 Maintenance X322x X328x series ...
Page 316: ...Cleaning the machine 316 14 Maintenance ...
Page 317: ...Cleaning the machine 317 14 Maintenance K325x K330x series ...
Page 318: ...Cleaning the machine 318 14 Maintenance ...
Page 320: ...Cleaning the machine 320 14 Maintenance K325x K330x series ...
Page 324: ...Cleaning the machine 324 14 Maintenance X322x X328x series ...
Page 325: ...Cleaning the machine 325 14 Maintenance ...
Page 326: ...Cleaning the machine 326 14 Maintenance K325x K330x series ...
Page 327: ...Cleaning the machine 327 14 Maintenance ...
Page 339: ...Clearing paper jams 339 15 Troubleshooting 3 In the multi purpose tray ...
Page 341: ...Clearing paper jams 341 15 Troubleshooting Jam feed 1 Jam feed 2 ...
Page 342: ...Clearing paper jams 342 15 Troubleshooting Jam feed 3 Jam feed 4 Optional device only ...
Page 357: ...Clearing paper jams 357 15 Troubleshooting 8 In the optional finisher area ...


