25
To
select the keypad sequence desired
, do the following:
1.
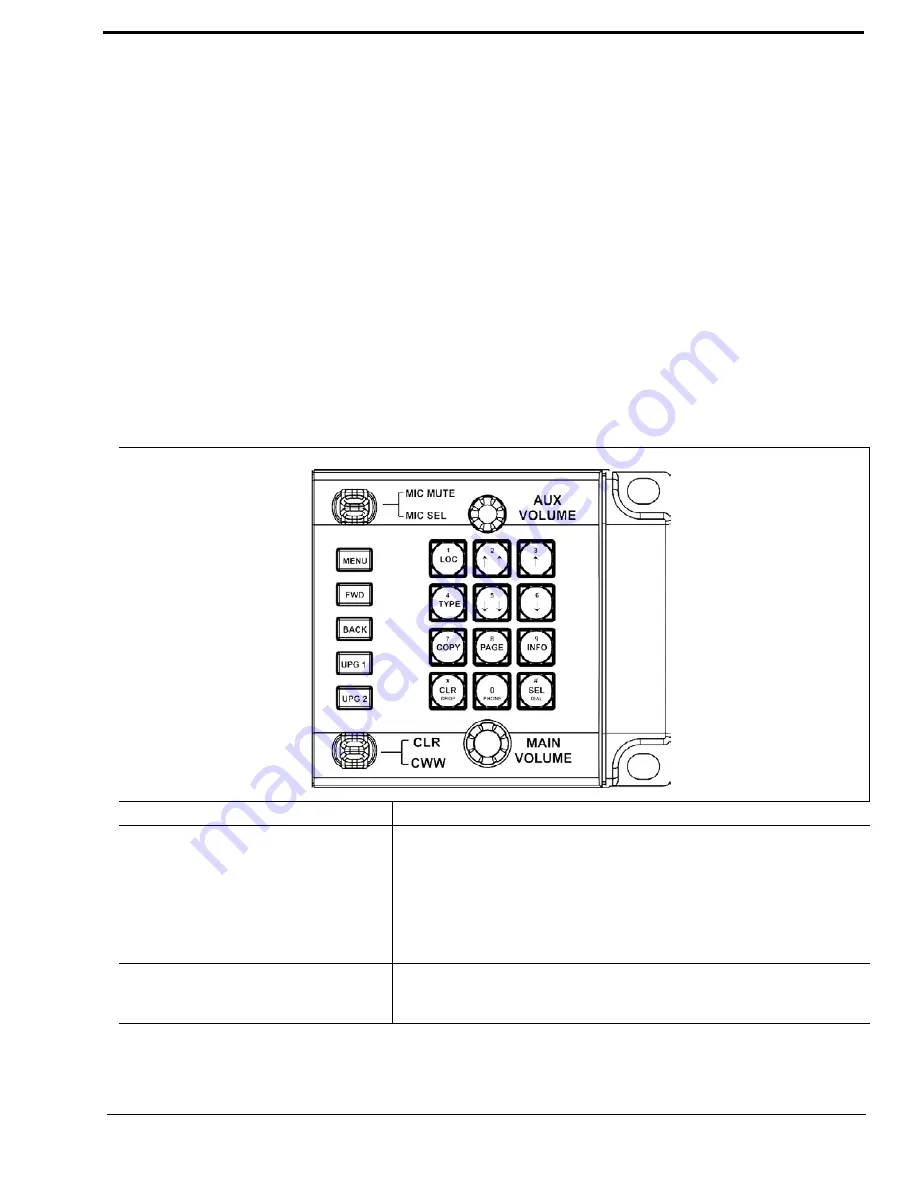
On the KP 32 CLD, press the
MENU
button.
The top-level menu appears.
2.
Using the (3)
↑
or (6)
↓
, scroll to
Service
.
3.
Press the
SEL
button.
The Service menu appears
.
4.
Using the (3)
↑
or (6)
↓
, scroll to
Keypad
.
5.
Press the
SEL
button.
Sequences and Backlight appear in the display window.
6.
Verify
Sequences
is highlighted.
7.
Press the
SEL
button.
Classic and Default appear in the display window
.
8.
Using the (3)
↑
or (6)
↓,
select the
keypanel sequence
you want to enable.
9.
Press the
SEL
button.
Default Keypad
For information on Default keypad sequences, see “Default Keypad Sequence” on page 134. For information on the Classic
Keypad, see “Classic Keypad Sequence” on page 132.
KEYPAD BUTTON
DESCRIPTION
MENU button
The MENU button is used to access the top-level menu structure.
>
Press the
Menu
button once.
The top-level menu appears in the display window
.
NOTE:
If the keypad backlight is set to Activate
(
Service|Keypad|Backlight
), you must press the Menu button
twice to access the top-level menu.
FWD button
The FWD button moves you forward through the menu option highlighted.
For example, if Display is highlighted in the display window and FWD is
pressed, the second level of the display menu appears.
Summary of Contents for CLD Color Keypanel Family DKP 16 CLD
Page 1: ...CLD Color Keypanel Family User Manual 93507858000 Rev B 8 2008 KP 32 CLD DKP 16 CLD EKP 32 CLD...
Page 8: ......
Page 11: ...5 KP 32 CLD Block Diagram FIGURE 1 KP 32 CLD Block Diagram...
Page 26: ...20...
Page 47: ...41 NOTE The KP 32 CLD resets itself once the firmware download is complete...
Page 52: ...46...
Page 55: ...49 FIGURE 23 Main Audio Options Menu...
Page 142: ...136...
Page 143: ...137 CHAPTER 8 Keypanel Menu Quick Reference...
Page 146: ...140 FIGURE 144 Service Menu for the KP 32 CLD with GPI 32 CLD Option card installed...
Page 150: ...144...
Page 154: ...148...
Page 156: ...150...
Page 160: ......


