T
echnical
B
ulletin
PAGE: 28/58
Model:
Taurus-C1 / P1
Date:
21-Oct-11
No.:
RD074026
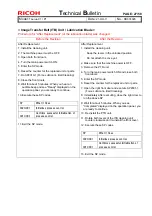
< Image Transfer Belt (ITB) Unit / After Transfer Belt Replacement >
The following procedure was corrected.
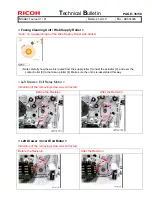
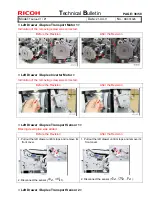
Before the Revision
After the Revision
1. The machine power must be OFF.
2. Open both front doors.
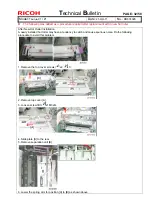
3. Remove the front cover of the ITB cleaning unit.
4. Rotate both blades of the ITB cleaning unit down
to retract the blades from the ITB.
5. PTR ( p.365)
6. Close the left front door.
7. With only the right door open, turn the main power
switch ON.
8. Reset the counter for the replaced belt.
9. Close the left front door but leave the right front
door open.
10. Enter the SP mode and do SP2310-001 to clean
and lubricate the ITB.
11. After the SP is finished, re-install the PTR unit,
and then close the right front door.
12. Wait for about 5 minutes. When you hear an
audible beep and see "Ready" displayed on the
operation panel, you are ready to continue.
•
Do not open any door or remove the used
toner bottle while lubrication is in progress.
13. Do SP2912-1. This SP adjusts the strength of the
LED beam of the ITB feed-back sensors (main
sensor and sub sensor).
14. Do SP2914-1. This SP code resets the ITB feed-
back sensors.
After a new ITB has been installed, or the original
belt re-installed, the physical condition of the belt
should be checked. The three ID/MUSIC sensors
(Rear, Center, Front) scan the belt to detect nicks
and scratches.
Belt Check
1. First, execute SP2310-1 to clean and lubricate the
belt.
2. Do SP3011 to manually execute process control.
3. Do SP3012-1 to confirm the successful
initialization of process control.
4. Do these SP codes to run the sensor tests.
•
SP2112-15
•
SP2112-16
•
SP2112-17
5. Each SP execution should return a "0". If an SP
returns any value other than "0", do the SP again.
6. After repeated executions, if one or more of the
SP codes continues to return any value other
than "0", the belt is damaged and must be
replaced.
1. The machine power must be OFF.
2. Open both front doors.
3. Remove the front cover of the ITB cleaning unit.
4. Rotate both levers of the ITB cleaning unit
clockwise to retract the blades from the ITB.
5. Remove the PTR unit. ( p.432)
6. Turn the main power switch ON and close both
front doors.
7. Enter the SP mode.
8. Reset the counter for the replaced ITB belt.
9. Open the right front door and execute SP2310-1
(Force Lubricant - Belt Cleaning).
10. Immediately after executing, close the right door
to run the above SP.
11. Wait for about 5 minutes. When you see
"Completed" displayed on the operation panel,
you are ready to continue.
•
Do not open any door or remove the used
toner bottle while lubrication is in progress.
12. Re-install the PTR unit.
13. Rotate both levers of the ITB cleaning unit
counter-clockwise and re-install the front cover.
14. Do SP2912-1. This SP adjusts the strength of the
LED beam of the ITB feed-back sensors (main
sensor and sub sensor).
15. Do SP2914-1. This SP code resets the ITB feed-
back sensors.
After a new ITB has been installed, or the original
belt re-installed, the physical condition of the belt
should be checked. The three ID/MUSIC sensors
(Rear, Center, Front) scan the belt to detect nicks
and scratches.
Belt Check
1. First, execute SP2310-1 to clean and lubricate the
belt.
2. Do SP3011 to manually execute process control.
3. Do SP3012-1 to confirm the successful
initialization of process control.
4. Do these SP codes to confirm the scan results:
•
SP2112-15
•
SP2112-16
•
SP2112-17
5. Each SP execution should return a "0". If an SP
returns any value other than "0", do Steps 2, 3
again..
6. After repeated executions, if one or more of the
SP codes continues to return any value other than
"0", the belt is damaged and must be replaced.

