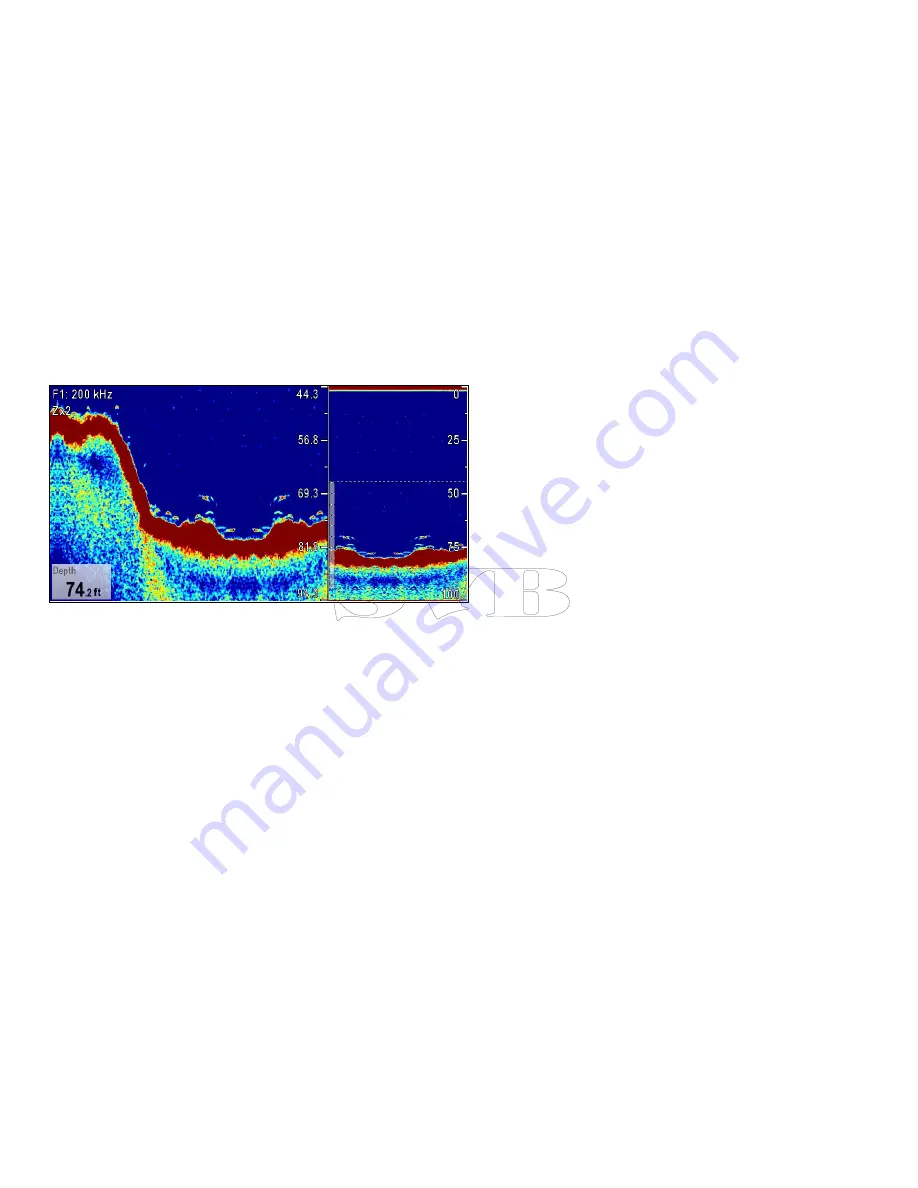
Zoom split
With the zoom display mode you can split the screen and display
the zoomed image alongside the standard fishfinder image (ZOOM
SPLIT). The zoomed section is indicated on the standard fishfinder
screen by a zoom box.
Selecting zoom split screen
From the fishfinder application, with Zoom preset selected:
1. Select
Menu
.
2. Select
Adjust Preset <mode>
, where <mode> is the preset
already selected.
3. Select
Display Mode
.
4. Select
Zoom
so that Split is highlighted.
Selecting Zoom will switch between Split and Full.
Adjusting the fishfinder zoom factor
When the zoom function is active (Zoom Full or Zoom Split), you
can either select a predefined zoom factor or adjust it manually.
From the fishfinder application, with Zoom preset selected:
1. Select
Menu
.
2. Select
Adjust Preset <mode>
, where <mode> is the preset
already selected.
3. Select
Display Mode
.
4. Select
Zoom Factor
.
5. Select a preset Zoom Factor (
x2
,
x3
,
x4
) or select
Manual
Once selection is made you will be returned to the Display Mode
menu.
6. If Manual is chosen select
Manual Zoom Factor
The manual zoom factor menu is displayed.
7. Select
Manual Zoom Factor
so that the zoom setting is
highlighted.
8. Using the
Rotary Control
change the zoom factor to the
required setting.
9. Press the
Ok
button, or select the
Manual Zoom Factor
menu
again to confirm the setting.
Adjusting the position of the fishfinder zoomed area
When the zoom function is selected, the system automatically
selects the zoom position so that the bottom details are always in the
lower half of the display. If required you can reposition the portion of
the image to be zoomed so that an alternative area is displayed.
From the fishfinder application, with Zoom preset selected:
1. Select
Menu
.
2. Select
Adjust Preset <mode>
, where <mode> is the preset
already selected.
3. Select
Display Mode
.
4. Select
Zoom Position
.
The manual zoom position menu is displayed.
5. Select
Zoom Position
.
Selecting the zoom position menu will switch the zoom position
between Auto and Manual.
6. If Manual is chosen use the
Rotary Control
to reposition the
zoomed area as required.
Using the fishfinder
197
Summary of Contents for e7
Page 2: ......
Page 4: ......
Page 14: ...14 e7 e7D User reference ...
Page 18: ...18 e7 e7D User reference ...
Page 62: ...62 e7 e7D User reference ...
Page 124: ...124 e7 e7D User reference ...
Page 132: ...132 e7 e7D User reference ...
Page 174: ...174 e7 e7D User reference ...
Page 211: ...Note The Shallow Limit cannot be set to greater than the Deep Limit Using the fishfinder 211 ...
Page 248: ...248 e7 e7D User reference ...
Page 260: ...260 e7 e7D User reference ...
Page 272: ...272 e7 e7D User reference ...
Page 278: ...278 e7 e7D User reference ...
Page 316: ...316 e7 e7D User reference ...
Page 317: ...Owner notes ...
Page 318: ...Owner notes ...
Page 319: ......
Page 320: ...www raymarine com ...


