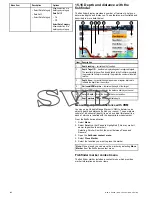
7. Select the data item you want to display.
Once selected a tick will be placed next to the data item in the
menu and the cell on screen will display the selected data item.
8. Repeat steps 3 to 6 for all the data items you want to change.
9. Select
Rename Page
.
The on screen keyboard is displayed.
10. Enter the new name for the datapage.
11. Select
SAVE
.
Deleting a datapage
You can delete custom or pre-configured datapages from the data
application. The minimum number of datapages allowed is 1.
From the data application:
1. Scroll to the datapage you want to delete.
2. Select
Menu
.
3. Select
Delete Page
.
The confirm delete pop up message is displayed.
4. Select
Yes
to delete the datapage, or
No
to cancel the action.
Note:
You cannot create a new engine page with the same layout
as the pre-configured engine datapages.
Setting number of engines
You can set the number of engines your vessel has up to a
maximum of 5.
From the data application:
1. Select
Menu
.
2. Select
Num. Of Engines
.
3. Select either 1, 2, 3, 4 or 5.
Once selected, a tick will be placed next to the item in the menu
and the engine datapage will be reset to display the correct
number of engines.
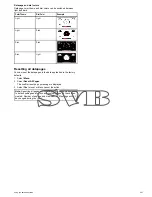
Engine datapages
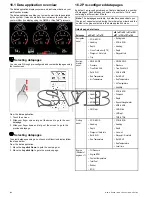
Depending on the number of engines you choose you will see one
of the following datapages:
1 Engine
2 Engines
3 Engines
4 Engines
5 Engines
Note:
The default number of engines is determined by the
vessel type selected during the initial start up wizard, if a sail
boat is chosen then default is 1 engine for motor boats default
is 2 engines.
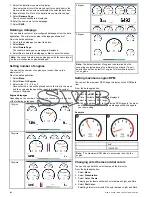
Setting maximum engine RPM
You can set the maximum RPM range to display on the RPM data
item.
From the data application:
1. Select
Menu
.
2. Select
Max RPM Range
.
A list of available RPM settings is displayed.
3. Select the required RPM range.
A tick will be placed next to the selected RPM range in the menu
and the RPM range on the engine datapage will be changed to
your new setting.
Example
1
2
1
Auto*
2
10,000 RPM
Note:
*The maximum RPM when in auto mode is set by the
engine.
Changing color theme and dial colors
You can change both the color theme and the dial color.
From the data application:
1. Select
Menu
.
2. Select
Presentation
.
3. Select
Color Theme
.
Selecting color theme will switch color between Light and Dark.
4. Select
Dial Color
.
Selecting dial color will switch the color between Light and Dark.
200
New a Series / New c Series / New e Series
Summary of Contents for A65
Page 2: ......
Page 4: ......
Page 8: ...8 New a Series New c Series New e Series...
Page 12: ...12 New a Series New c Series New e Series...
Page 20: ...20 New a Series New c Series New e Series...
Page 36: ...36 New a Series New c Series New e Series...
Page 64: ...64 New a Series New c Series New e Series...
Page 86: ...86 New a Series New c Series New e Series...
Page 96: ...96 New a Series New c Series New e Series...
Page 106: ...106 New a Series New c Series New e Series...
Page 138: ...138 New a Series New c Series New e Series...
Page 192: ...192 New a Series New c Series New e Series...
Page 202: ...202 New a Series New c Series New e Series...
Page 206: ...206 New a Series New c Series New e Series...
Page 218: ...218 New a Series New c Series New e Series...
Page 228: ...228 New a Series New c Series New e Series...
Page 232: ...232 New a Series New c Series New e Series...
Page 242: ...242 New a Series New c Series New e Series...
Page 248: ...248 New a Series New c Series New e Series...
Page 286: ...286 New a Series New c Series New e Series...
Page 300: ...300 New a Series New c Series New e Series...
Page 307: ......
Page 308: ...www raymarine com...

