


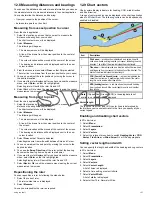


• Auto— The track interval is automatically set (Auto will
minimize track points whilst maintaining correlation between
the track and the actual path followed).
• Time— The track points are placed at regular intervals of time.
• Distance— The track points are placed at regular intervals of
distance.
5. Select the
Track Interval
and set to the appropriate value:
• Units of time from the list displayed (available if “record track
by” is set to time).
• Units of distance from the list displayed (available if “record
track by” is set to distance).
• Not available — no Track Interval is available if the “record
track by” is set to auto).
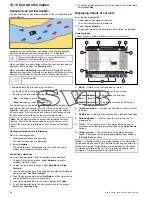
Track context menu
Selecting a track in the chart application displays a context menu
showing the track length, number of points and menu items.
The context menu provides the following menu items:
•
Stop Goto
(only available during active navigation.)
•
Erase Track
•
Hide Track
•
Create Route From
•
Rename
•
Edit Color
•
Acquire Target
(only available if Radar overlay is switched on.)
When creating a track the context menu options change to:
•
Stop Goto
(only available during active navigation.)
•
Stop Track
•
Erase Route
— Disabled
•
Create Route From
•
Rename
•
Edit Color
•
Acquire Target
(only available if Radar overlay is switched on.)
Accessing the context menu
You can access the context menu by following the steps below.
1. New e Series or New c Series:
i.
Selecting a location, object or target on-screen and pressing
the
Ok
button.
2. Touchscreen multifunction displays:
i.
Selecting an object or target on-screen.
ii. Selecting and holding on a location on-screen.
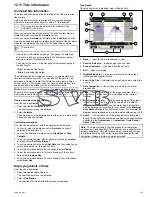
Reviewing and editing a track
You can review and edit aspects of the tracks stored.
You can:
• Erase a track.
• Create a route from a track.
• Show or hide a track on the chart (only available from the chart
application).
• Change the name of a track.
• Change the color of a track.
Selecting a track to review or edit
1. Do one of the following to select the required track:
• From the chart application, select a track on screen to display
the track context menu.
• From the chart application, go to the following menu:
Menu >
My Data > Track List
, and select the required track.
• From the homescreen, select:
My Data > Track List
and
select the required track.
You can then proceed and review or edit the required track using
the options available.
Erasing tracks
Erasing a track
From the chart application:
1. Select
Menu
.
2. Select
My Data
.
3. Select
Track List
.
The track list is displayed.
4. Select the track you want to erase.
5. Select
Erase Track
.
The erase track pop up message is displayed.
6. Select
Yes
to confirm, or
No
to cancel the action.
Note:
You can also erase tracks from the homescreen:
My Data
> Track List
.
Erasing all tracks
From the homescreen:
1. Select
My Data
.
2. Select
Erase Data From System
.
3. Select
Erase Tracks From System
.
The erase tracks from system dialog is displayed.
4. Select
Erase All
.
The confirm delete pop up message is displayed.
5. Select
Yes
to confirm, or
No
to cancel the action.
Using waypoints, routes and tracks
117
Summary of Contents for A65
Page 2: ......
Page 4: ......
Page 8: ...8 New a Series New c Series New e Series...
Page 12: ...12 New a Series New c Series New e Series...
Page 20: ...20 New a Series New c Series New e Series...
Page 36: ...36 New a Series New c Series New e Series...
Page 64: ...64 New a Series New c Series New e Series...
Page 86: ...86 New a Series New c Series New e Series...
Page 96: ...96 New a Series New c Series New e Series...
Page 106: ...106 New a Series New c Series New e Series...
Page 138: ...138 New a Series New c Series New e Series...
Page 192: ...192 New a Series New c Series New e Series...
Page 202: ...202 New a Series New c Series New e Series...
Page 206: ...206 New a Series New c Series New e Series...
Page 218: ...218 New a Series New c Series New e Series...
Page 228: ...228 New a Series New c Series New e Series...
Page 232: ...232 New a Series New c Series New e Series...
Page 242: ...242 New a Series New c Series New e Series...
Page 248: ...248 New a Series New c Series New e Series...
Page 286: ...286 New a Series New c Series New e Series...
Page 300: ...300 New a Series New c Series New e Series...
Page 307: ......
Page 308: ...www raymarine com...