


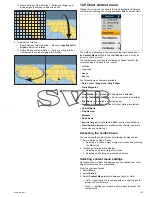


You can also follow any route in reverse order.
Following a stored route
From the chart application:
1. Select
Menu
.
2. Select
Navigate
.
3. Select
Follow Route
.
The Route list is displayed.
4. Select the route you want to follow.
5. Select
Follow Route
.
Cancelling navigation of a route
From the chart application:
1. Select the Route.
The route context menu is displayed.
2. Select
Stop Follow
.
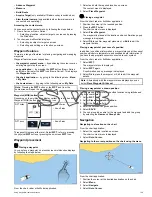
Arriving at a waypoint
As your vessel approaches a waypoint, the waypoint arrival alarm
provides a warning.
1. Select
Ok
on the waypoint arrival alarm pop up message.
Once the alarm is acknowledged, the next waypoint is selected, and
the display updates to indicate the next leg of the route.
Note:
You can set the approach distance (radius) at which the
waypoint arrival alarm will sound using the
Alarms
menu from the
homescreen:
Set-up > Alarms > Waypoint Arrival
.
Advancing to the next waypoint in a route
You can skip the current active waypoint and advance to the next
waypoint in a route at any time.
While following a route in the chart application:
1. Select the route.
The route context menu is displayed.
2. Select
Advance Waypoint
.
Note:
If the current destination is the last waypoint, the chart
advances on to the first waypoint in the route.
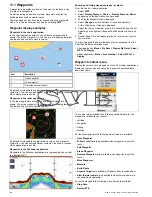
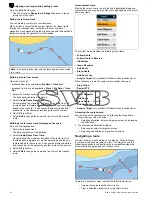
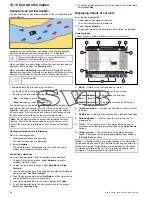
Cross Track Error (XTE)
Cross Track Error (XTE) is the amount of deviation from your
intended route or waypoint, expressed as a distance.
D
11765-2
XTE
In the event that you steer off-track, you can go straight to your
target by resetting XTE.
Resetting Cross Track Error (XTE)
While following a route in the chart application:
1. Select the route.
The route context menu is displayed.
2. Select
Restart XTE
.
Resetting XTE results in a new course from the current vessel
position to the current target waypoint. This does not affect your
saved route.
D12295-1
You can also reset the XTE from the Navigate Menu:
Menu >
Navigate > Restart XTE
.
Following a route in reverse order
From the chart application:
1. Select the route.
The route context menu is displayed.
2. Select
Follow Route In Reverse
.
You can also select
Follow Route In Reverse
by selecting a route
from the route list:
Menu > Navigate > Follow Route
.
Review or edit a route
There are a variety of attributes associated with routes. These can
be reviewed and edited.
You can:
• Show or hide a route on the chart screen.
• Review details of the route
• Change the name or color of a route.
• Add, move and remove waypoints from a route.
• Change the route lines width.
Note:
An active route can be edited, with the exception of the
active waypoint. If a waypoint being edited becomes active, then
the system shall cancel the edit; the waypoint shall remain in
its original position.
Showing or hiding a route
From the chart application:
1. Select
Menu
.
2. Select
My Data
.
3. Select
Display My Data
.
4. Select
Select Routes To Display
.
The display routes dialog is displayed.
5. Select the route to switch between Show and Hide.
Selecting a route to review or edit
1. Do one of the following to select the required route:
• With the chart application active, select a route on screen to
display the route context menu.
• With the chart application active, select:
Menu > My Data >
Route List
and select the required route from the list.
• From the homescreen, select:
My Data > Route List
and
select the required route from the list.
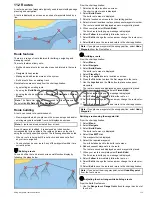
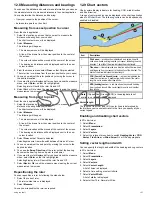
Adding a waypoint to a route on the chart screen
From the chart application:
1. Select the appropriate leg of the route.
The route context menu is displayed.
2. Select
Insert Waypoint
.
3. Select the location for the new waypoint.
The leg of the route is stretched to include the new waypoint.
Removing a waypoint from a route
From the chart application:
1. Select the waypoint you want to erase.
The waypoint context menu is displayed.
2. Select
Erase Waypoint
.
The erase waypoint pop up message is displayed.
Using waypoints, routes and tracks
115
Summary of Contents for A65
Page 2: ......
Page 4: ......
Page 8: ...8 New a Series New c Series New e Series...
Page 12: ...12 New a Series New c Series New e Series...
Page 20: ...20 New a Series New c Series New e Series...
Page 36: ...36 New a Series New c Series New e Series...
Page 64: ...64 New a Series New c Series New e Series...
Page 86: ...86 New a Series New c Series New e Series...
Page 96: ...96 New a Series New c Series New e Series...
Page 106: ...106 New a Series New c Series New e Series...
Page 138: ...138 New a Series New c Series New e Series...
Page 192: ...192 New a Series New c Series New e Series...
Page 202: ...202 New a Series New c Series New e Series...
Page 206: ...206 New a Series New c Series New e Series...
Page 218: ...218 New a Series New c Series New e Series...
Page 228: ...228 New a Series New c Series New e Series...
Page 232: ...232 New a Series New c Series New e Series...
Page 242: ...242 New a Series New c Series New e Series...
Page 248: ...248 New a Series New c Series New e Series...
Page 286: ...286 New a Series New c Series New e Series...
Page 300: ...300 New a Series New c Series New e Series...
Page 307: ......
Page 308: ...www raymarine com...