


Updating the Firmware
Updating Firmware via a Serial Connection
CubiScan 25 Service Manual
2 1
2. Carefully remove the glass platform and place it in a
safe location.
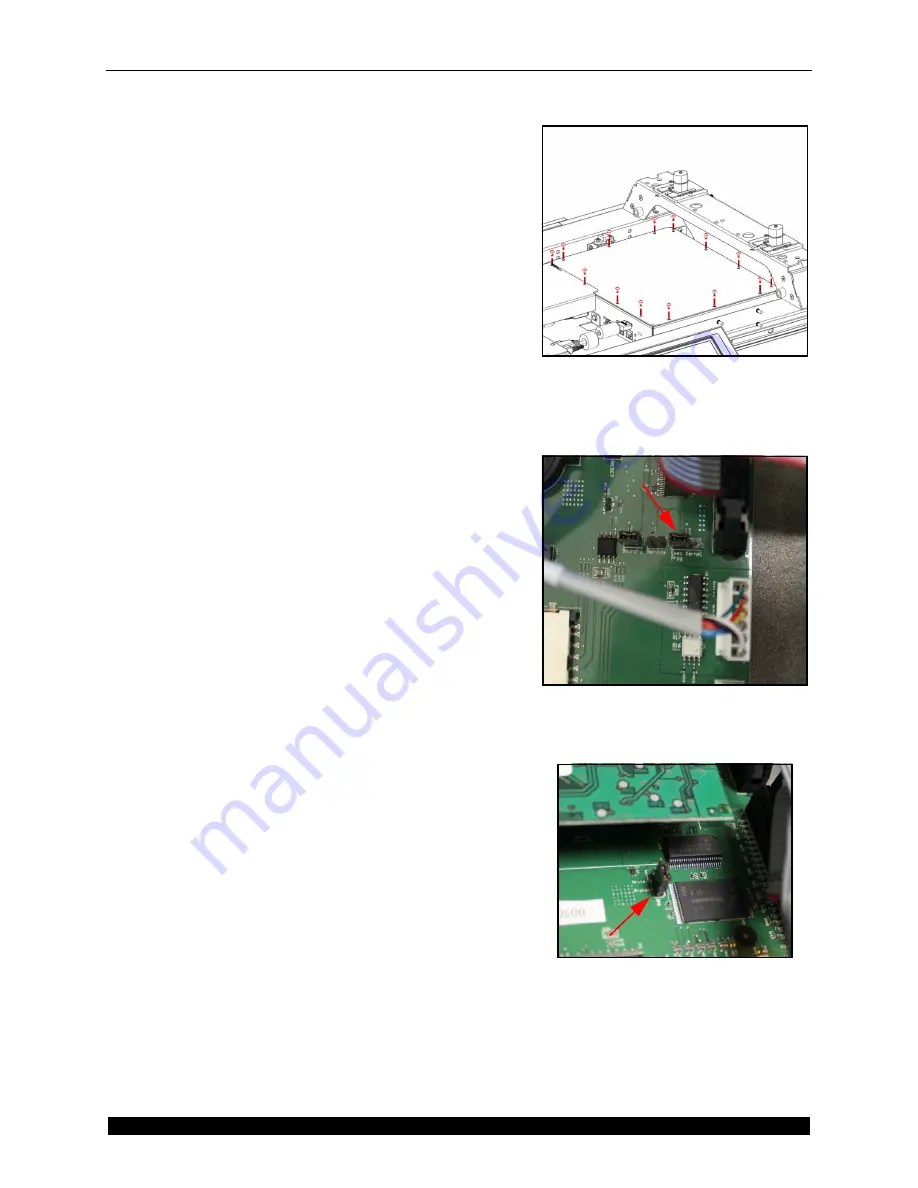
3. Using the Phillips screwdriver, remove the 10 screws
holding the controller box lid in place. Refer to
4. Remove the controller box lid.
5. To allow the firmware to be updated, you will need to
move two jumpers. The first jumper is located near
the SD card. Refer to
. Move the jumper
from the Exec mode to the Kernel mode.
6. Move the second jumper from the Protected mode to
the Write mode. Refer to
.
7. Connect the USB to serial adapter to the PC.
8. Connect one end of the RS-232 cable to the adapter
and the other end to the back of the CubiScan 25
controller.
9. Open the CS125Downloader.exe.
10. Navigate to the CS125Downloader.exe folder using
the Directory.
11. Select CS25.bin from the Files window.
12. Select the port that the adapter is connected to.
13. Power the CubiScan 25 on. If you are connected
correctly, the kernel version will be displayed in the
message box.
14. Click
Program
. The application will now program the
motherboard. When the firmware is done loading it
will then go through the verification process. This
process is indicated by asterisks. You must wait until
this process is finished.
15. When the verification process has finished, power
the CubiScan 25 down.
16. Move the jumper from step 6 back to the Protected
mode.
17. Move the jumper from step 5 back to the Exec mode.
Figure 13
Controller Lid Screws
Figure 14
Jumper 1
Figure 15
Jumper 2


