PART 1: CX-Programmer
CHAPTER 4 – Reference
OMRON
CX-Programmer _Page 90
Forcing is only allowed when the PLC is in Debug or Monitor mode (not Run mode).
Use the following procedure to force bits.
1, 2, 3…
1. Obtain the Ladder program and select the element to be forced.
2. Select
Force
from the context sensitive menu, followed by
On
,
Off
or
Cancel
.
Select
Force
from the context sensitive menu, followed by
Cancel All
to cancel all forced bits so that current
values are free to be changed by the PLC program.
Once an element has been forced, a symbol is placed in the Ladder program to indicate that its status has been
forced.
♦
Set
. Set is available from the contact or coil context sensitive menu. The bit can be set to 1 or 0 by selecting
the
Set
option from the contact or coil context sensitive menu followed by
Value
,
To 1
or
To 0
.
♦
Differentiate
.
Differentiate is available from the contact or coil context sensitive menu, performing the
same functions as that within the Edit Contact dialog. Select
Differentiate
from the context sensitive menu,
followed by
Up
or
Down
.
♦
Immediate
.
Immediate Refresh is available from the contact or coil context sensitive menu, performing the
same functions as that within the Edit Contact dialog. Select
Immediate Refresh
from the context sensitive
menu.
♦
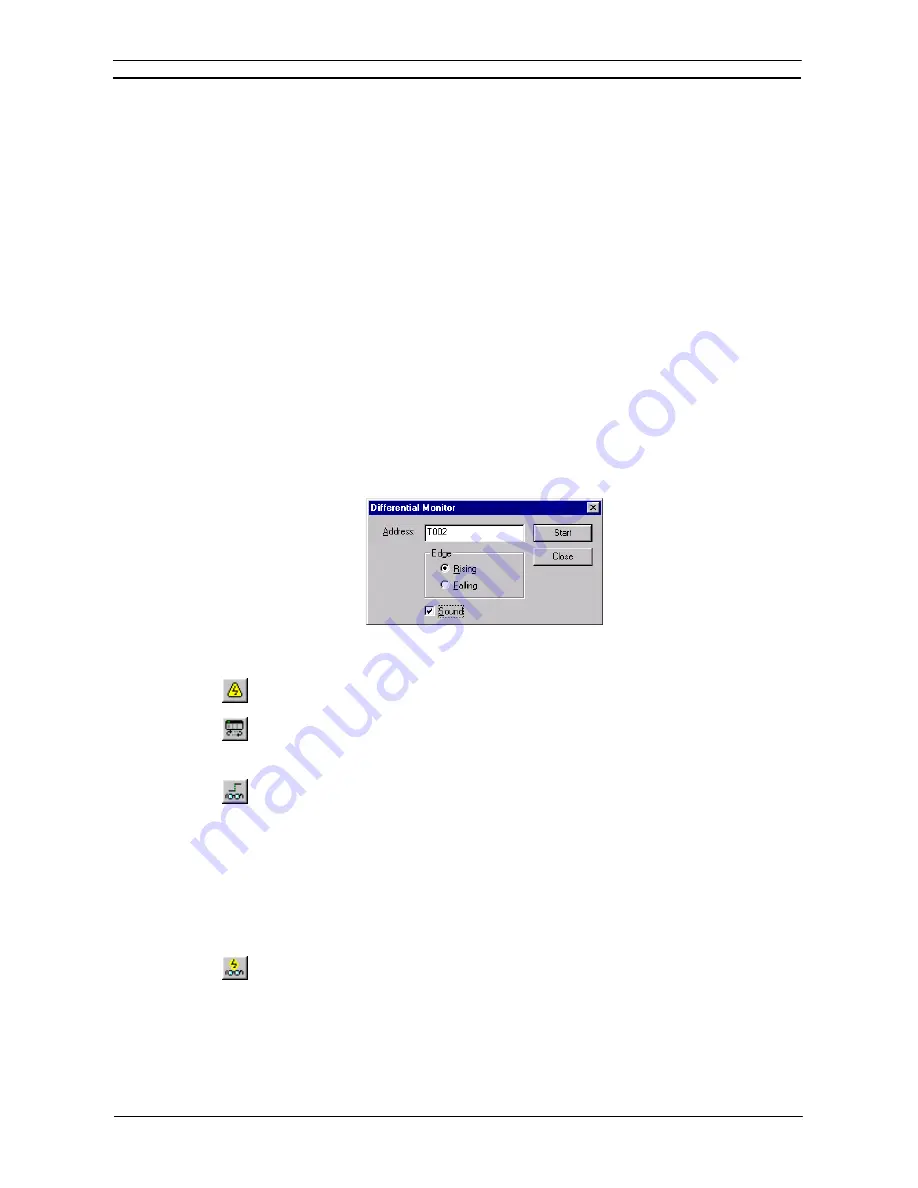
Differential Monitor
.
Differential Monitor is for bits that are not accessible for conventional monitoring
(for instance, values changing too rapidly), but which can be monitored via the Differential Monitor dialog.
The dialog permits the selection of a particular bit to monitor, whether it is monitored against its falling or
rising edge, and whether sound should be used when the bit value changes.
Use the following procedure to apply the differential monitor.
1, 2, 3…
1. Select the Program object in the project workspace to display the Ladder program in the
Diagram Workspace.
2. Select
the
Work On-line
button from the toolbar. A confirmation message is displayed:
select the
Yes
pushbutton to connect to the PLC.
3. Select the
Run Mode
button from the toolbar. Differential monitoring can only be
accomplished in this PLC operating modes and Monitor mode.
4. Select the contact or coil to monitor.
5. Select
the
Differential Monitor
button from the toolbar. The Differential Monitor dialog
is displayed.
6. The address associated with the contact or coil selection is displayed in the
Address
field.
Select an
Edge
option.
7. Select
the
Sound
setting to retrieve audio whilst monitoring.
8. Select
the
Start
pushbutton to start monitoring. The
Start
pushbutton becomes a
Stop
pushbutton.
9. Select
the
Stop
pushbutton to cancel monitoring. Select the
Close
pushbutton to exit the
dialog.
10. Select the
Toggle PLC Monitoring
button from the toolbar to stop monitoring.
Instruction Editing
The Edit Instruction dialog allows an instruction to be selected and entered into the Ladder program.
The dialog can be displayed in two forms, either:
simple dialog mode
or
detailed dialog mode
. The default
mode can be set in the
Diagram
tab in the
Options
dialog. To change the
simple dialog mode
to a
detailed
dialog mode
, select
Detail
pushbutton.
Summary of Contents for CX-Programmer 9
Page 1: ...Cat No W446 E1 10 CX Programmer Ver 9 SYSMAC WS02 CXPC_ V9 OPERATION MANUAL...
Page 2: ......
Page 3: ...SYSMAC WS02 CXPC V9 CX Programmer Ver 9 Operation Manual Revised December 2009...
Page 4: ......
Page 6: ......
Page 19: ...CX Programmer_Page xvi Unit Versions and Lot Numbers...
Page 30: ......
Page 31: ...PART 1 CX Programmer...
Page 32: ......
Page 100: ......
Page 120: ......
Page 198: ...PART 1 CX Programmer CHAPTER 4 Reference OMRON CX Programmer _Page 118...
Page 224: ...PART 1 CX Programmer Keyboard Shortcuts CX Programmer OMRON CX Programmer _Page 144...
Page 240: ......
Page 241: ...PART 2 CX Server PLC Tools...
Page 242: ......
Page 250: ......
Page 256: ......
Page 268: ...PART 2 CX Server PLC Tools CHAPTER 2 PLC Memory Component OMRON CX Server PLC Tools_Page 18...
Page 286: ......
Page 338: ......
Page 382: ......
Page 414: ......
Page 430: ......
Page 436: ......
Page 437: ...PART 3 CX Server Runtime...
Page 438: ......
Page 482: ......
Page 488: ......
Page 504: ......
Page 530: ......
Page 540: ......
Page 541: ......
Page 542: ......


