you have your range selected you can then delete them. Click on the column heading to sort the
display of print jobs by that criteria.
Special Prints
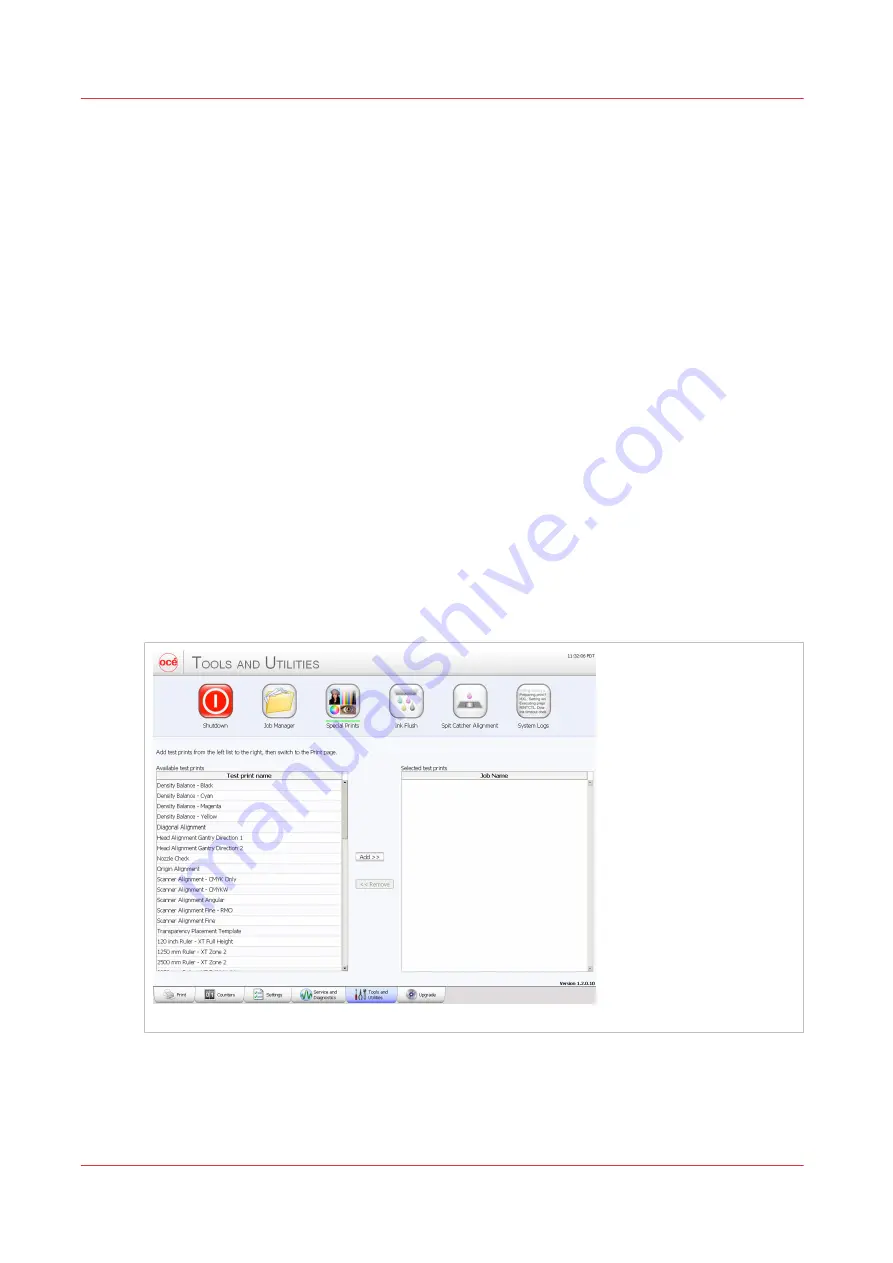
The Special Prints module displays two lists. The list on the left shows the available special
prints. Some of these prints are used by service technicians to adjust and troubleshoot the
printer. Some are of interest to the Operator: the Ship print, the table ruler prints, the Nozzle
Check print, and the Media Advance Correction Factor print.
Special Prints of Interest to the Operator
• the
Reference print
is used to determine that the printer output meets quality standards. A ship
print that is printed at the factory is shipped with each printer. It can be used as a comparison
with one printed at the customer site.
• The
Table Rulers
are meant to be printed on the table to assist you to place media. These
images are set up to print on the horizontal and vertical axes of the table. They are available in
metric or imperial measure.
• The
Nozzle Check
is used to determine if there are any clogged nozzles that can affect print
quality (note that it is also available on the command toolbar in the Print Job Control module).
• the
Media Advance Correction Factor
print (used for roll media only). This print is used to
correct a certain type of banding related to incorrect media advance - see How to Determine
Media Advance Correction.
The list on the right shows all active jobs that are currently in the print queue. Add a special print
from the left into the right list to make it active in the Print Job Control module. If you remove a
job from this list, it is also removed from the Active job list and is not available to print. Special
print instances that are removed from the Active list do not go to the Inactive list; they are simply
removed.
[33] Special Prints
How to Load a Special Print
1) Click a special print to select it in the left window.
2) Click the Add button to place it in the print queue on the right.
Tools and Utilities Module
58
Chapter 4 - How to Navigate the User Interface
Summary of Contents for Arizona 365 GT
Page 1: ...Operation guide Oc Arizona 365 GT User Manual...
Page 6: ...Contents 6...
Page 7: ...Chapter 1 Introduction...
Page 11: ...Chapter 2 Product Overview...
Page 13: ...Chapter 3 Safety Information...
Page 38: ...Roll Media Safety Awareness 38 Chapter 3 Safety Information...
Page 39: ...Chapter 4 How to Navigate the User Interface...
Page 61: ...Chapter 5 How to Operate Your Oc Arizona Printer...
Page 76: ...How to Handle Media 76 Chapter 5 How to Operate Your Oc Arizona Printer...
Page 77: ...Chapter 6 How to Operate the Roll Media Option...
Page 109: ...Chapter 7 How to Use the Static Suppression Upgrade Kit...
Page 113: ...Chapter 8 How to Work With White Ink...
Page 164: ...How to Create and Use Quick Sets 164 Chapter 8 How to Work With White Ink...
Page 165: ...Chapter 9 Ink System Management...
Page 170: ...Change Ink Bags 170 Chapter 9 Ink System Management...
Page 171: ...Chapter 10 Error Handling and Troubleshooting...
Page 174: ...Troubleshooting Overview 174 Chapter 10 Error Handling and Troubleshooting...
Page 175: ...Chapter 11 Printer Maintenance...
Page 220: ...How to Remove Uncured Ink on the Capstan 220 Chapter 11 Printer Maintenance...
Page 221: ...Chapter 12 Regulation Notices...
Page 226: ...226 Chapter 12 Regulation Notices...
Page 227: ...Appendix A Application Information...
Page 233: ......


