59
DPSClick User Manual
v. 4.0
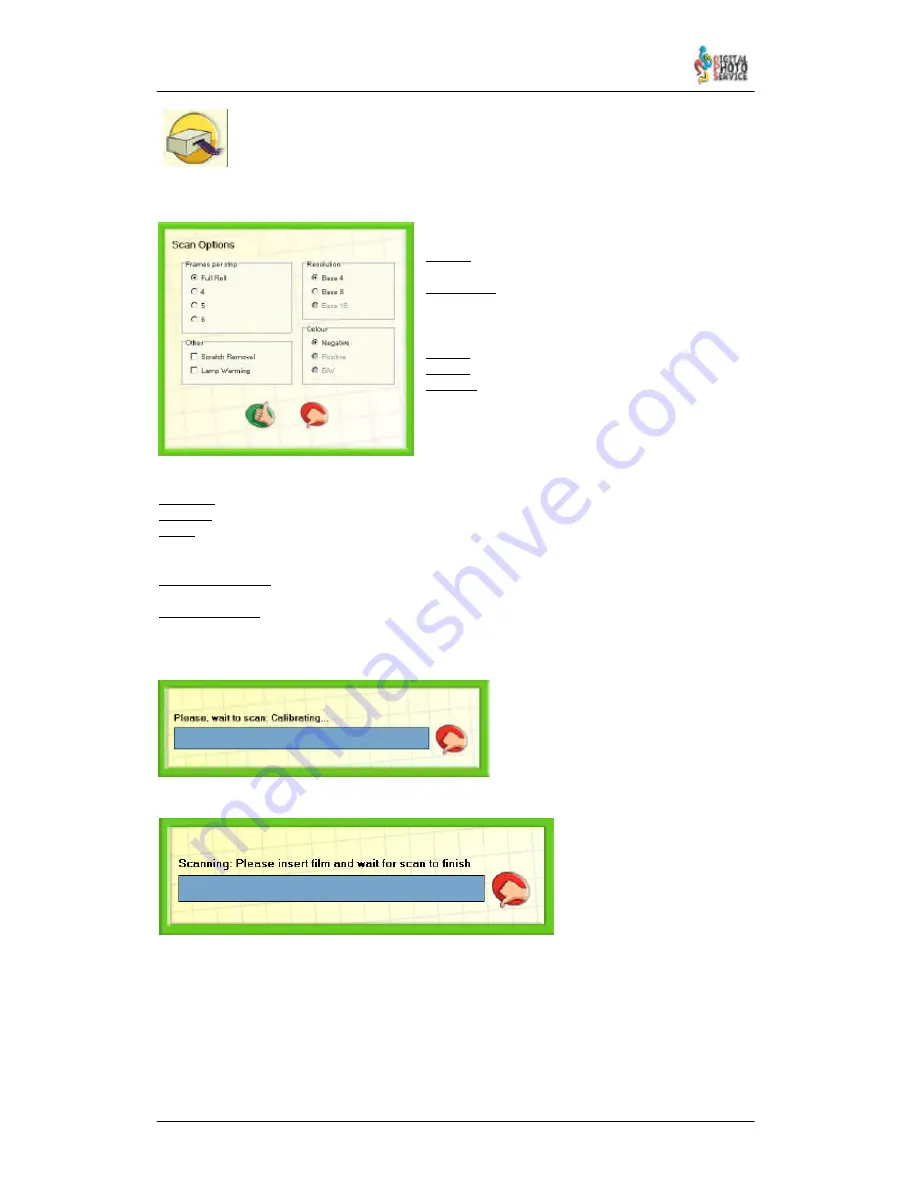
Click this icon to scan. It shows a form where you can choose the scan options.
Check here the options you prefer.
Frames per strip:
Full roll: Use this if you want to scan a full roll of
images.
4, 5, and 6: chose one of them if you have strips of 4,
5 or 6 images, respectively.
Resolution:
Base 4: use this to print up to L size.
Base 8: use this to print up to W size.
Base 16: use this to print up to A4 size (F235 only).
Colour:
Negative: check this to scan negative films.
Positive: use this to scan positive films (F235 only).
B&W: use this to scan Black and White films (F235 only).
Other:
Scratch Removal: check this to enable Digital Ice™ scratch removal technology when scanning.
Enabling this, the scanning time will increase.
Lamp Warming: if you want to obtain the optimum quality you must to check this. Be care with
F235, because its lamp warming can take a very long time, in order to obtain the best results.
Once you have chosen the options, click OK to start scan process.
A progress bar like this appears when
scanner is making some action. Over it,
it is showed a message that you must
follow. When starts scanning process
you must wait while the scanner is
calibrating or warming up.
Don’t insert the film into the scanner until you have prompted:
At this point you can insert the film into the scanner. If you insert a full roll, you could want
wait for scan to finish, but it is possible to cancel the process when you want, by pressing
Cancel button next to the progress bar. You will obtain only the images scanned.
If you have chosen scanning strips, you can insert them sequentially. Every time you have a
strip scanned, the progress bar will increment a step. To finish scanning strips, you have to
press Cancel button or wait scanning time out.


