25
DPSClick User Manual
v. 4.0
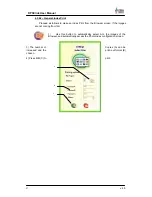
All the images and folders included at the bottom of the screen will be recorded to the
Backup
, although you should remember that if a selected folder already contains one of the
images that is also included in the list the image file will only be recorded on the CD–ROM
once.
The bottom right part of the screen indicates the space available in the CD-ROM.
This number is updated each time we select a folder or a file. Remember that this size
cannot exceed 650 Mbytes if recording on a 74–minute CD–ROM or 700 Mbytes on an 80–
minute CD–ROM. If it gets red color the maximum capacity has been exceeded.
5) Press
OK
to go on to the next step.
6) As in point 5 of the previous section of PhotoClickCD, you will be prompted to provide a
name. In this case, unlike PhotoClickCD, this name will identify the CD–ROM label.
7) You will be prompted for final confirmation to begin recording. All the procedures related
to Simulating recording, as dealt with in the section on PhotoClickCD, are equally valid for
the BackUp CD.
8) The recording will be completed, and the CD–ROM will be left open to add further
sessions.
If you check later the CD, you will see that each time a BackUp CD is saved a new
folder is created with the new pictures added. The name of the folder is always composed by
date and time.
4.3.5.3 – Formatting CD-RW (rewritable) media.
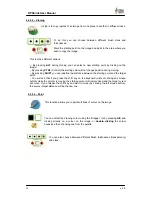
If you need to format rewritable media you can press this button before
you start any recording. If ‘Quick format’ option is checked the formatting
action will be faster, but for best performance it’s better not to choose it.


