


159
Replacing the Fuser Unit
When "ORDER FUSER UNIT" is displayed on the screen of the operation panel, prepare a
replacement fuser unit. The estimated timing for the next message to be displayed is when
printing approximately 5,000 pages.
When "FUSER UNIT LIFE" is displayed, replace the fuser unit.
The estimated replacement cycle of the fuser unit is approximately 100,000 pages for 216
mm simplex printing (one page per job).
•
The actual number of pages you can print with the fuser unit before replacement depends on how you
use it.
•
Even after "FUSER UNIT LIFE" is displayed, you can extend the lifetime of the fuser unit
somewhat by opening and closing the cover, etc., but we recommend you replace the fuser unit
soon to prevent malfunction.
•
Replace the fuser unit after you use it up to the end of its lifetime. If you use the removed fuser unit
with another device, its lifetime will not be displayed correctly.
•
"ORDER FUSER UNIT" is not displayed when [ADMIN SETUP] > [PANEL SETUP] > [NEARLIFE
STATUS] is set to [DISABLE].
•
Do not expose the image drum unit to direct sunlight or strong light (approximately 1,500 lux or
more). Do not leave the image drum unit exposed for 5 minutes or more, even under room
lighting.
•
You can change the timing for displaying the "ORDER FUSER UNIT" message. Set it using [ADMIN
SETUP] > [OTHERS SETUP]
[NEARLIFE SETUP] > [FUSER NEARLIFE] on the operation panel. Available values are from 500 to
5,000 (in 500 increments).
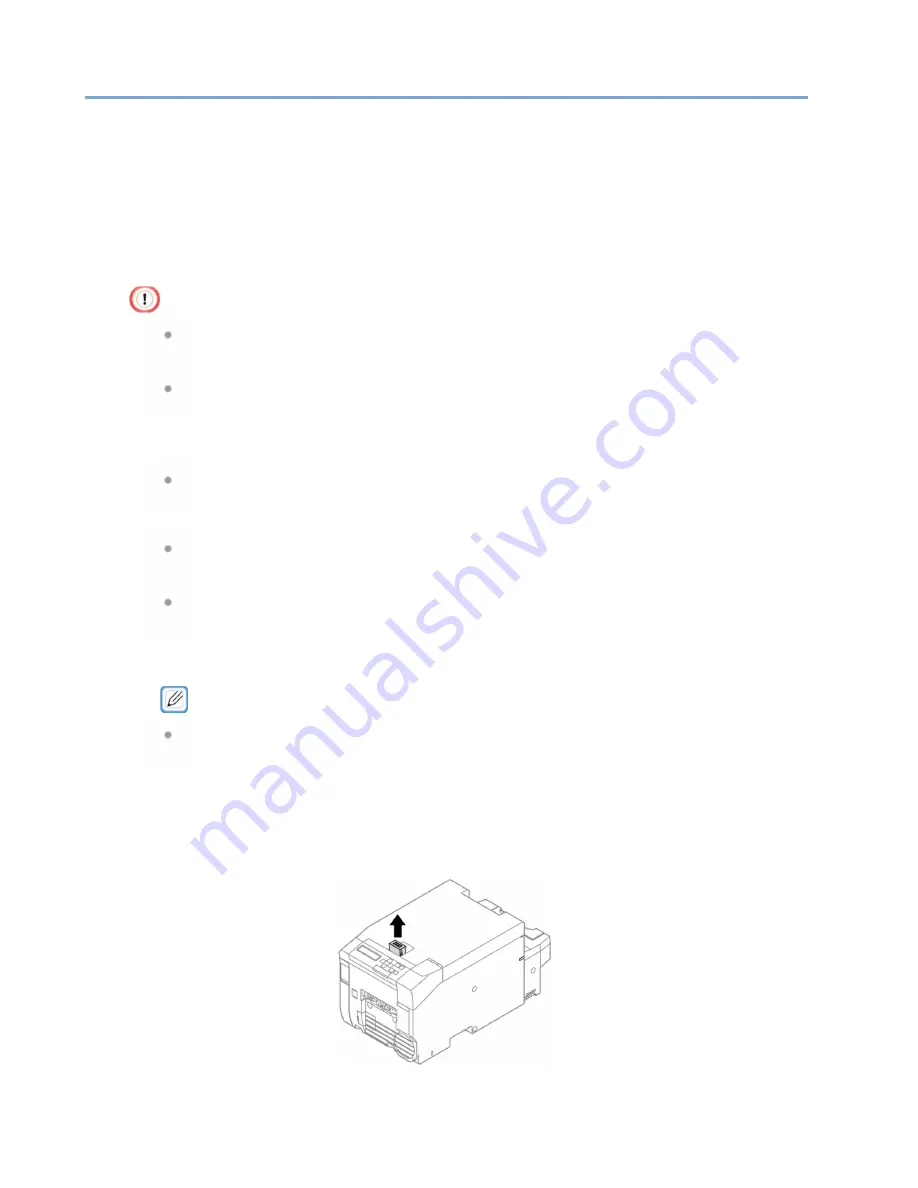
1
Insert your finger into the recess on the top of the machine and pull up the lever.
Summary of Contents for 360C
Page 1: ...360C Operator s Manual 880076 0101 Rev 2 ...
Page 17: ...17 Unpacking How to Unpack the Machine Checking the Accessories Installing Consumables 2 ...
Page 24: ...24 ...
Page 36: ...35 7 Tighten the screws x 2 8 Connect the connector ...
Page 37: ...36 9 Attach the Cover Cable PSNT 10 Attach the Cap Cover PSNT x 2 ...
Page 50: ...49 ...
Page 91: ...90 ...
Page 147: ...146 ...
Page 156: ...155 8 Remove the cover toner 9 Close the top cover 10 Open the toner cartridge cover ...
Page 167: ...166 8 Close the top cover ...
Page 178: ...177 15 Close the feeder cover until it clicks ...
Page 179: ...178 ...
Page 198: ...197 4 Close the feeder cover until it clicks ...
Page 233: ...232 ...
Page 244: ...243 The settings of the machine can be changed from the Admin Setup tab ...
Page 280: ...279 11 Confirm the setting results and click Back ...
Page 289: ...288 ...
Page 296: ......
Page 297: ......


