


SoundAdvisor Model 831C
Viewing Time History Data
16-5
Step 4
Press
Close
(
/*/
)and save the Setup.
Step 5
Enter the Setup Manager, highlight the name of the Time History setup, and set it
as the Active setup file.
Step 6
Run a measurement and navigate to the
Time History
or
Live
tab.
Step 7
Press the
Menu
softkey
(
/*/
) and select
Mark Sound Type
.
Step 8
As shown in
, a partial menu appears over the bottom half of your
Time History tab. As sound types occur, select any of the available markers to
mark that sound type. Deselect the marker to end the mark.
FIGURE 16-2
Marking a Sound Type
1.
Select the checkbox in-
line with a sound type
to
mark the beginning of the
sound. Deselect it to mark
the end.
16.3 Viewing Time History Data
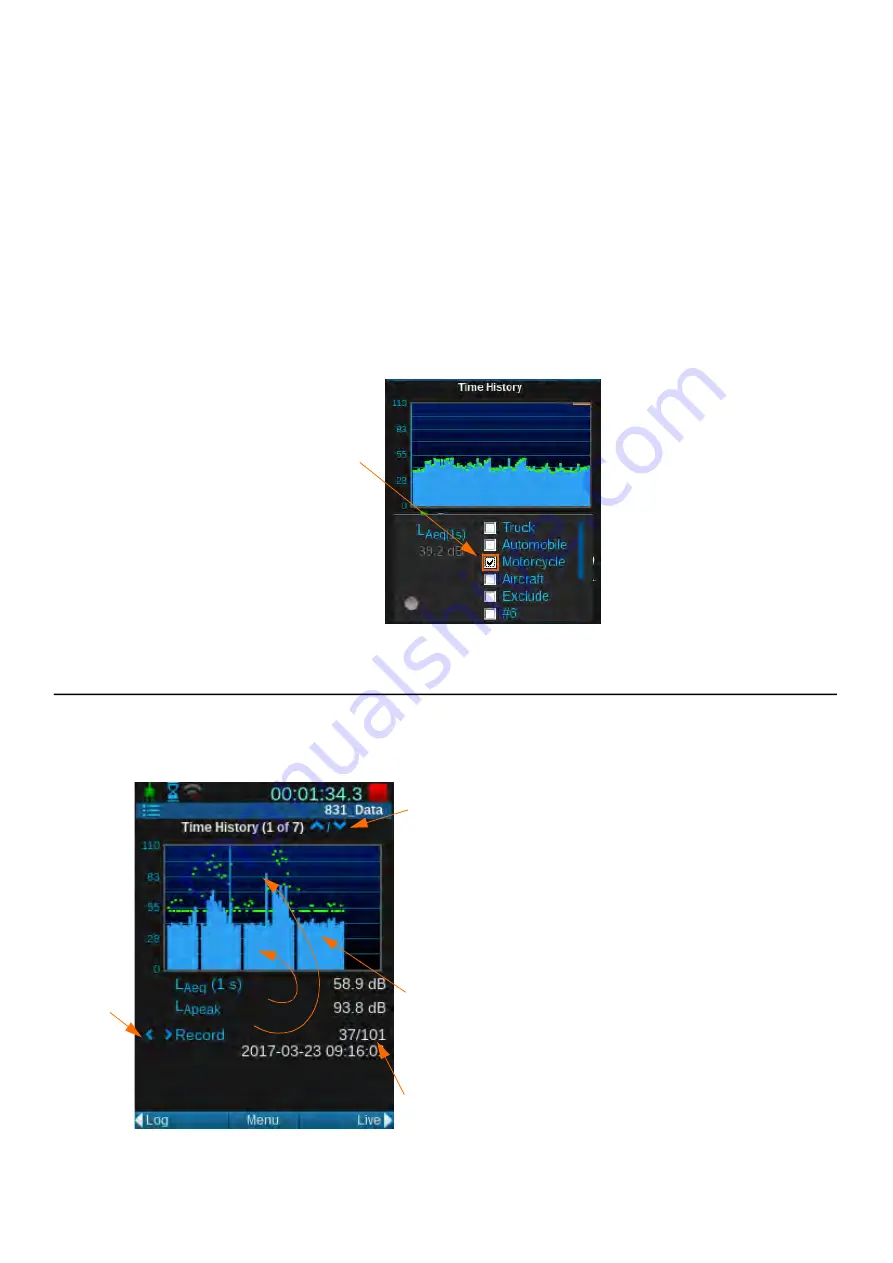
Time History data displays on the Time History tab as shown in
.
FIGURE 16-3
Time History Tab (Page 1)
1.
Highlight this line and use the
5
key to toggle
from Record view to the metric view.
2.
Depending on the enabled firmware options and
the measurement setup used, the
Time History
screen
can display data pages just like Live or Overall. Press
the up or down (
8
2
) navigation buttons to
navigate through these different pages.
3.
Blue bands show the L
Aeq
for the time interval.
Green marks show the metric data (L
APeak
is shown
here).
4.
To jump to a different record number, press the
Menu
softkey and select
Locate
from the pop-up
menu.
1.
1.
3.
2.
4.


