Startup
Startup—the Details
2-5
Ribbon
Plug
the
optional
Kurzweil
Ribbon
Controller
into
the
modular
Ribbon
jack
on
the
rear
panel.
The
ribbon
controller
itself
should
rest
on
a
flat
surface;
it
fits
nicely
between
the
keys
and
the
buttons
and
sliders
on
the
front
panel.
The
ribbon
is
a
continuous
controller.
You
can
program
the
ribbon
controller
to
send
MIDI
Controller
messages
1–127,
as
well
as
several
specialized
messages.
It
generates
values
of
0–127
for
whatever
MIDI
Controllers
you
assign
it
to
send.
Just
press
it,
and
slide
your
finger
along
the
ribbon
to
change
the
value
of
the
message
it’s
sending.
You
can
configure
the
ribbon
to
have
one
control
section
that
runs
its
entire
length,
or
to
have
three
sections
of
equal
length.
It
sends
its
highest
values
when
you
press
it
at
the
end
where
the
cable
connects.
When
you
configure
it
to
have
three
sections,
each
section
sends
its
highest
values
at
the
end
closest
to
the
cable.
Caution
:
The
modular
jack
is
designed
for
connection
to
the
Kurzweil
Ribbon
Controller
option
only.
Don’t
plug
any
other
modular
plugs
into
the
Ribbon
jack.
Switching On the Power
The
PC3K’s
power
switch
is
on
the
rear
panel,
adjacent
to
the
power
cable
connection.
When
you
power
up,
the
display
briefly
shows
some
startup
information.
The
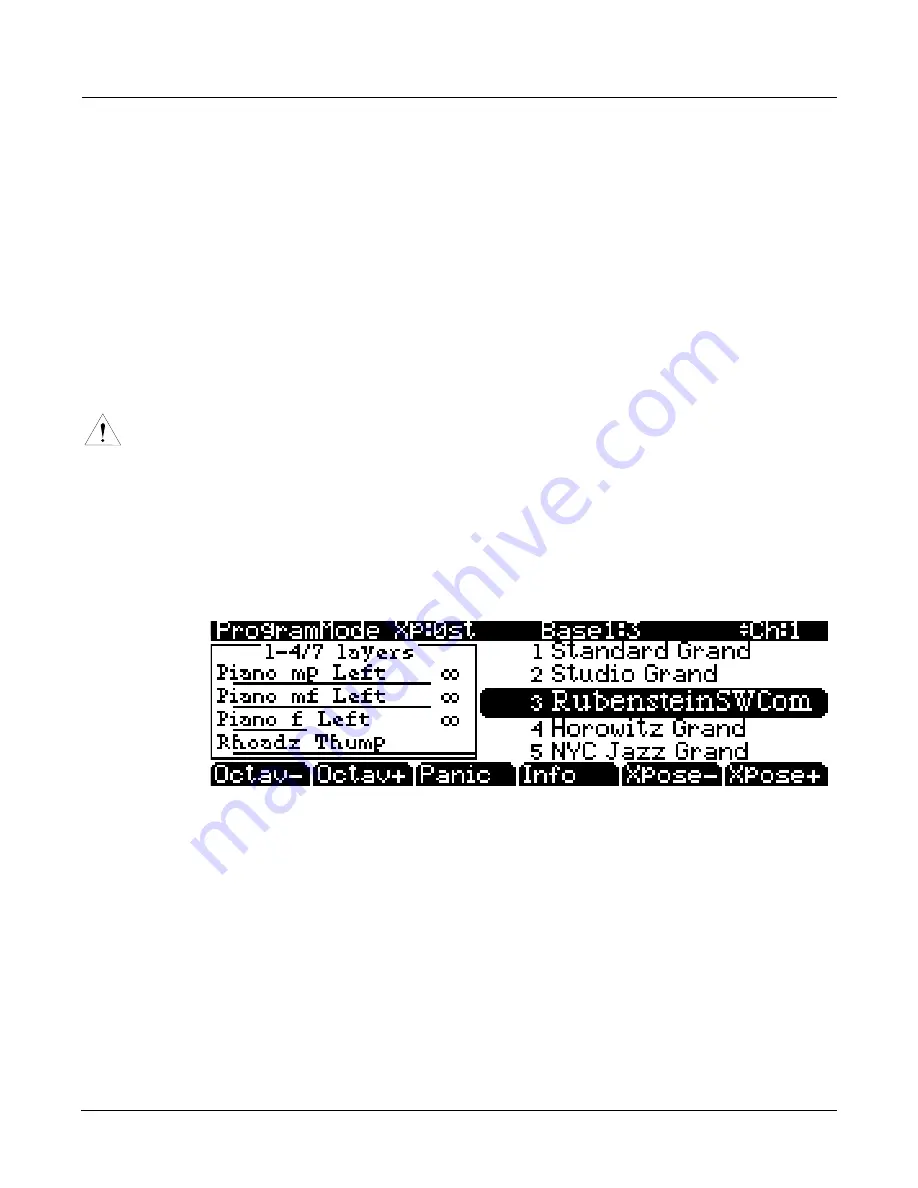
Program
mode
display
then
appears.
It
looks
like
the
diagram
below,
though
your
PC3K
may
be
different
from
the
example.
The
first
time
you
power
up
(or
after
a
reset),
your
instrument
will
be
set
to
operate
on
MIDI
Channel
1
(as
shown
at
the
far
right
of
the
top
line
above).
Set
the
volume
at
a
comfortable
level.
You’ll
get
the
best
signal
‐
to
‐
noise
ratio
if
you
keep
the
PC3K
at
full
volume,
and
adjust
the
level
from
your
mixing
board.
You
may
also
want
to
adjust
the
display
contrast
and
brightness.
There
are
two
small
knobs
on
the
rear
panel
of
the
PC3K
for
this
purpose.
Summary of Contents for PC3K6
Page 24: ...1 6 Introduction Options...
Page 50: ...4 4 The Operating Modes Using the Modes...
Page 58: ...5 8 Editing Conventions Special Button Functions...
Page 130: ...6 72 Program Mode Programming Tips...
Page 202: ...7 72 Setup Mode Recording A Setup To Song Mode...
Page 206: ...8 4 Quick Access Mode The QA Editor...
Page 232: ...9 26 Effects Mono Algorithms...
Page 268: ...11 18 Master Mode Preview Sample PRVIEW...
Page 302: ...12 34 Song Mode and the Song Editor Song Editor The EVENT Page...
Page 328: ...14 14 Keymap and Sample Editing Editing Samples...
Page 334: ...B 4...
Page 370: ...D 32 PC3K Objects V 1 31 Effect Chains...
Page 372: ...E 2 PC3K Legacy File Conversion Object Types and Conversion Details...


