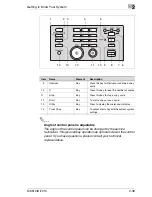

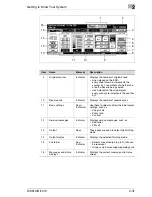
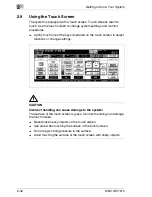


Getting to Know Your System
2
Di5510/Di7210
2-45
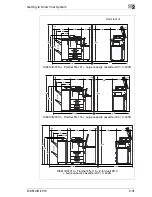
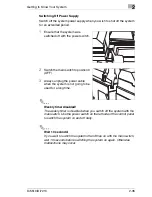
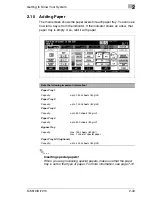
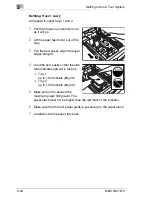
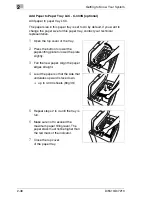
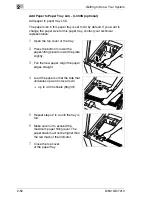
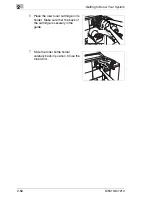
Refilling Trays 3 and 4
Add paper to paper trays 3 and 4.
These trays allow various paper sizes and alignments.
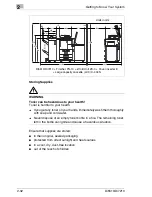
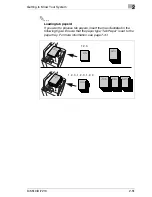
CAUTION
Incorrect handling can cause damage to the copier!
Do not touch the upper area of the edge guides to adjust them to the paper
size.
§
Always release the paper guide lock before moving the paper guide.
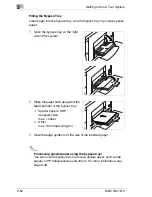
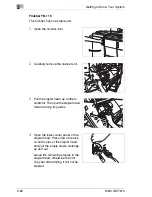
1
Carefully pull the paper drawer out
as far as it will go.
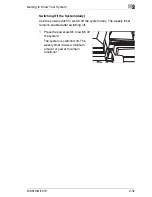
2
Lift the paper feed roller out of the
way.
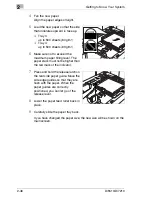
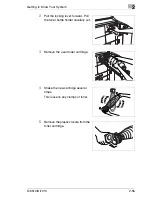
3
Only when changing the paper
size
H
Remove any paper remaining in
the paper feed cassette.
H
Press down the locking
mechanism on the rear paper
guide and pull the paper guide
out.
H
Replace the rear paper guide at
the desired paper size mark.
1
2
Summary of Contents for Di5510
Page 1: ...Di5510 Di7210 Advanced Information...
Page 2: ......
Page 28: ...1 Introduction 1 16 Di5510 Di7210...
Page 90: ...2 Getting to Know Your System 2 62 Di5510 Di7210 9 Close the finisher door...
Page 96: ...2 Getting to Know Your System 2 68 Di5510 Di7210...
Page 148: ...3 Initial Steps 3 52 Di5510 Di7210...
Page 236: ...4 Basic Functions 4 88 Di5510 Di7210...
Page 352: ...6 Network functions 6 54 Di5510 Di7210 3 Configure settings as required...
Page 455: ...Troubleshooting 8 Di5510 Di7210 8 13 5 Close the finisher door...
Page 457: ...Troubleshooting 8 Di5510 Di7210 8 15 5 Close the finisher door...


