


3
Initial Steps . . .
3-16
Di5510/Di7210
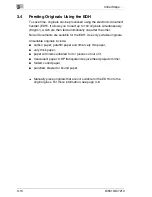
Changing Settings
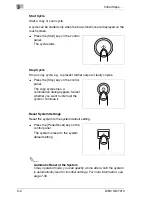
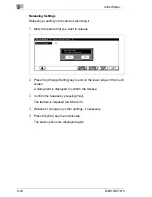
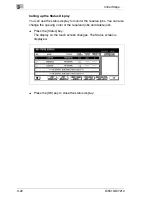
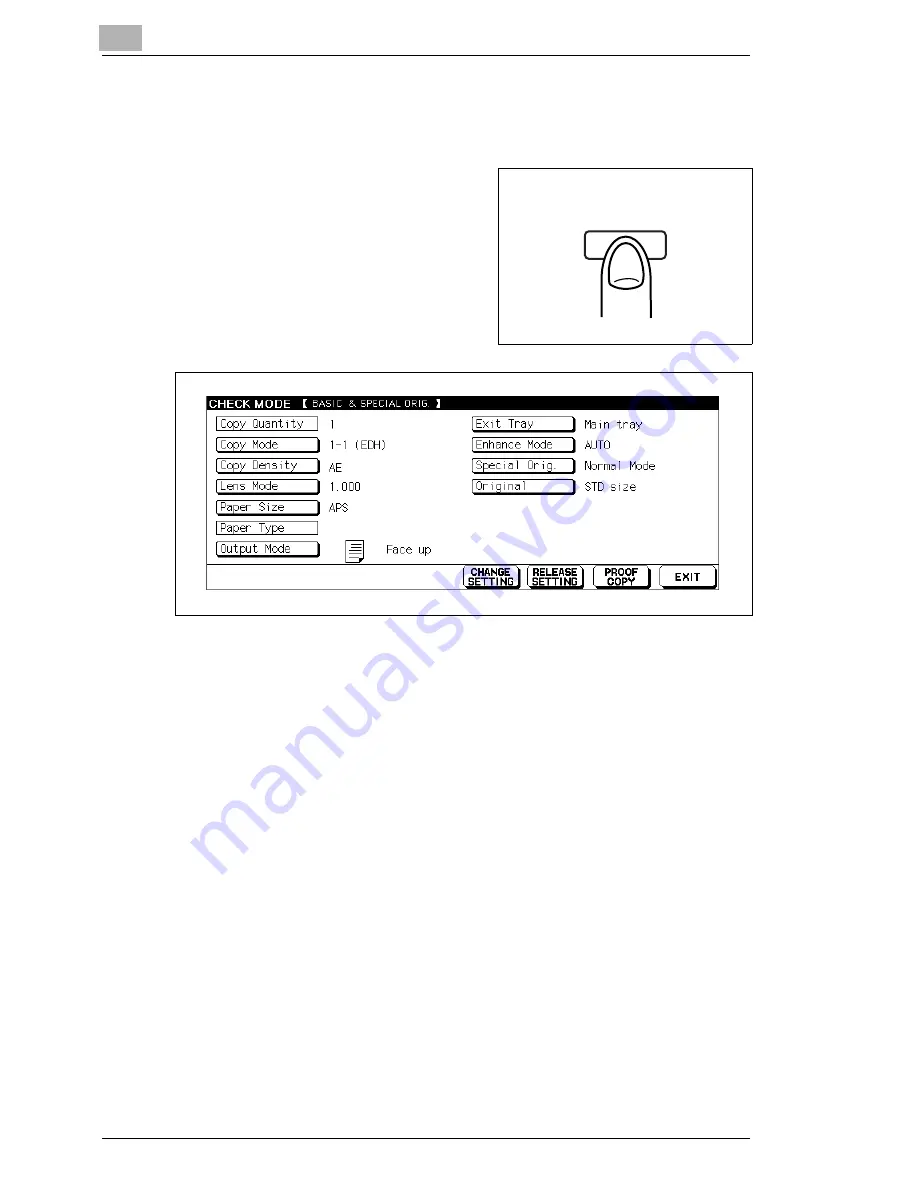
Modify the system settings in check mode or release them.
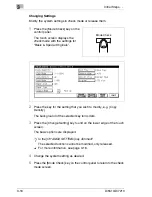
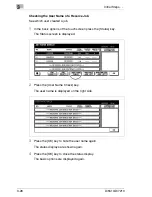
1
Press the [Mode Check] key on the
control panel.
The touch screen displays the
check mode with the settings for
“Basic & Special Originals”.
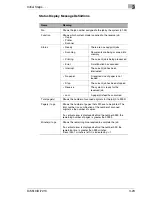
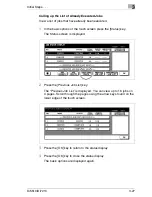
2
Press the key for the setting that you wish to modify, e.g. [Copy
Density].
The background of the selected key turns dark.
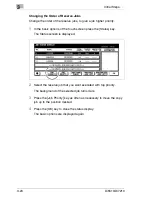
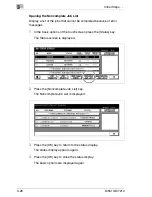
3
Press the [Change Setting] key found on the lower edge of the touch
screen.
The basic options are displayed.
?
Is the [CHANGE SETTING] key dimmed?
The selected function cannot be modified, only released.
§
For more information, see page 3-18.
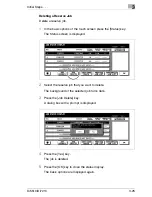
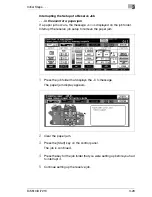
4
Change the system setting as desired.
5
Press the [Mode Check] key on the control panel to return to the check
mode screen.
Mode Check
Summary of Contents for Di5510
Page 1: ...Di5510 Di7210 Advanced Information...
Page 2: ......
Page 28: ...1 Introduction 1 16 Di5510 Di7210...
Page 90: ...2 Getting to Know Your System 2 62 Di5510 Di7210 9 Close the finisher door...
Page 96: ...2 Getting to Know Your System 2 68 Di5510 Di7210...
Page 148: ...3 Initial Steps 3 52 Di5510 Di7210...
Page 236: ...4 Basic Functions 4 88 Di5510 Di7210...
Page 352: ...6 Network functions 6 54 Di5510 Di7210 3 Configure settings as required...
Page 455: ...Troubleshooting 8 Di5510 Di7210 8 13 5 Close the finisher door...
Page 457: ...Troubleshooting 8 Di5510 Di7210 8 15 5 Close the finisher door...


