


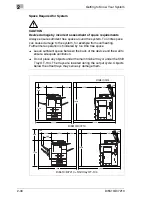

Getting to Know Your System
2
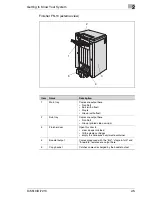
Di5510/Di7210
2-19
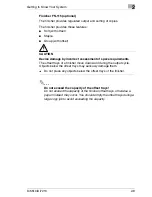
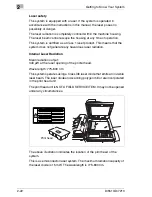
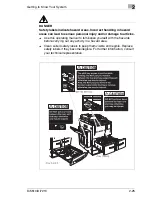
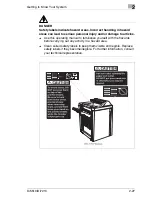
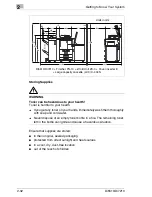
DANGER
Incorrect use of the power cable can result in fire and/or electrical
shock!
The system is equipped with high-voltage components. Incorrect handling
of the system's power cable may cause damage to the cable. This could
result in fire and/or cause electrical shock. Observe the following safety
precautions to prevent injury and system damage.
§
Be sure that the power cable is not damaged. If this is not the case,
switch off the system immediately. Unplug the power cable. Consult
your technical representative. Do not repair the network cable.
§
Do not pull directly on the power cable itself when unplugging the
power cable from the power outlet.
§
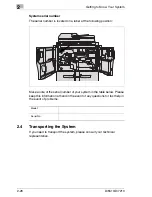
Do not move the system unless it is unplugged.
§
Never place heavy objects on the power cable.
§
Do not pull or bend the power cable.
§
Do not place the system on cables belonging to other devices.
§
Ensure that no cables of other devices get pinched in the system.
§
Be sure that the power cable sits correctly in the power outlet.
§
Always make sure that the power outlet is visible and accessible at all
times.
§
Keep the network connector and the socket free from dust.
§
If an extension cable is needed, use one with a capacity that
corresponds to or exceeds the power consumption of the system.
§
Never connect the system to a multiple-socket extension cord.
§
Do not dismantle the system.
§
Allow only specially trained and authorized service personnel to carry
out maintenance and repairs.
§
Never touch the drum unit.
§
Note that the system is still switched on even when it is in low power
mode.
§
Always switch off the system using the main power switch if the
system is not going to be used for a long time.
Summary of Contents for Di5510
Page 1: ...Di5510 Di7210 Advanced Information...
Page 2: ......
Page 28: ...1 Introduction 1 16 Di5510 Di7210...
Page 90: ...2 Getting to Know Your System 2 62 Di5510 Di7210 9 Close the finisher door...
Page 96: ...2 Getting to Know Your System 2 68 Di5510 Di7210...
Page 148: ...3 Initial Steps 3 52 Di5510 Di7210...
Page 236: ...4 Basic Functions 4 88 Di5510 Di7210...
Page 352: ...6 Network functions 6 54 Di5510 Di7210 3 Configure settings as required...
Page 455: ...Troubleshooting 8 Di5510 Di7210 8 13 5 Close the finisher door...
Page 457: ...Troubleshooting 8 Di5510 Di7210 8 15 5 Close the finisher door...


