
6
Network functions
6-22
Di5510/Di7210
H
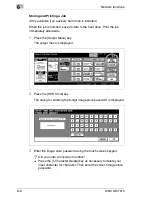
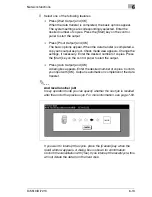
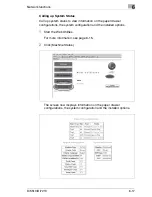
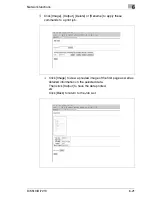
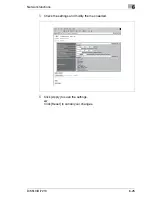
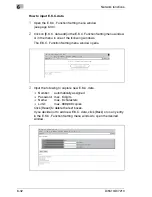
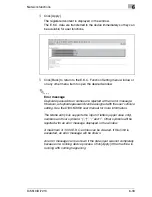
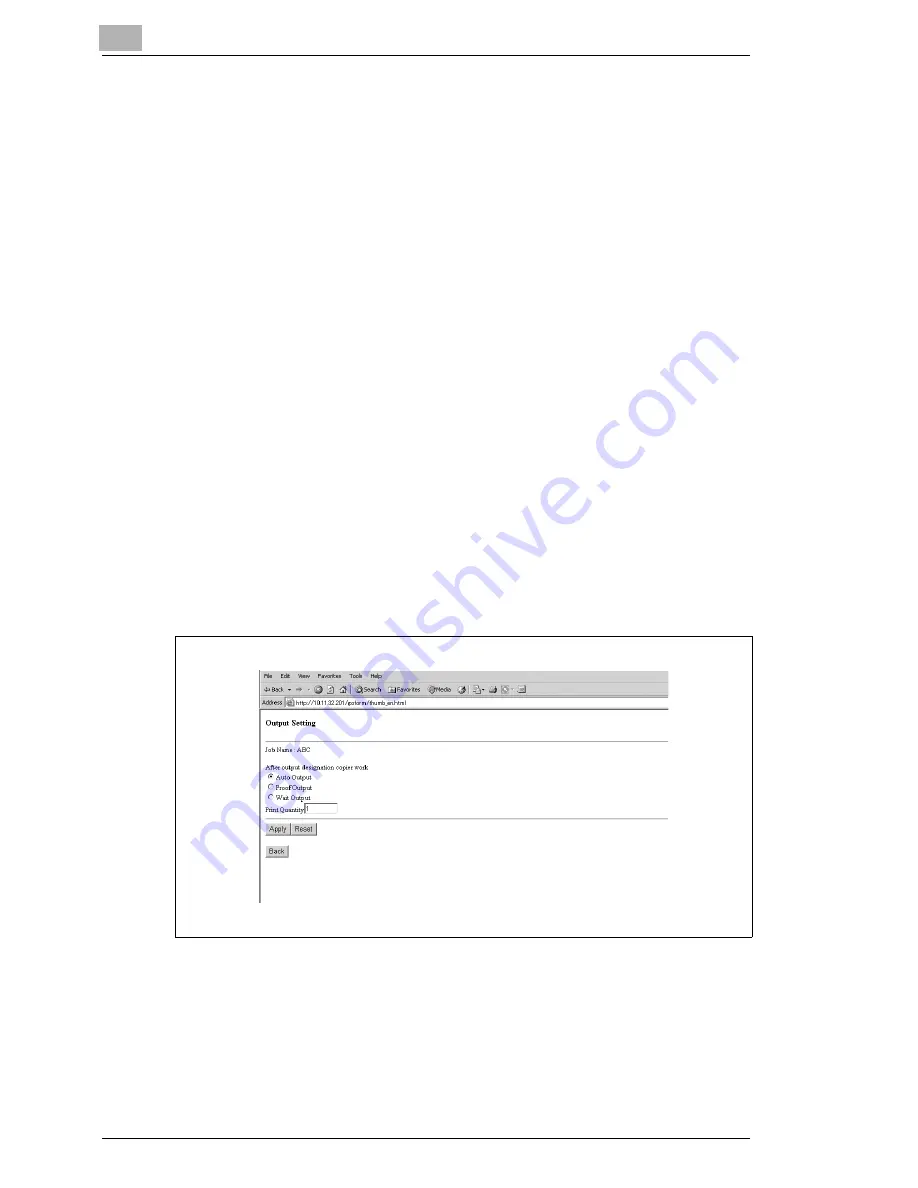
Click [Output] to start printing the data on the system. Select the
finishing mode that you want.
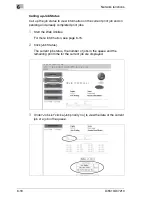
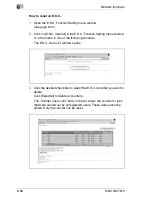
Auto output
Enter the number of sets you want and then click [Apply]. The print
job is printed. The print job cannot be stopped or interrupted using
the Web Utilities. This can only be achieved on the system directly.
When the print job is finished, a message indicating so is displayed
on the PC.
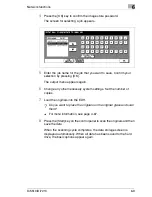
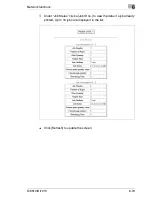
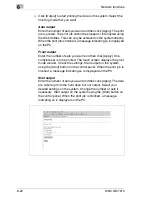
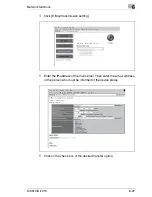
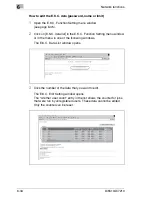
Proof output
Enter the number of sets you want and then click [Apply]. One
complete set is to be printed. The touch screen displays the proof
mode window. Check the settings. Start output on the system
using the [Start] button on the control panel. When the print job is
finished, a message indicating so is displayed on the PC.
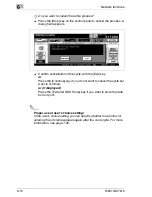
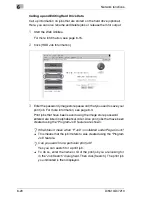
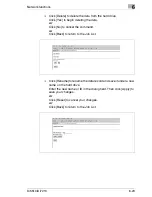
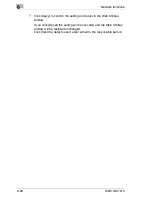
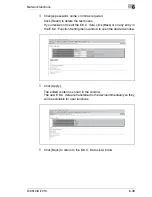
Wait output
Enter the number of sets you want and then click [Apply]. The data
are called up from the hard drive but not output. Select your
desired settings on the system. Change the number of sets if
necessary. Start output on the system using the [Start] button on
the control panel. When the print job is finished, a message
indicating so is displayed on the PC.
Summary of Contents for Di5510
Page 1: ...Di5510 Di7210 Advanced Information...
Page 2: ......
Page 28: ...1 Introduction 1 16 Di5510 Di7210...
Page 90: ...2 Getting to Know Your System 2 62 Di5510 Di7210 9 Close the finisher door...
Page 96: ...2 Getting to Know Your System 2 68 Di5510 Di7210...
Page 148: ...3 Initial Steps 3 52 Di5510 Di7210...
Page 236: ...4 Basic Functions 4 88 Di5510 Di7210...
Page 352: ...6 Network functions 6 54 Di5510 Di7210 3 Configure settings as required...
Page 455: ...Troubleshooting 8 Di5510 Di7210 8 13 5 Close the finisher door...
Page 457: ...Troubleshooting 8 Di5510 Di7210 8 15 5 Close the finisher door...


