


5
Applications
5-22
Di5510/Di7210
?
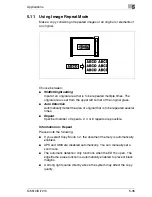
Do you want to insert several pages at one position?
§
Example: first insertion at position 6 (three pages)
Enter position “6” three times in succession. The first three
documents scanned from the original glass are inserted after
page 6 of the originals, which was scanned from the EDH.
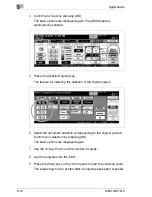
4
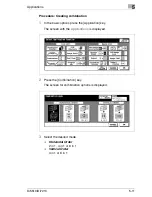
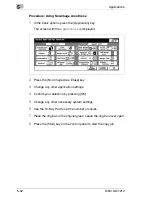
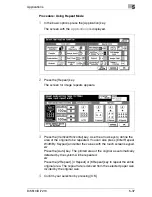
Confirm your input by pressing [OK].
5
Change any other necessary system settings.
6
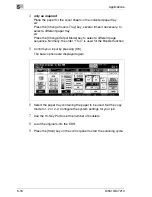
Use the 10-Key Pad to set the number of copies.
7
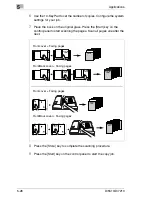
Load the originals that are suitable for the EDH into the EDH. Start the
scan cycle by touching [Start].
The originals are fed in and scanned one after the other.
8
Place a document to be inserted onto the original glass. Press the
[Start] key on the control panel to start the scanning cycle. Repeat this
step until all documents have been scanned.
?
In what order do the inserted documents have to be scanned?
§
Scan the document in the order in which they are to be inserted.
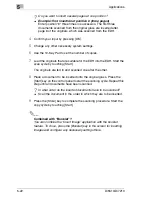
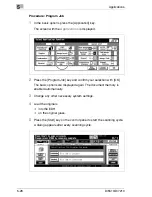
9
Press the [Store] key to complete the scanning procedure. Start the
copy cycle by touching [Start].
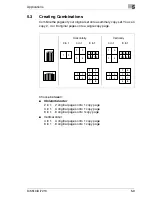
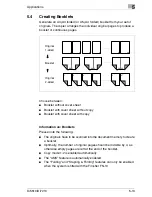
Combined with “Booklet”?
You can combine the “Insert Image” application with the booklet
feature. To do so, press the [Booklet] key in the screen for inserting
images and configure any necessary settings there.
Summary of Contents for Di5510
Page 1: ...Di5510 Di7210 Advanced Information...
Page 2: ......
Page 28: ...1 Introduction 1 16 Di5510 Di7210...
Page 90: ...2 Getting to Know Your System 2 62 Di5510 Di7210 9 Close the finisher door...
Page 96: ...2 Getting to Know Your System 2 68 Di5510 Di7210...
Page 148: ...3 Initial Steps 3 52 Di5510 Di7210...
Page 236: ...4 Basic Functions 4 88 Di5510 Di7210...
Page 352: ...6 Network functions 6 54 Di5510 Di7210 3 Configure settings as required...
Page 455: ...Troubleshooting 8 Di5510 Di7210 8 13 5 Close the finisher door...
Page 457: ...Troubleshooting 8 Di5510 Di7210 8 15 5 Close the finisher door...


